EasyManua.ls Logo

HermanMiller Nelson Daybed User Manual

HermanMiller Nelson Daybed
3 pages
To Next Page IconTo Next Page
Page #1 background imageLoading...
Page #1 background image
HermanMiller Assembly Instructions1
How to assemble
your Daybed.
HermanMiller
Daybed Installation
Instructions
For more information about our products and services or to see a list of dealers, please visit us at
www.hermanmiller.com/product-instructions or call 888 - 443 - 4357.
© 2016 Herman Miller, Inc., Zeeland, Michigan Printed in U.S.A. Part No. 1BFR4C - B.
4mm Allen Wrench (1)
Parts Included
Tools Required
Safety Instructions & Warning
Read all instructions before using products
Failure to fully tighten screws may cause injury
Periodically check fasteners to ensure tightness
The right is reserved to make changes at any time without notice
Will require at least 2 people
Extra bolts have been included
Step 1
Ends
Middle
Tapping Screw (4)Short Bolt (24)
2nd Spring
15th Spring
8th & 9th
Springs
Hairpin Leg (4)
Daybed Frame (1)
Optional: Back Cushions (2)
or Side Cushion (1)
Optional: Wood Bolster (1)
OR
Seat Cushion (1)
Wood Leg (4)
Optional: Bolster
Support
Phillips Driver
With seat cushion facing upside down, lower frame onto cushion. Ensure cushion is centered
on frame then attach using three velcro straps. Straps should be secured in the positions
shown below. Weave one end of the strap in/out of the spring to limit movement.
Question and Answer IconNeed help?

Do you have a question about the HermanMiller Nelson Daybed and is the answer not in the manual?

HermanMiller Nelson Daybed Specifications

General IconGeneral
DesignerGeorge Nelson
ManufacturerHerman Miller
Height16 inches
MaterialUpholstery
Color OptionsVaries based on upholstery selection

Summary

Parts Included

How to Assemble Your Daybed

Safety Instructions and Warnings

Read all instructions before use; ensure fasteners are tight to prevent injury.

Tools Required

Lists the necessary tools for assembly, primarily a Phillips driver.

Step 1: Attach Seat Cushion to Frame

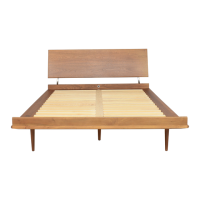
Lower the seat cushion onto the frame and secure using three velcro straps.

Step 2: Attach Legs

Attach legs using short bolts, specifying quantities for Hairpin and Wood legs.

Step 3: Flip Platform

Flip the assembled platform and cushion to its right side up.

Step 4: Attach Bolster Supports

Secure bolster supports at the back or side using short bolts for cushion options.

Step 5: Attach Wood Bolster

Attach the wood bolster to the supports using tapping screws.

Step 6: Place Cushions

Place the back cushions or side cushion onto the assembled daybed.

Related product manuals