Do you have a question about the HermanMiller Vantum and is the answer not in the manual?
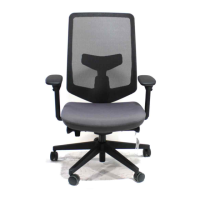
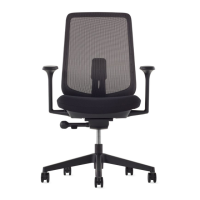
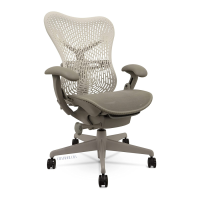
Lists all necessary tools and components for the Vantum chair disassembly process.
Instructions to lift the headrest to its highest position and remove it.
Procedure to remove the thoracic component by sliding the mount upwards.
Method to remove the lumbar component by tilting the part.
Loosens the hex flange bolt using a 10mm socket to remove the back frame assembly.
Unscrews hex flange bolt and three 13mm bolts to remove the J-bar.
Removes screws using a 10mm socket and then detaches the chair arms.
Releases the seat handle and depresses rear tabs to slide the seat off the tilt control.
Procedure to take the seat out from the tilt assembly.
Instructions to turn the lever counterclockwise to activate the cylinder.
Places the lift-off tool on the top edge of the cylinder.
Hits the lift-off tool with a mallet to release the base from the cylinder.
Removes the old tilt control from the cylinder.
Places a nylon cap over the cylinder and strikes it with a mallet to release the base.
Slides the base off the cylinder.
Pulls out and removes all the casters from the chair base.
Guidelines for identifying and segregating plastic and metal components for recycling.
| Warranty | 12-year warranty |
|---|---|
| Category | Indoor Furnishing |
| Armrest | Adjustable |
| Tilt Limiter | Yes |
| Tilt Tension | Adjustable |
| Weight Capacity | 350 lbs |
| Adjustable Features | Seat Height, Arm Height, Tilt Tension |
| Color Options | Black |