MANL-00005-A - D Series Rotary Dispensers.docx 16
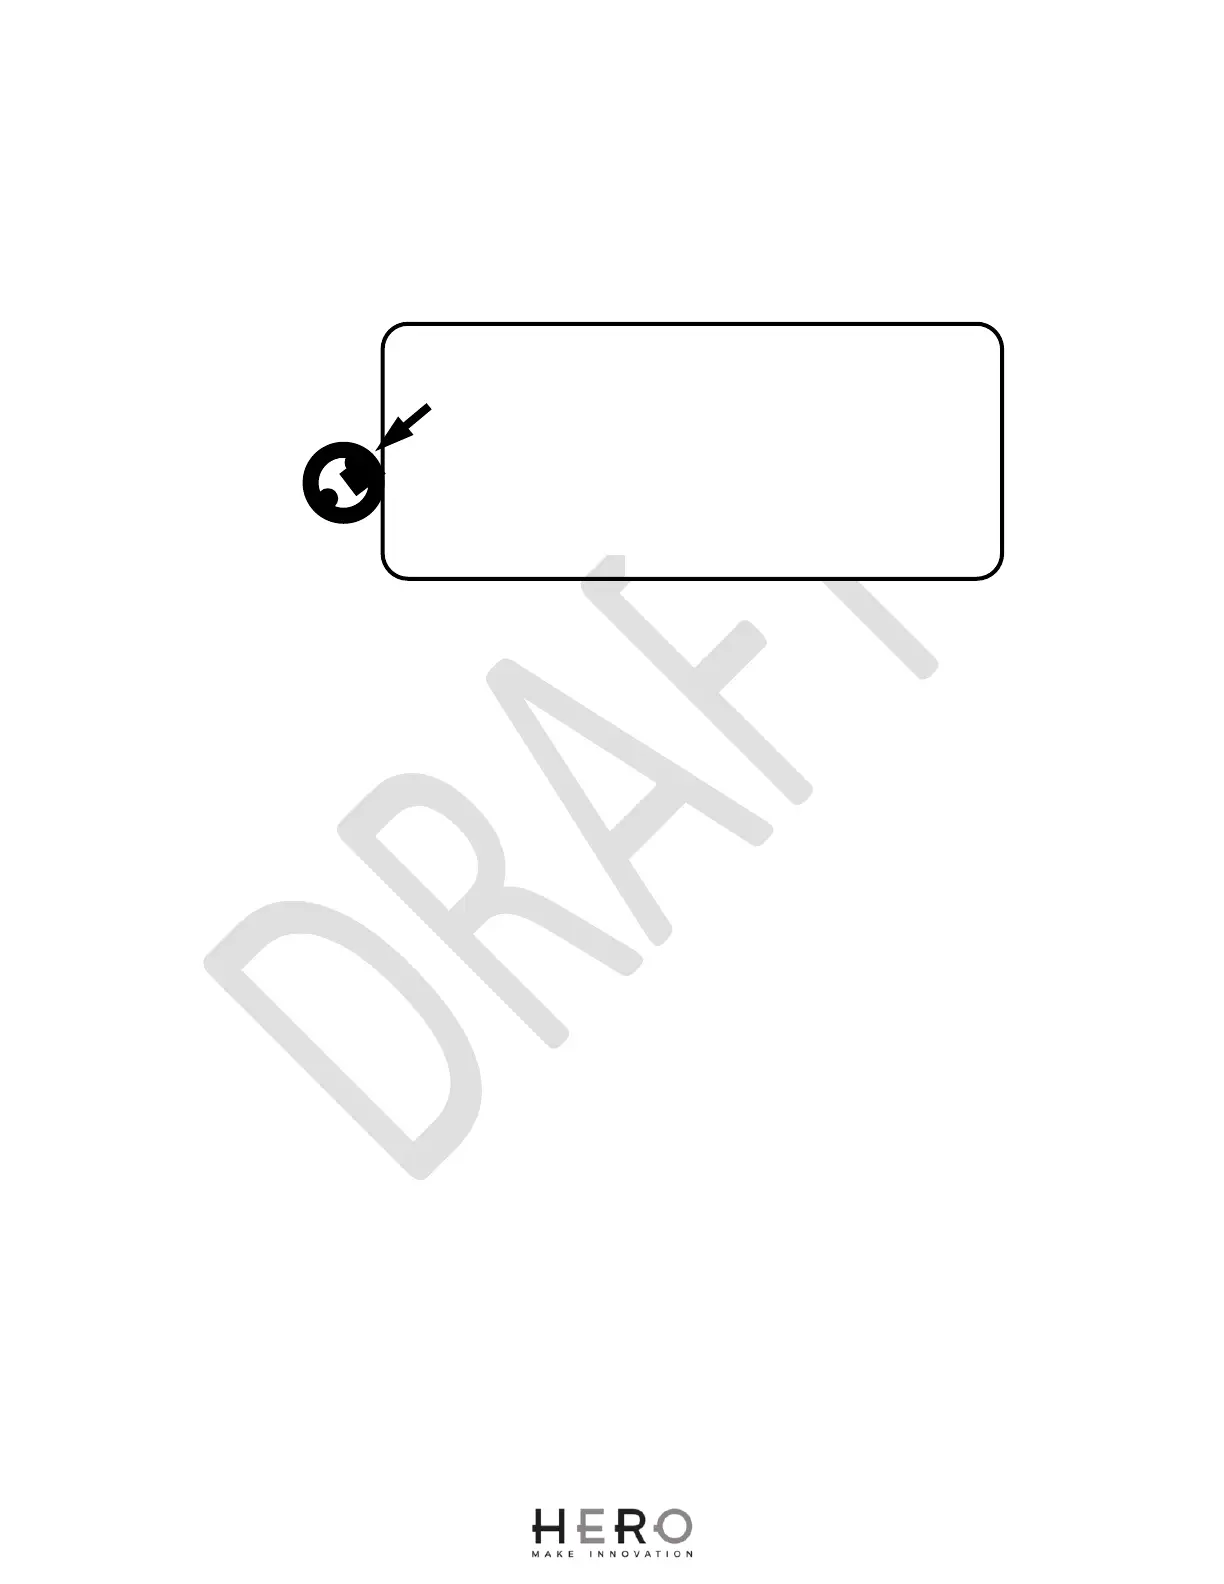
The timer is located on the base next to the power cord. A decal is located next to the timer indicating the
location of the start position. In order to rotate the timer adjustment knob you will require a flat screw
driver. By rotating the adjustment knob the timer can be advanced to the start position. While rotating the
knob a faint clicking sound will be heard. Rotate the dial through the “off” cycle until agitation begins. The
“on” cycle is very short so rotation of the adjustment knob must be done very slowly. You should hear a
loud click during rotation which indicates the “on” position and the start of agitation. Once the ten minute
agitation cycle is complete the timer will then reactivate every seven or four hours.
TO TURN TIMER ON SLOWLY
ROTATE CLOCKWISE UNTIL
FIRST LOUD CLICK
ADJUST TIMER
with flat blade
screwdriver
DAILY ROUTINE CARE OF THE DISPENSER
It is recommended that the following daily routine be adopted
to ensure trouble free operation of the dispenser.
1. Check the level of the colorant and top-up if required.
2. Set all gauges to maximum dispense. Raise and lower each
plunger without opening valve. Repeat the procedu
slowly.
3. With a damp cloth, wipe down stand, canisters and pumps,
paying particular attention to pump nozzles to prevent
accumulation of excess colorant which may dry out and cause
erratic discharge or blockage.