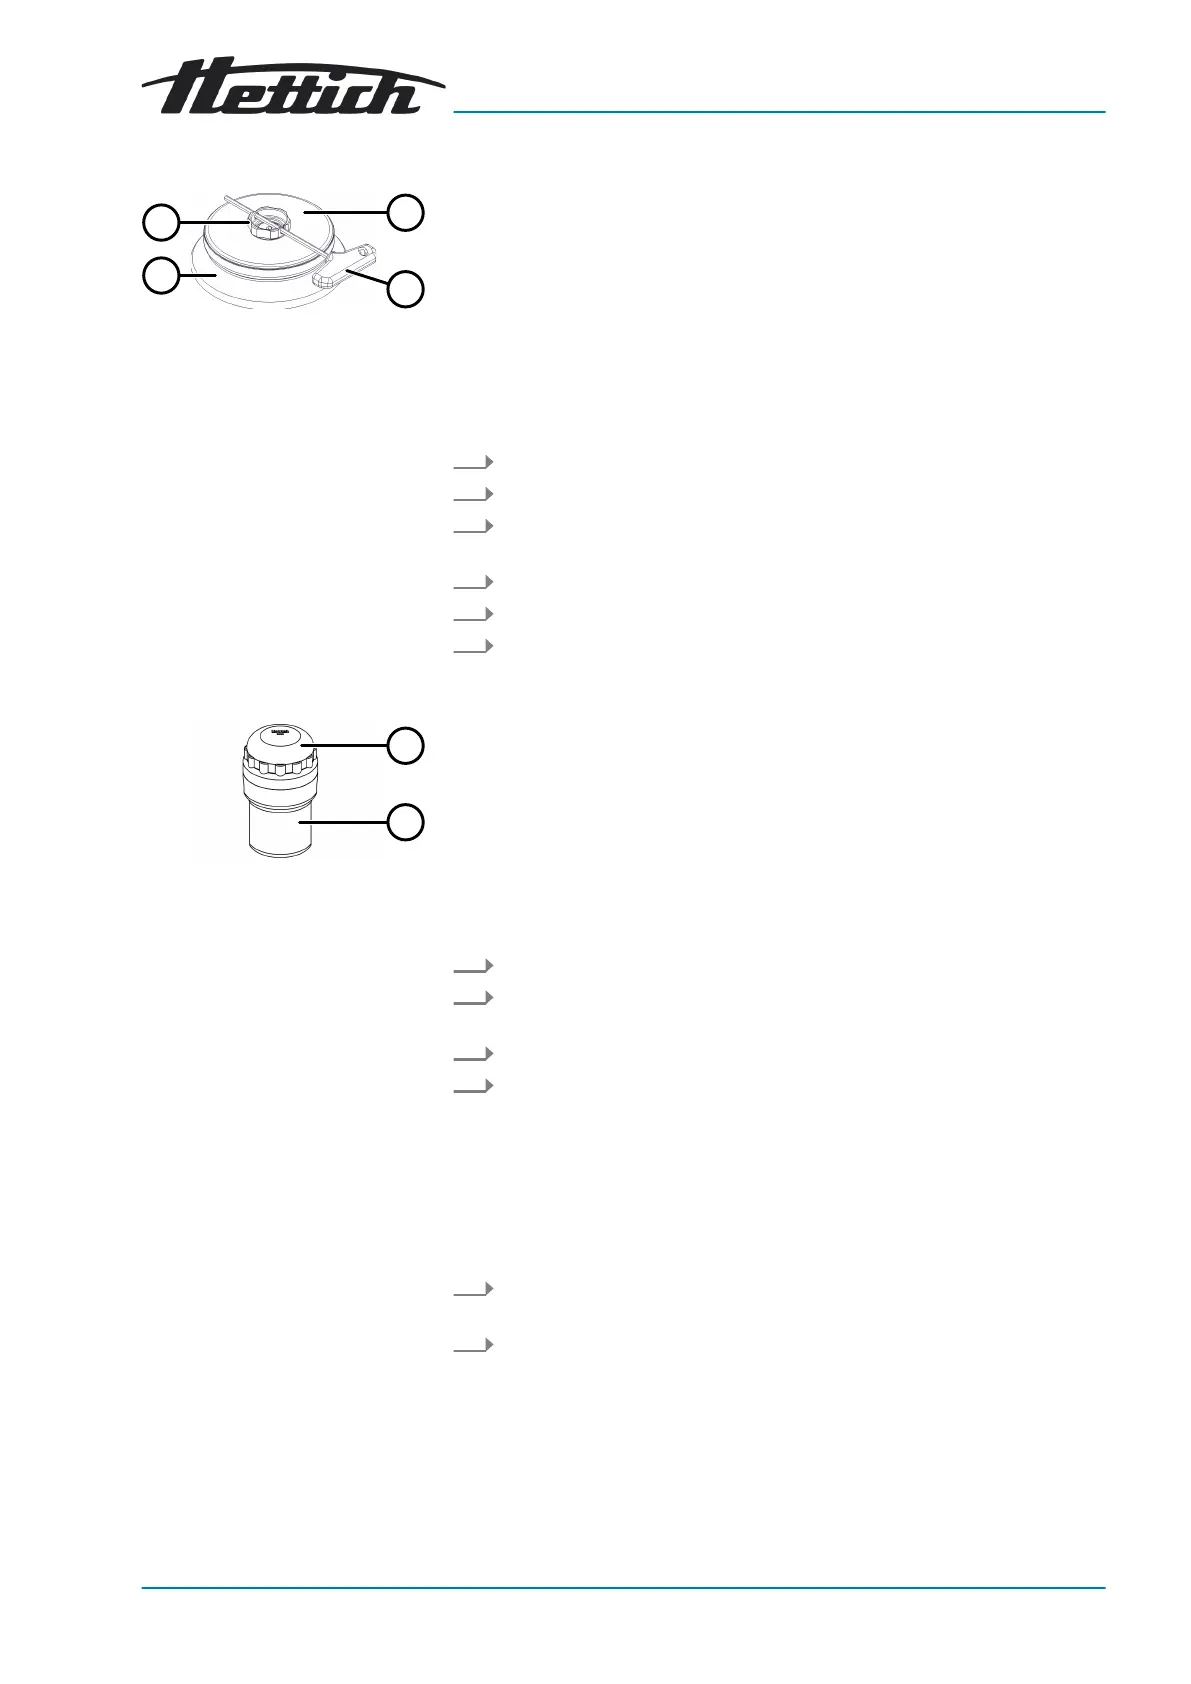
Fig. 23: Biosafety system
1 Rotary handle
2 Rotor
3 Lid
4 Key
Closing
Opening
Fig. 24: Biosafety system
1 Lid
2 Bucket
Closing
Opening
6.6.2 Lid with screw cap and hole
1. Place the lid (
3
) centrally on the rotor (
2
).
2. Insert the supplied key (
4
) into the hole in the rotary handle (
1
).
3. Turn the lid (
3
) at the key (
4
) clockwise until it is tightly closed.
1. Insert the supplied key (
4
) into the hole in the rotary handle (
1
).
2. Turn the lid (
3
) at the key (
4
) anticlockwise until it is open.
3. Remove the lid (
3
) from the rotor (
2
).
6.6.3
Lid with screw cap
1.
Place the lid (
1
) centrally on the bucket (
2
).
2. Turn the lid (
1
) clockwise until it is tightly closed.
1. Turn the lid (
1
) anticlockwise until it is open.
2. Remove the lid (
1
) from the bucket (
2
).
6.7
Centrifugation
6.7.1
Centrifugation in continuous operation
Personnel:
■ Trained user
1.
Set minutes, seconds and hours on
‘0’
or retrieve a continuously
running program.
2.
Press the
[START]
button.
🡆
The centrifugation run is started.
The
[START]
button ashes until the rotor is read in.
The
[START]
button lights up during the centrifugation run.
The timing starts at
‘00:00’
.
The rotor speed or the resulting RCF value, the temperature in
the centrifuging chamber (only for centrifuges with cooling) and the
elapsed time are displayed during the centrifugation run.

 Loading...