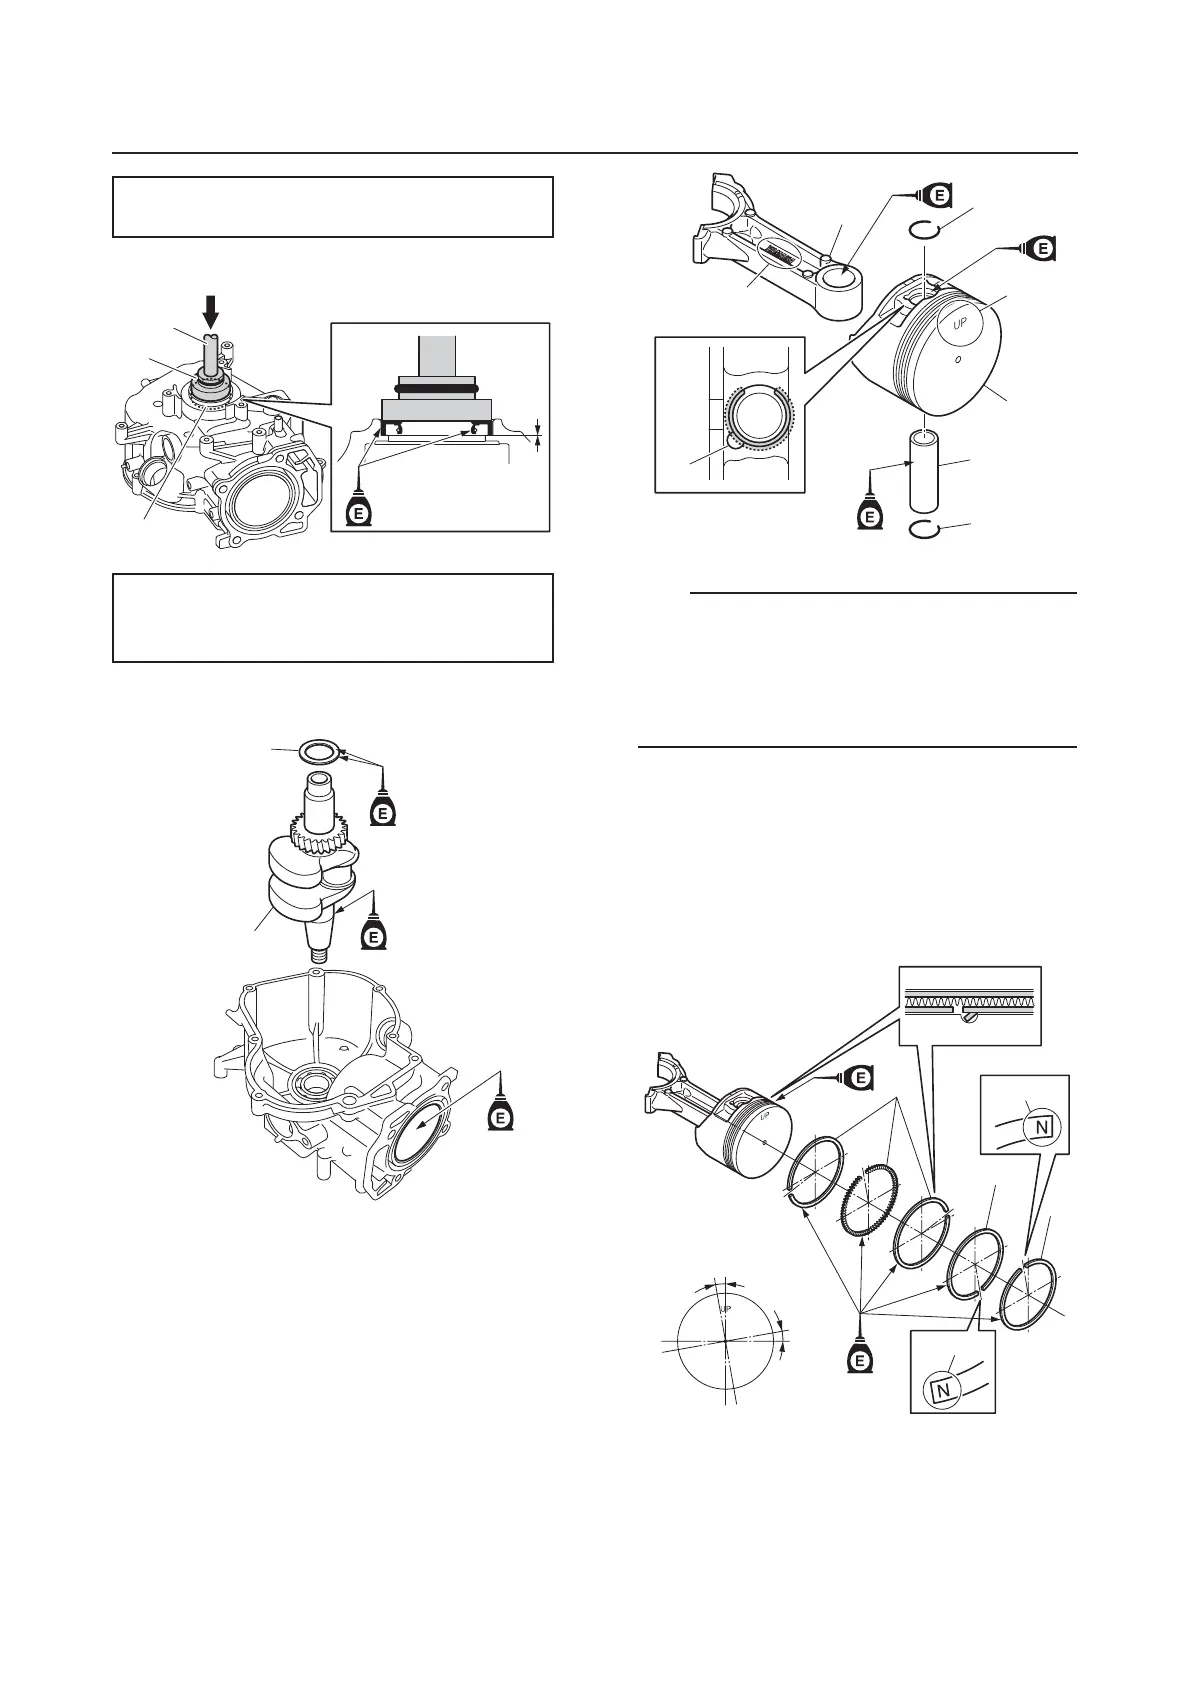
Cylinder block
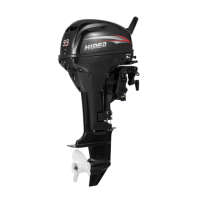
2. Install a new oil seal d.
3. Install the crankshaft g and washer h.
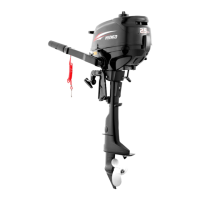
4. Assemble the piston i, connecting rod
a, piston pin j, and clips k.
•
Face the mark b on the con-
necting rod a in the same direction as the
“UP” mark c on the piston crown.
• Do not align the clip end with the groove d
in the piston pin boss.
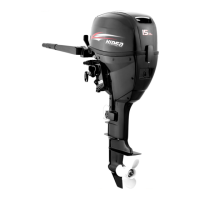
5. Install the oil rings e, 2nd ring f, and
top ring g.
6. Offset the piston ring end gaps. NOTICE:
Do not scratch the pistons or break
the piston rings.
Driver rod LL b
Ball bearing attachment c
Driver rod LS e
Ball bearing attachment f
d
e
f
h
g
d
c
i
j
k
k
b
a
#1
#1
#2
#2
#3
#3
#4
#4
#5
#5
e
f
g
h
10˚
10˚
h
139