Network Camera User Manual
85
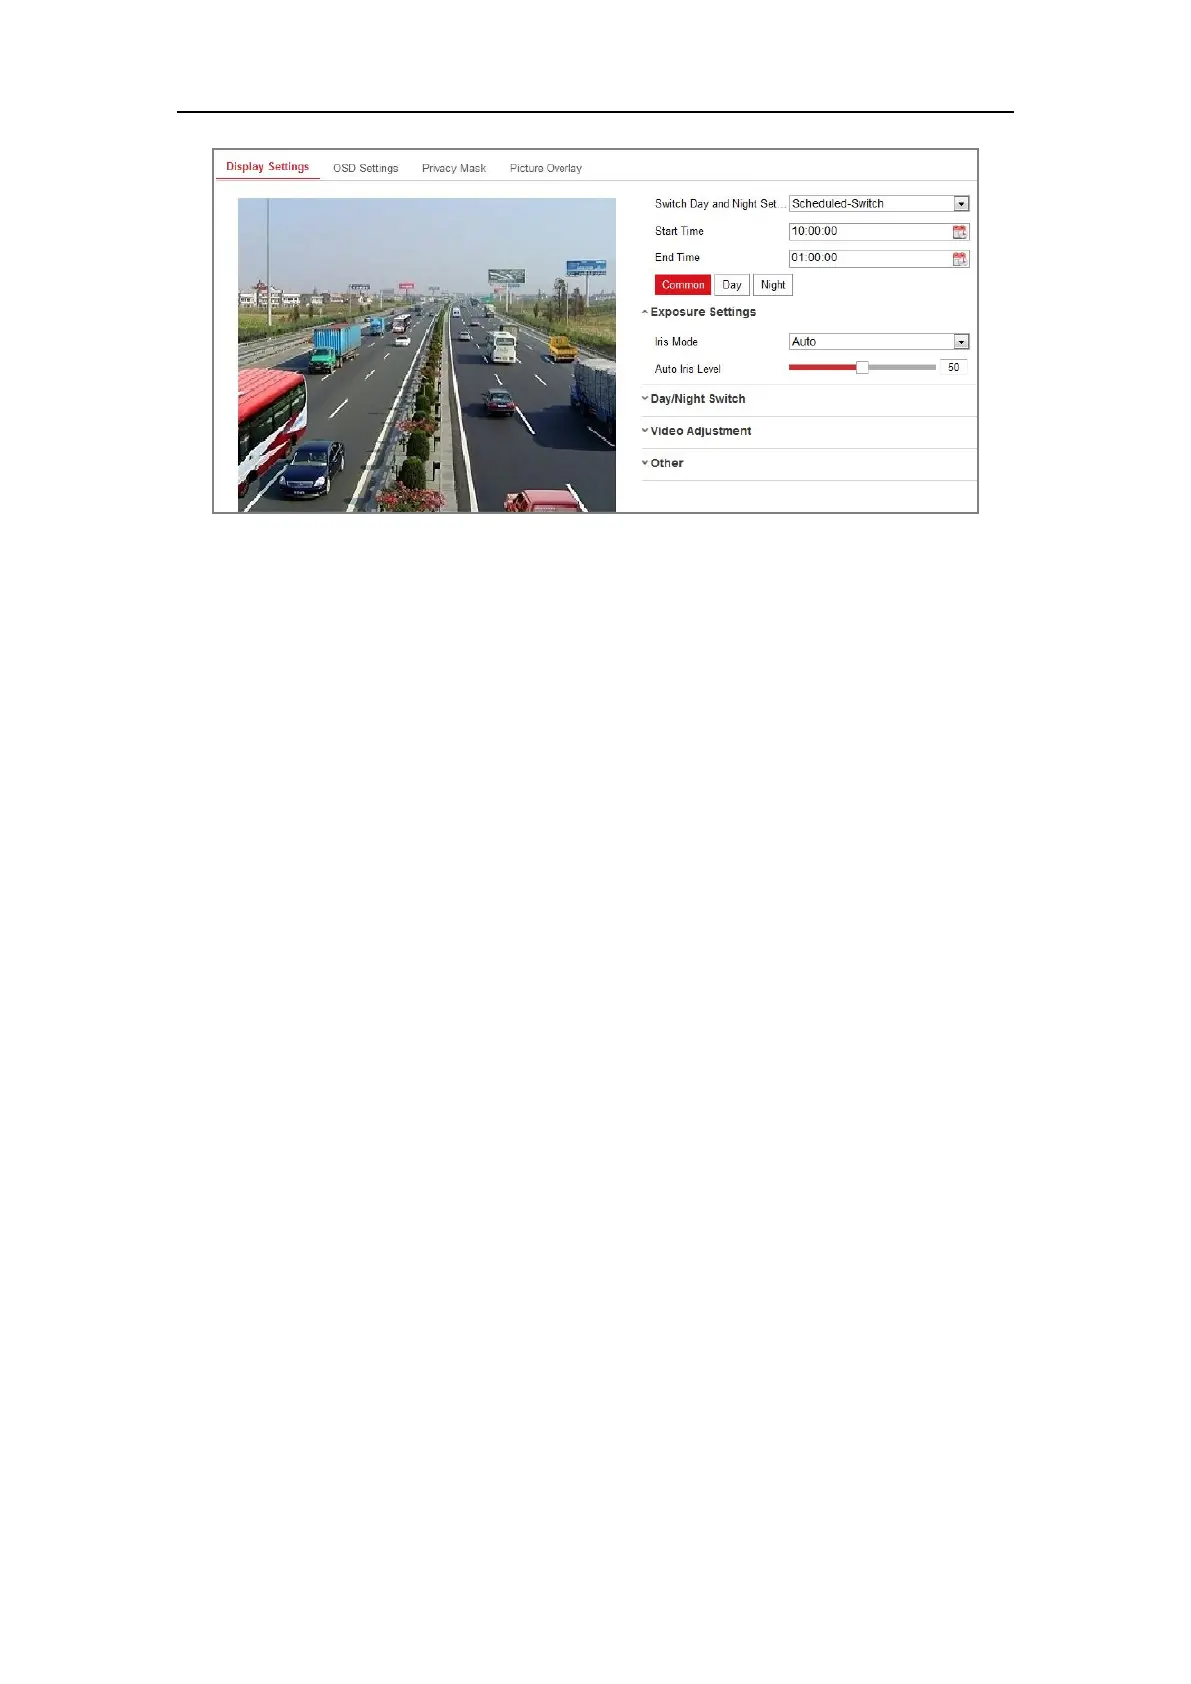
Figure 9-5 Day/Night Scheduled-Switch Configuration Interface
Steps:
1. Click the calendar icon to select the start time and the end time of the switch.
Notes:
• The start time and end time refer to the valid time for day mode.
• The time period can start and end on two days in a row. For example, if you
set start time as 10:00 and end time as 1:00, the day mode will be activated at
10 o'clock in the morning and stopped at 1 o'clock early in the next morning.
2. Click Common tab to configure the common parameters applicable to the day
mode and night mode.
Note: For the detailed information of each parameter, please refer to Section 9.1.1
Day/Night Auto-Switch.
3. Click Day tab to configure the parameters applicable for day mode.
4. Click Night tab to configure the parameters applicable for night mode.
Note: The settings saved automatically if any parameter is changed.
9.2 Configuring OSD Settings
Purpose:
You can customize the camera name, time/date format, display mode, and OSD size
displayed on the live view.
 Loading...