© Hikvision
Figure 6-11 Child Directory
Upload type: To enable uploading the captured picture to the FTP server.
3. Click to save the settings.
4. You can click Test to confirm the configuration.
Note:
If you want to upload the captured pictures to FTP server, you also have to enable the
continuous snapshot or event-triggered snapshot in Snapshot interface.
Configuring Email Settings
Purpose:
The system can be configured to send an Email notification to all designated receivers if an alarm
event is detected, e.g., motion detection event, video loss, video-tampering, etc.
Before you start:
Configure the DNS Server settings under Configuration> Network > Basic Settings > TCP/IP
before using the Email function.
Steps:
1. Enter the Email settings interface:
Configuration> Network > Advanced Settings > Email
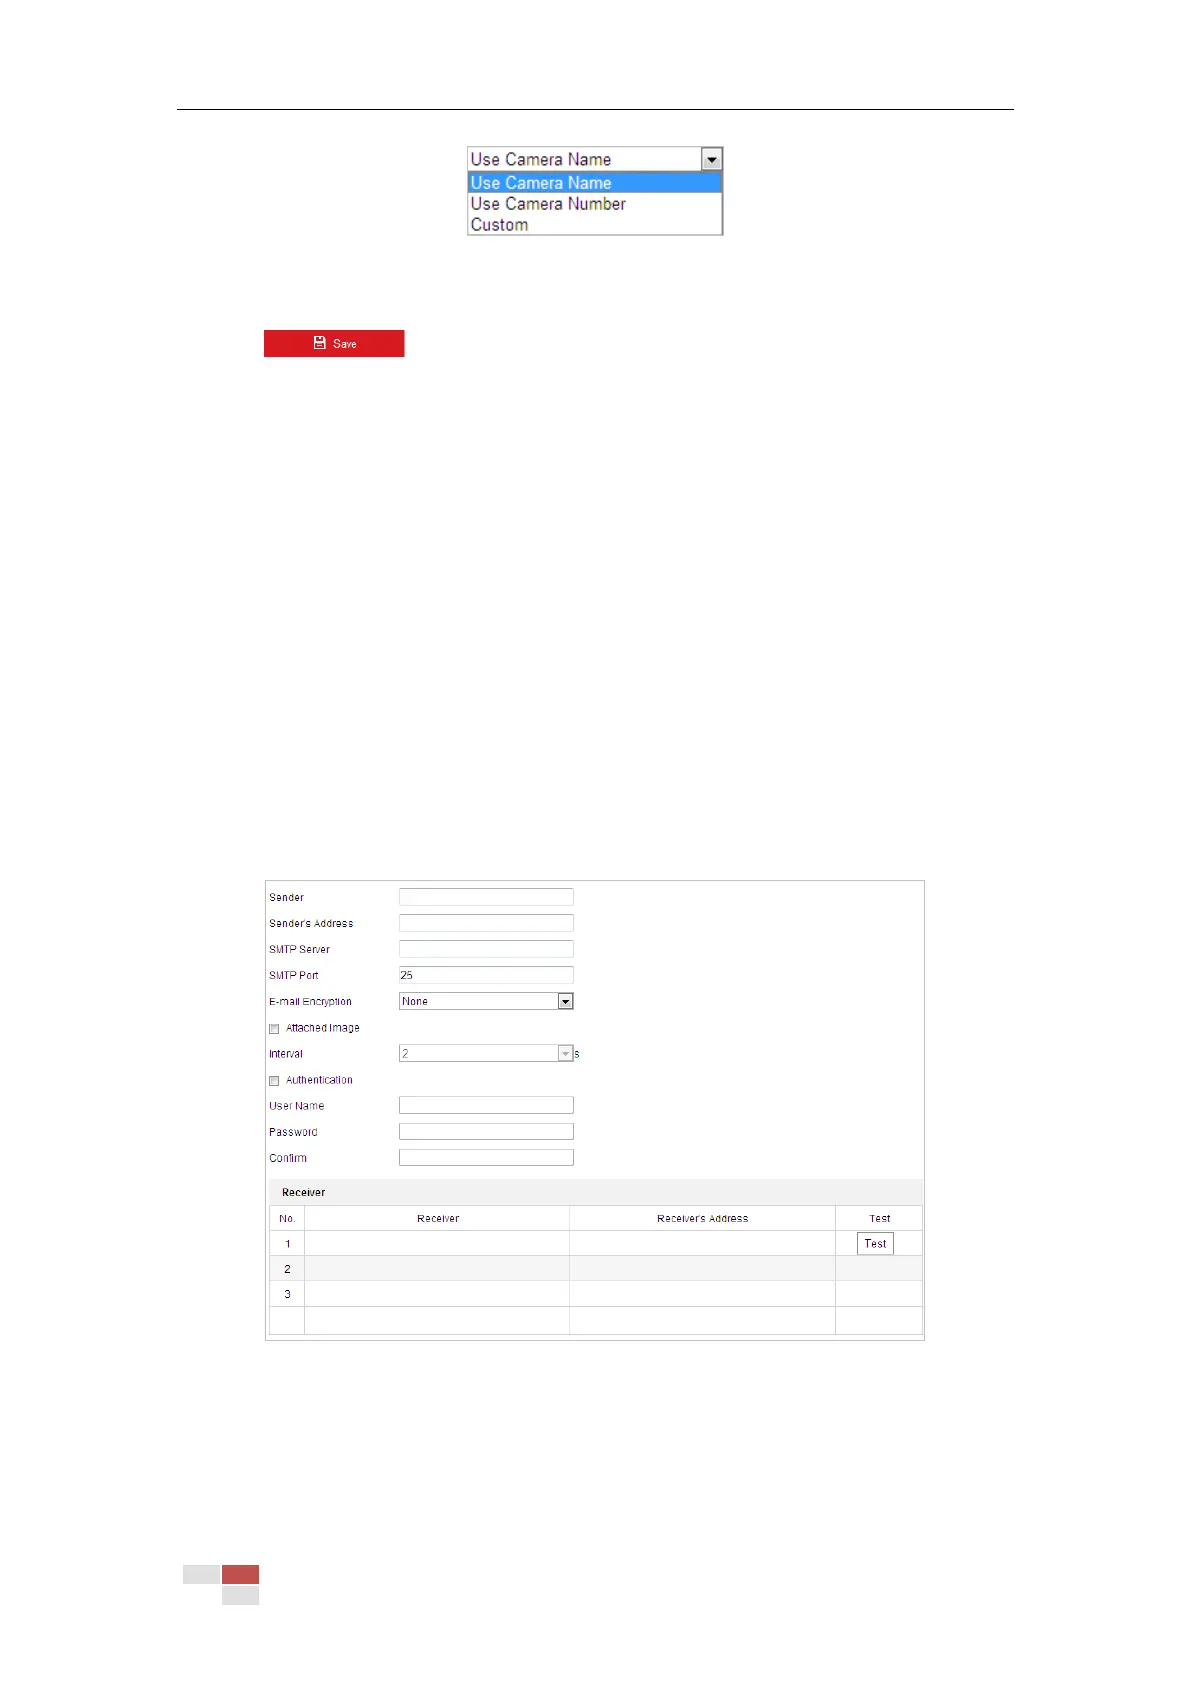
Figure 6-12 Email Settings
2. Configure the following settings:
Sender: The name of the email sender.
Sender’s Address: The email address of the sender.
SMTP Server: The SMTP Server IP address or host name (e.g., smtp.263xmail.com).
 Loading...