20
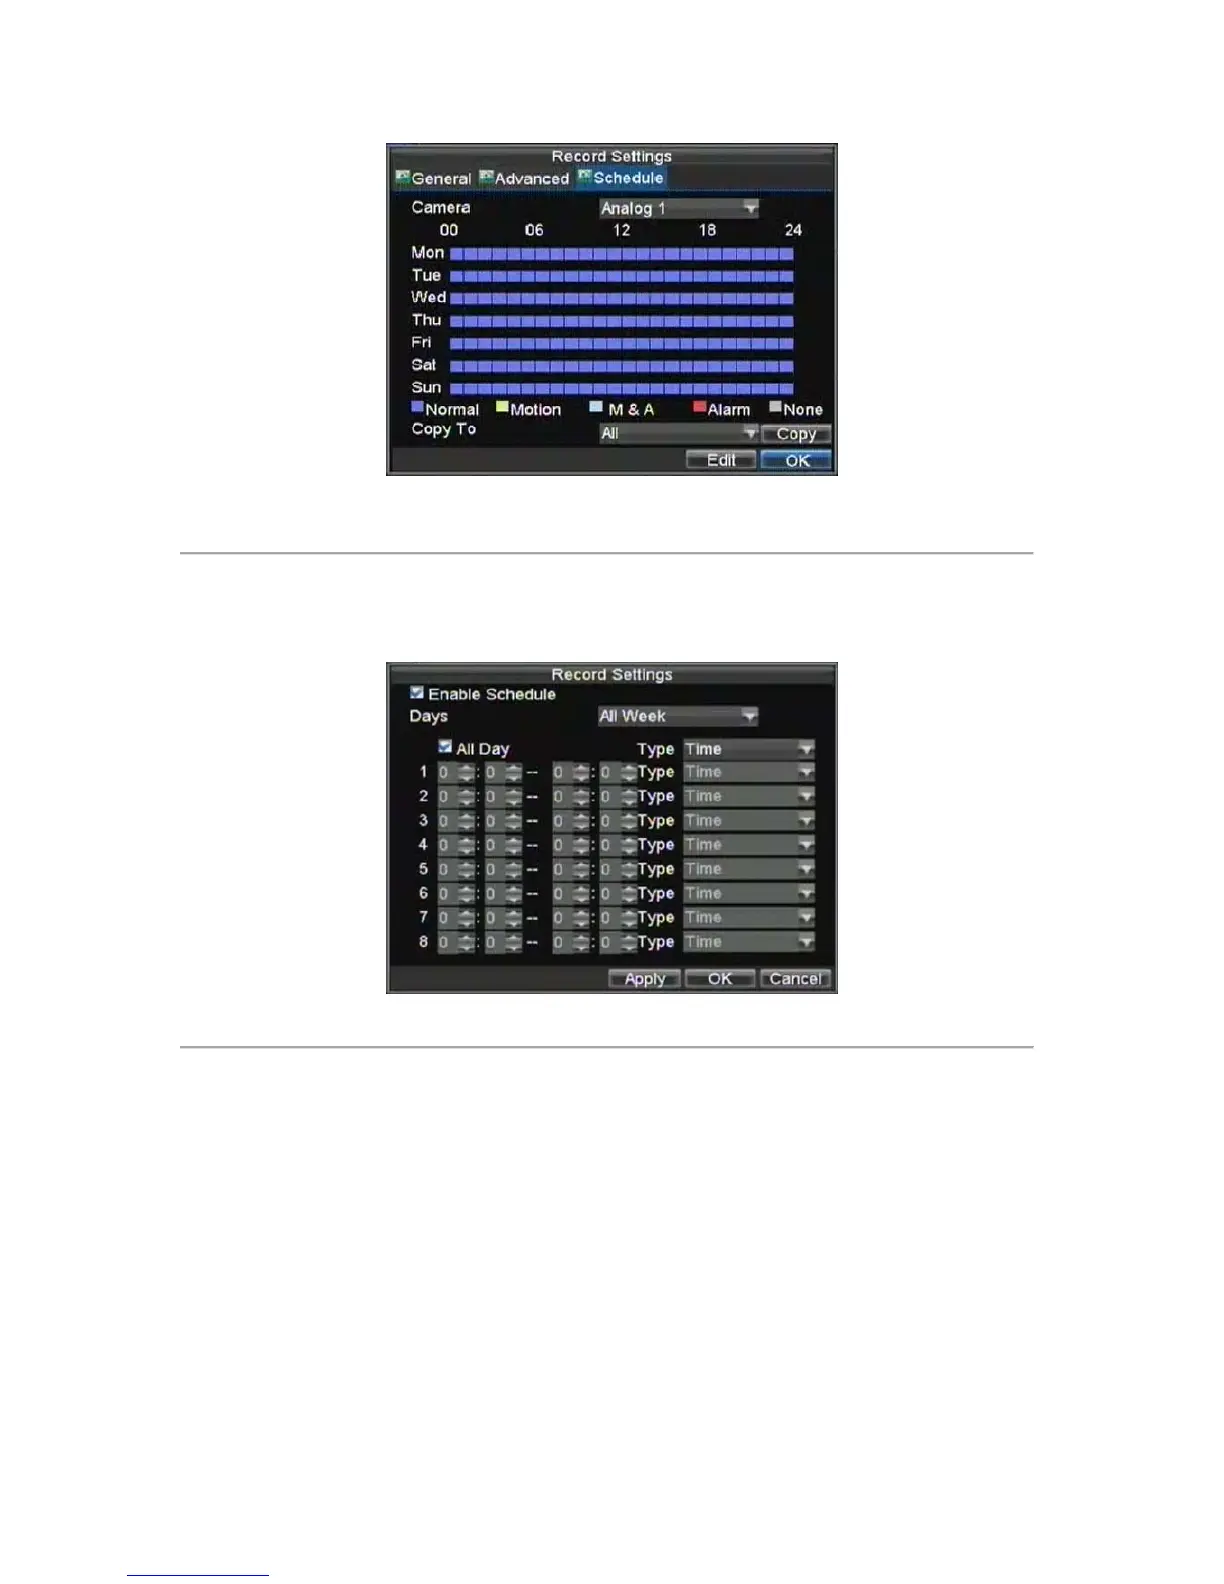
Figure 6. Schedule Settings
12. Click the Edit button. This will open up a new recording schedule, shown in Figure 7.
13. Check both the Enable Schedule and All Day checkbox. This will enable the recording schedule and
have it record continuously all day.
Figure 7. Edit Schedule Settings
14. Click the OK button. This will take you back to the Schedule tab. To copy the schedule to a different
channel, select the channel or all under Copy To and click the Copy button.
15. Click the Next button. This will take you to the Network Settings window, shown in Figure 8.
 Loading...