EasyManuals Logo

HIKVISION E Series Quick Guide

HIKVISION E Series
40 pages
To Next Page IconTo Next Page
To Previous Page IconTo Previous Page
Page #21 background imageLoading...
Page #21 background image
E Series Network Speed Dome·Quick Guide
20
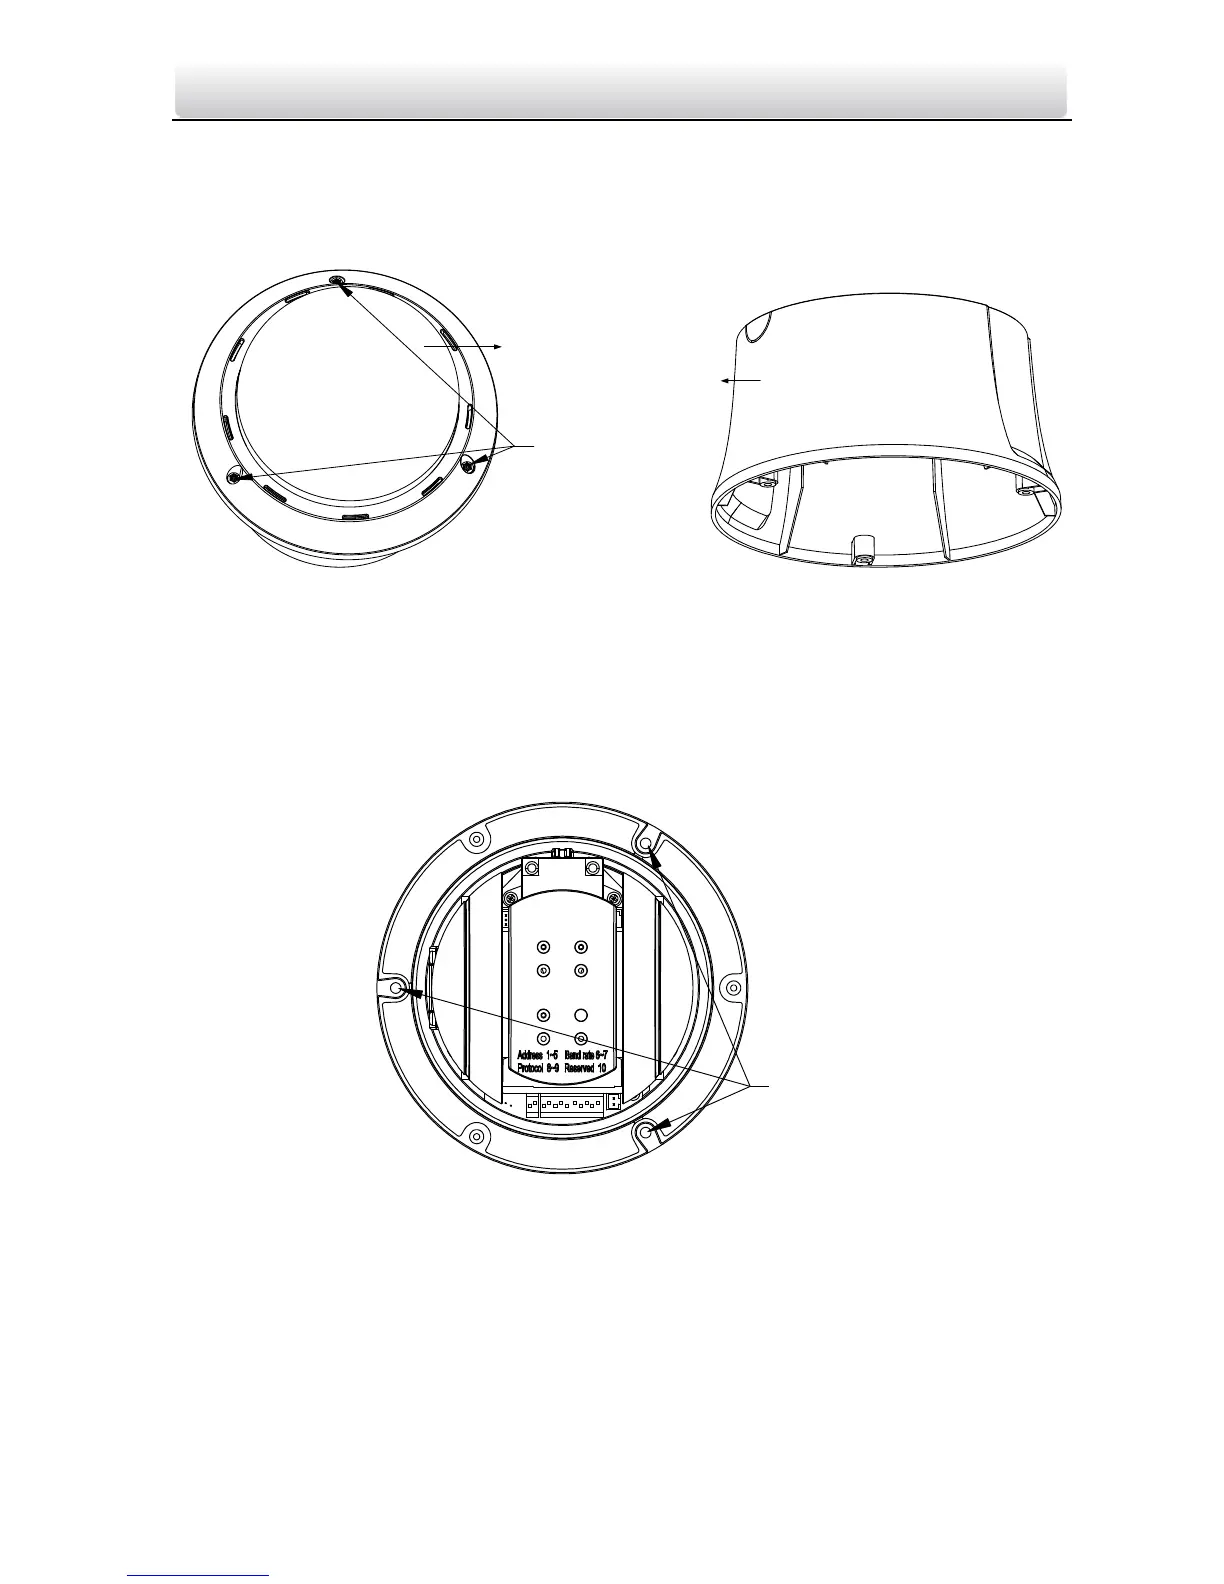
1). Loosen three screws as shown in the following figure.
2). Remove the lower dome.
3). Loosen three screws and remove the back box.
4). Remove the protective lens cover, foam and sticker from the dome drive.
Lower Dome
Three Screws
Back Box
Figure 2-16 Dissemble the Speed Dome
3. Install the toggle bolts.
1). Remove the toggle from the toggle bolt.
2). Insert the bolts into the screw holes on the dome as shown in Figure 2-17.
3). Rotate the bolts through the screw holes.
4). Reinstall the toggles as shown in Figure 2-18.
Toggle Bolt
Holes
Figure 2-17 Toggle Bolt Holes

Other manuals for HIKVISION E Series

Questions and Answers:

Question and Answer IconNeed help?

Do you have a question about the HIKVISION E Series and is the answer not in the manual?

HIKVISION E Series Specifications

General IconGeneral
BrandHIKVISION
ModelE Series
CategorySecurity Camera
LanguageEnglish

Related product manuals