EasyManuals Logo
Home>HIKVISION>Security Camera>E Series

HIKVISION E Series Quick Guide

HIKVISION E Series
40 pages
To Next Page IconTo Next Page
To Previous Page IconTo Previous Page
Page #25 background imageLoading...
Page #25 background image
E Series Network Speed Dome·Quick Guide
24
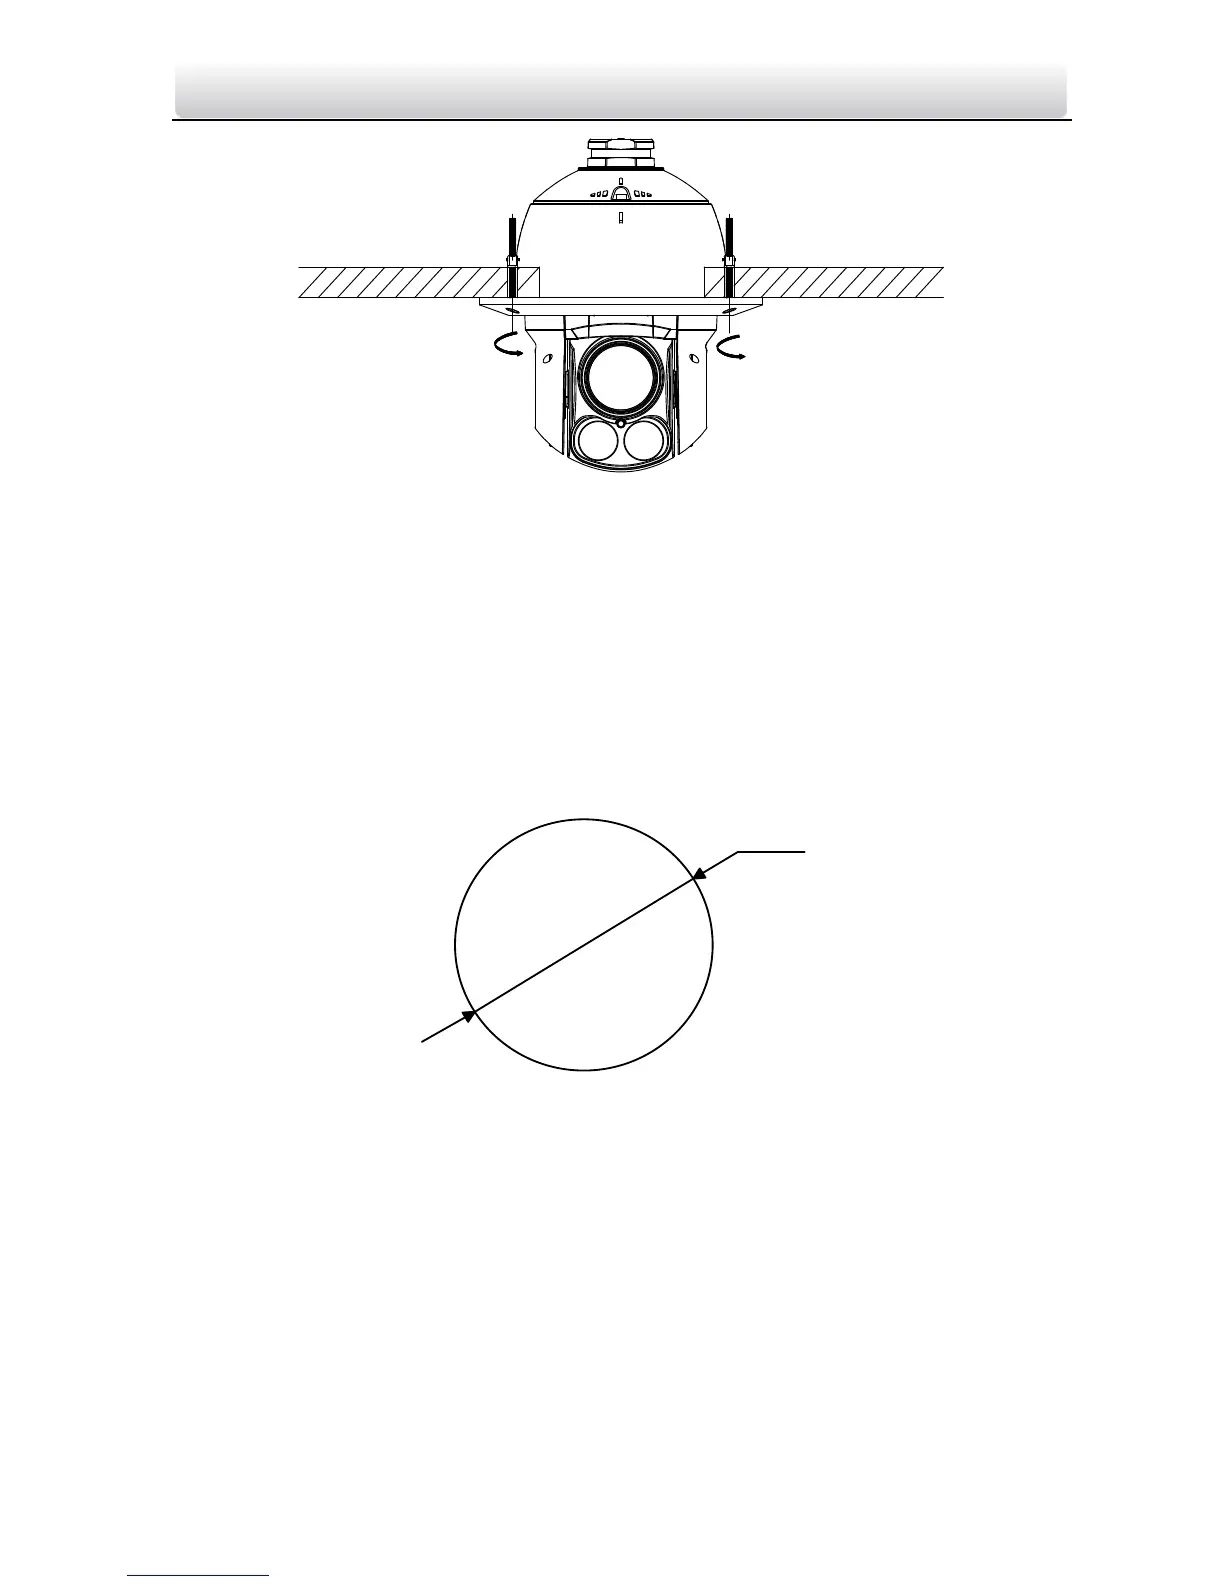
Figure 2-25 Install the Dome to the Ceiling
2.2.3 5-inch Network Speed Dome
Steps:
1. Drill holes in the ceiling.
1). Attach the drill template to the ceiling where you need to install the speed dome.
2). Cut a hole and drill screw holes according to the drill template.
Note: ±2mm of the diameter of the circle is tolerable.
224
Figure 2-26 Drill Template
2. Rotate the lower dome counterclockwise to separate it from the back box as shown in Figure
2-27.
3. Remove the protective lens cover, foam and sticker from the dome drive.
4. Attach lower dome to the back box, and rotate clockwise to secure it.

Other manuals for HIKVISION E Series

Questions and Answers:

Question and Answer IconNeed help?

Do you have a question about the HIKVISION E Series and is the answer not in the manual?

HIKVISION E Series Specifications

General IconGeneral
BrandHIKVISION
ModelE Series
CategorySecurity Camera
LanguageEnglish

Related product manuals