8. Route the cables through the ceiling for the speed dome.
Figure 2-21 Finish the Installation
2.2.2 Mini IR Network Speed Dome
Before you start:
The in-ceiling mounting is applicable to the indoor ceiling.
Steps:
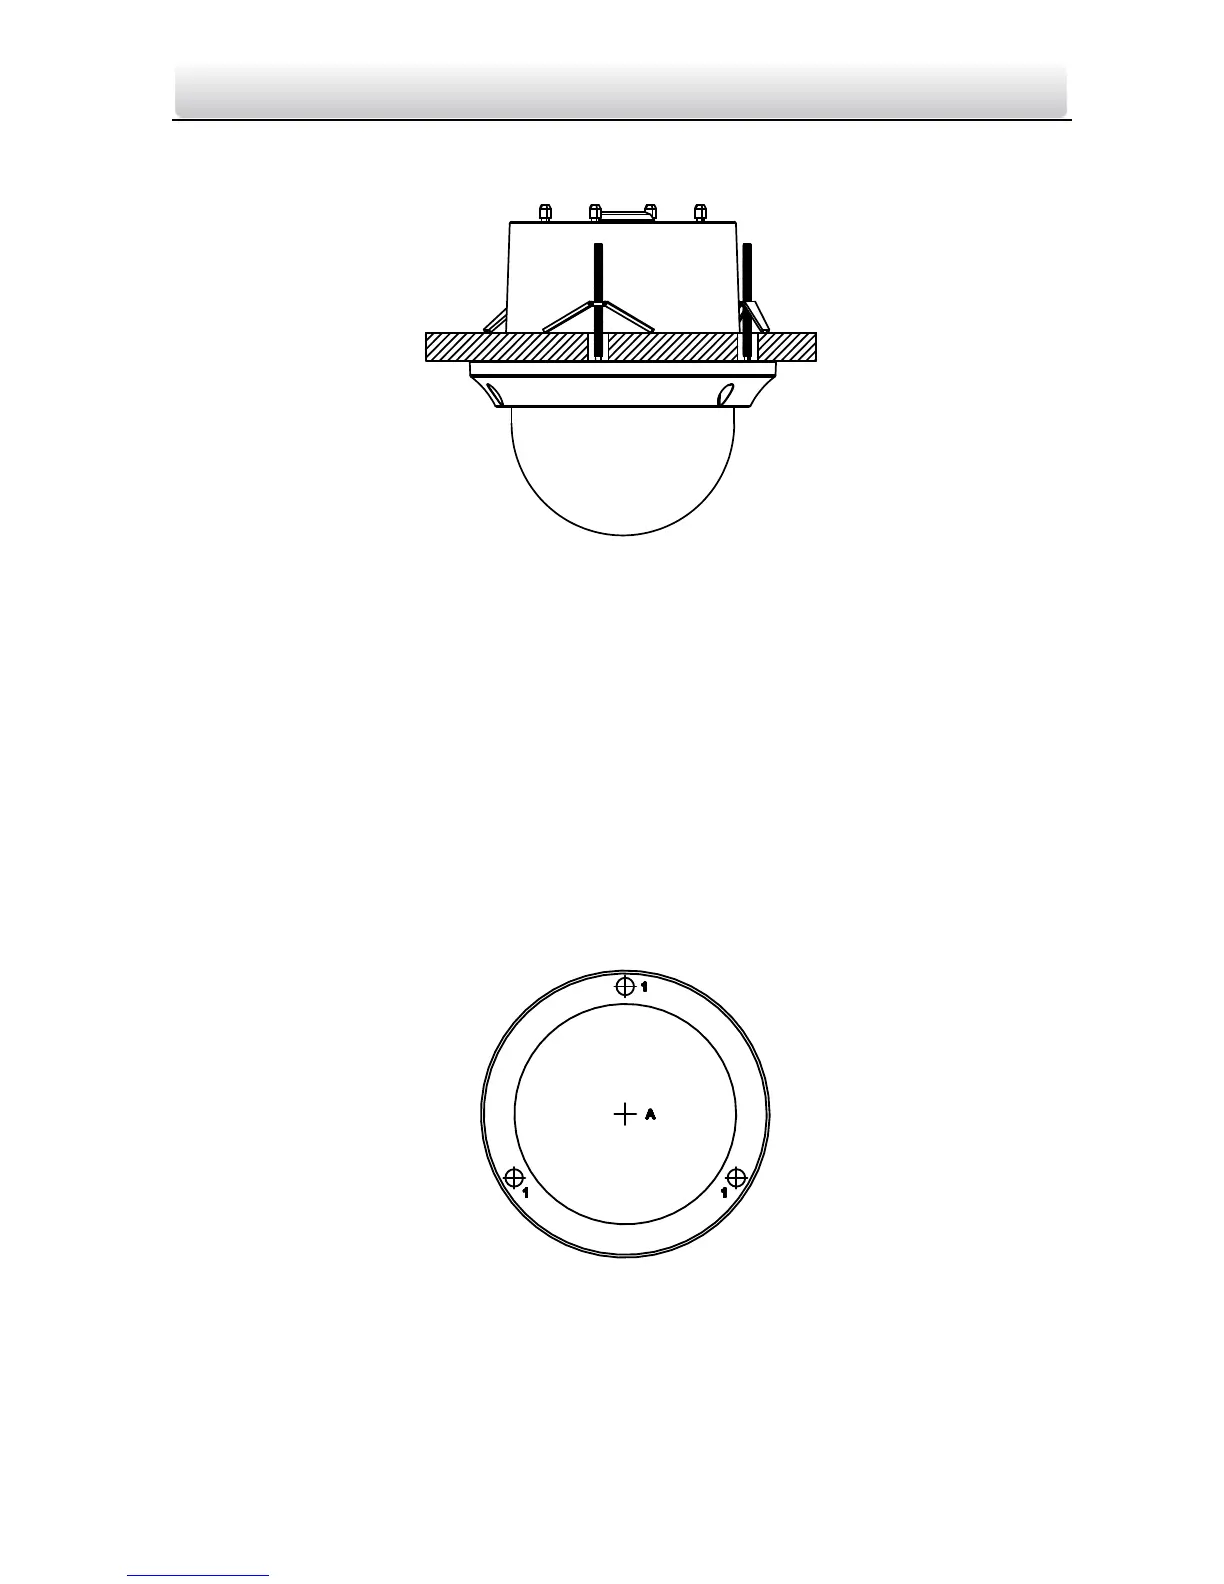
1. Drill holes in the ceiling.
1). Attach the drill template to the ceiling where you need to install the speed dome.
2). Cut a hole and drill screw holes according to the drill template.
Note: ±2mm of the diameter of the circle is tolerable.
Figure 2-22 Drill Template
2. Route the cables through the ceiling for the speed dome.
3. Install the toggle bolts.
1). Remove the toggle from the toggle bolt.
 Loading...