EasyManuals Logo

HIKVISION E Series Quick Guide

HIKVISION E Series
40 pages
To Next Page IconTo Next Page
To Previous Page IconTo Previous Page
Page #32 background imageLoading...
Page #32 background image
E Series Network Speed Dome·Quick Guide
31
3. Install 4 bolts to the screw holes as shown in Figure 2-39.
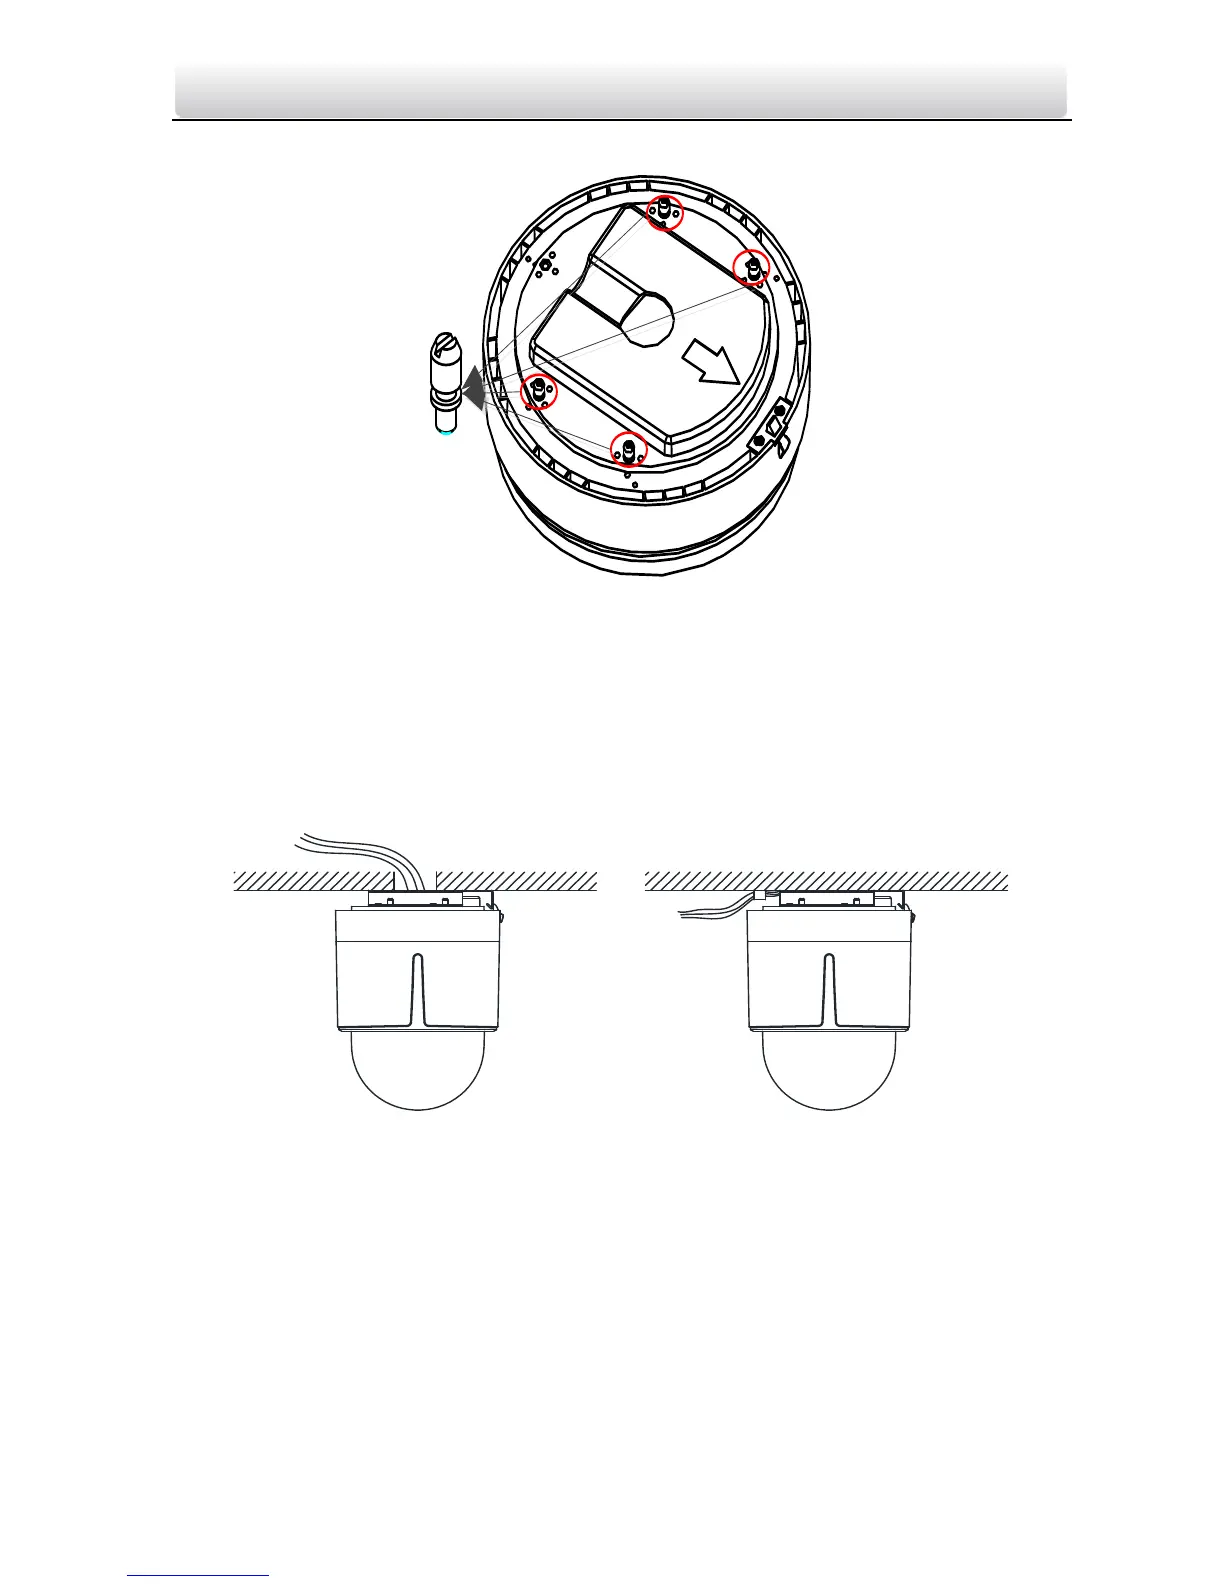
Figure 2-39 Install the bolts
Routing Method:
The cables of dome can be routed either from the top or the side of the back box, as shown in
Figure 2-40. For the cables routed from the top of the back box, it is required to drill a cable hole in
the ceiling.
Figure 2-40 Cabling for Ceiling Mounting
Installing:
Steps:
1. Rotate the lower dome counterclockwise to separate it from the back box.
2. Remove the protective lens cover, foam and sticker from the dome drive.
3. Attach lower dome to the back box, and rotate clockwise to secure it.
4. Use the mounting base as a template to mark four screw holes onto the ceiling.

Other manuals for HIKVISION E Series

Questions and Answers:

Question and Answer IconNeed help?

Do you have a question about the HIKVISION E Series and is the answer not in the manual?

HIKVISION E Series Specifications

General IconGeneral
BrandHIKVISION
ModelE Series
CategorySecurity Camera
LanguageEnglish

Related product manuals