EasyManuals Logo

HIKVISION E Series Quick Guide

HIKVISION E Series
40 pages
To Next Page IconTo Next Page
To Previous Page IconTo Previous Page
Page #33 background imageLoading...
Page #33 background image
E Series Network Speed Dome·Quick Guide
32
5. If you route cables from the top of the back box, mark the cable hole on the ceiling and drill a
hole.
Screw Hole
Cable Hole
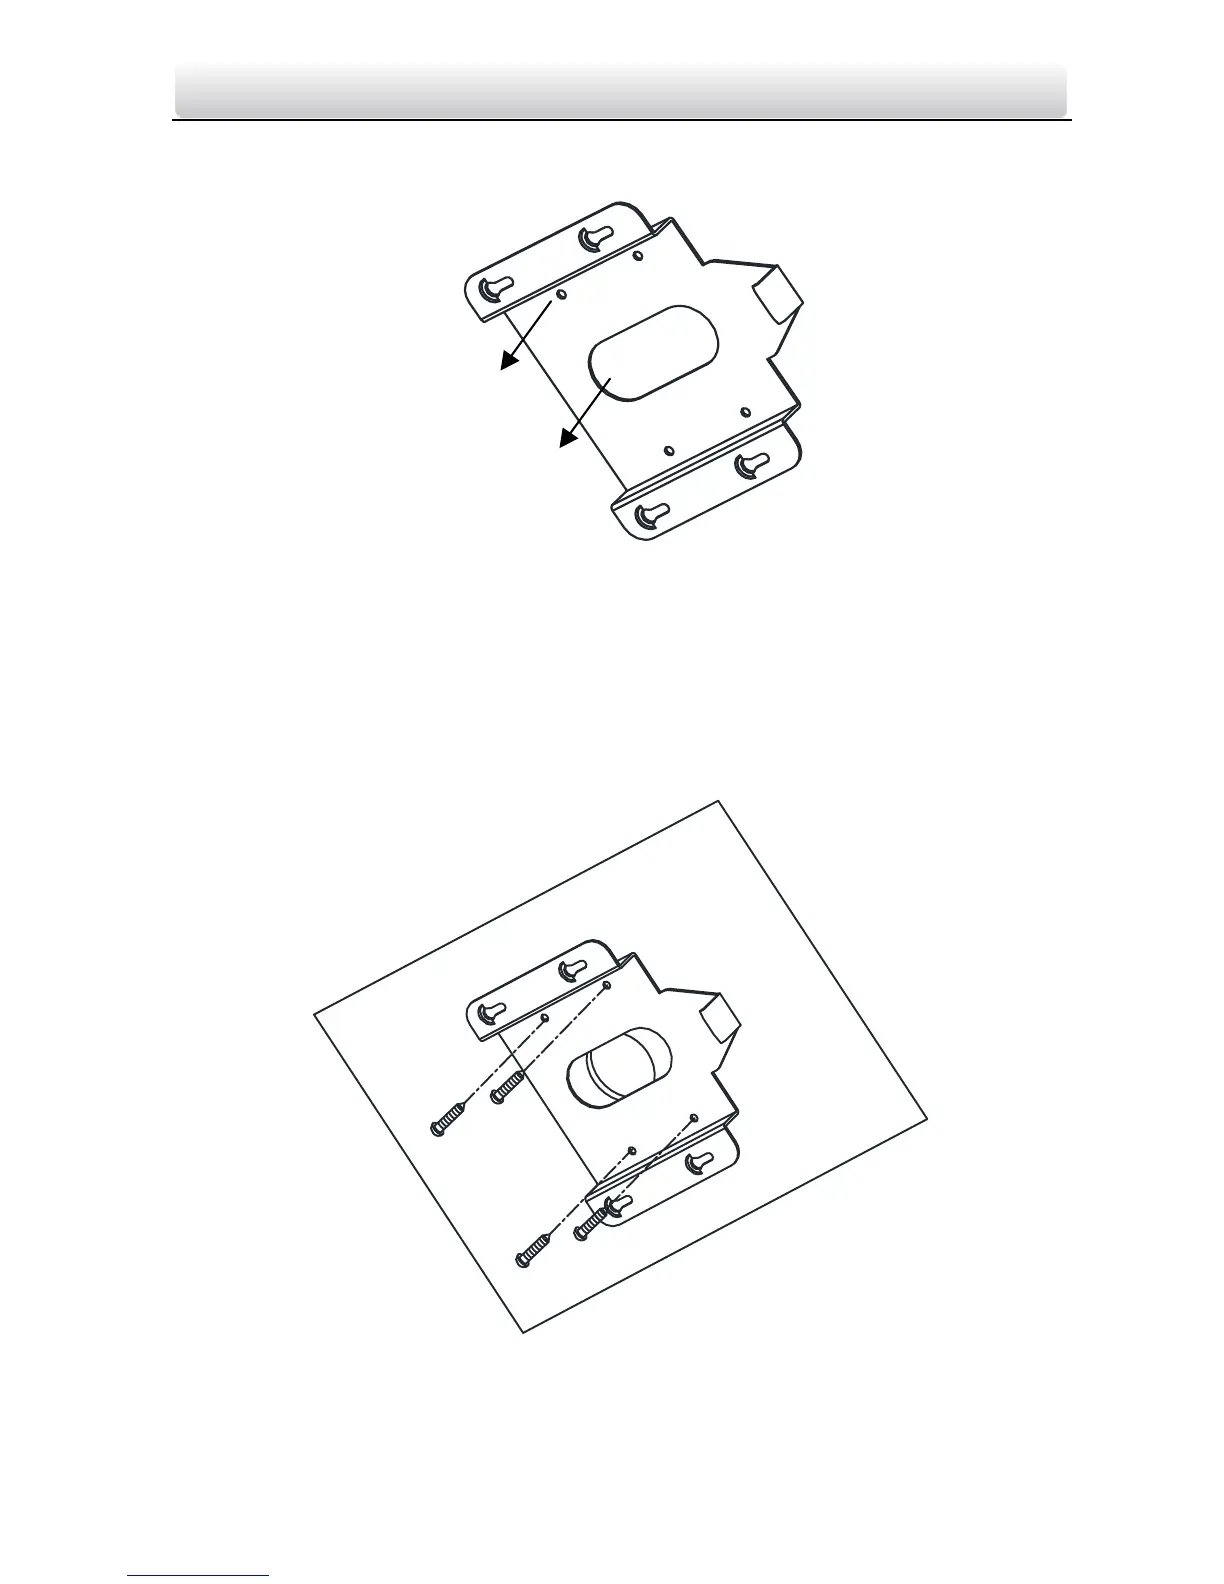
Figure 2-41 Mark the Screw Positions
6. Secure the mounting base to the ceiling with set screws.
If the speed dome is installed to the wooden wall, use the self-tapping screws to secure the
mounting base.
If the dome is installed to the cement wall, drill three Φ5 mounting holes onto the wall
according to the hole locations, and then insert the cement screws into the holes and finally
use self-tapping screws to secure the mounting base to the wall.
Figure 2-42 Secure the Mounting Base
7. Install the speed dome to the mounting base.

Other manuals for HIKVISION E Series

Questions and Answers:

Question and Answer IconNeed help?

Do you have a question about the HIKVISION E Series and is the answer not in the manual?

HIKVISION E Series Specifications

General IconGeneral
BrandHIKVISION
ModelE Series
CategorySecurity Camera
LanguageEnglish

Related product manuals