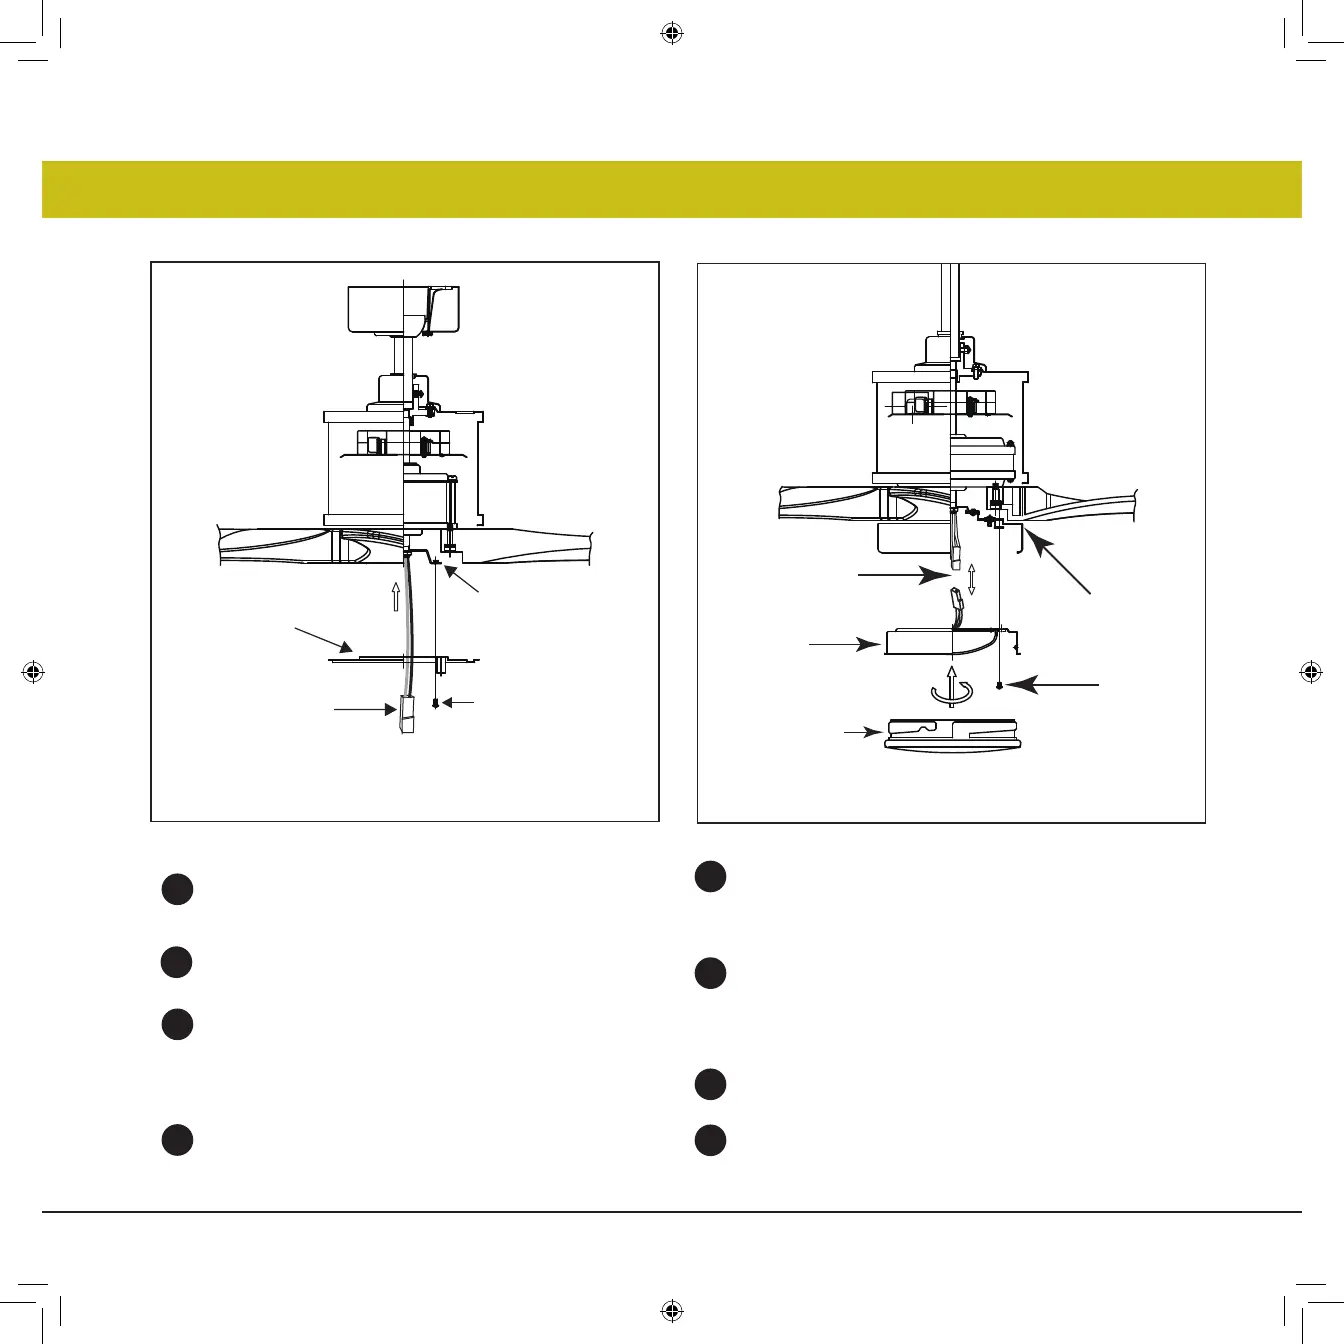
INSTALLING THE LED ASSEMBLY AND GLASS SHADE
1
2
3
4
5
6
7
8
5
NOTE: Be sure the power is off before installing.
Remove one of the three screws on the mounting hub
located on the fan motor. Loosen the other 2 screws. (Do not
remove) (Fig. 1)
Pass the light wires through the center hole of the adapter
plate.
Place the key holes on the adapter plate over the 2 screws
previously loosened, turn the adapter plate until it locks in
place at the narrow section of the key holes. Secure by
tightening the 2 screws previously loosened and the one
previously removed.
Remove one of the three screws on the adapter plate
located on the fan motor. Loosen the other 2 screws. (Do not
remove) (Fig. 2)
Fig. 1 Fig. 2
While holding the LED Assembly under your fan, make the
polarized plug connections: (Fig. 2)
- Red to white
- Black to black
Tuck connections neatly into adapter plate. Place the key
holes on the LED Assembly over the 2 screws previously
loosened, turn the LED Assembly until it locks in place at the
narrow section of the key holes. Secure by tightening the 2
screws previously loosened and the one previously removed.
Raise the glass shade against the LED Assembly and turn
clockwise until snug, DO NOT OVERTIGHTEN.
Restore power and your light kit is ready for operation.
©2019 Hinkley Lighting, Inc.
|
hinkley.com
|
11
Light Wires
Adapter Plate
Mounting Hub
(bottom of motor)
Screws
Glass shade
Screws
Adapter Plate
Wire connectors
LED
Assembly