Englsh
Once you have connected external systems to your TV, you can swtch to dfferent nput
sources. Press the Source button on your remote control consecutvely or use the
drectonal buttons and then press the OK button to swtch to dfferent sources. Besdes
ths, you can swtch to the desred nput source by selectng the desred opton from the
Inputs menu on the Home Screen or TV optons >Source menu n Lve TV mode.
If you want to connect a devce to the TV, make sure that both the TV and the devce are
turned off before makng any connecton. Use a sutable cable to connect two unts
together.
Change the Input Source
6
Intal Setup Wzard
5
Note: If you want the channels to be sorted in the preset order of Tivusat set the satellite as Hotbird at 13.0º
East (13.0E).
When turned on for the first time, a welcome screen will be displayed. Select your language and press OK.
Follow the on screen instructions to setup your TV and install channels. The installation wizard will guide you
through the setup process. You can perform initial setup anytime using the Reset option in the
Settings>Device Preferences menu. You can access the Settings menu from the Home Screen or from the TV
options menu in Live TV mode.
After starting the initial setup wizard a search for accessories will be performed. Follow the on-screen
instructions to pair your remote control (depends on the model of the remote control) and other wireless
accessories with your TV. For more detailed information on pairing your remote, refer to the full user manual.
Tivusat Installation
You can search and store Tivusat channels. Set the Satellite Type as Preferred Satellite and then set the
operator accordingly. Press OK or the Right directional button to proceed.
Note: For detaled nformaton and nstructons on the ntal setup process refer to the Insructon Book of ths
TV.
Connect your TV to the Internet
7
You can access the Internet va your TV, by connectng t to a
broadband system. It s necessary to confgure the network
settngs n order to enjoy a varety of streamng content and nternet
applcatons. These settngs can be confgured from the Network
& Internet menu located under the TV optons>Settngs menu n
Lve TV mode or under the Settngs menu on the Home Screen.
You can also hghlght the Connected/Not Connected con on the
Home screen and press OK to access ths menu.
Wreless Connecton
Wred Connecton
A wreless LAN modem/router s requred to connect the TV to the
Internet va wreless LAN. Hghlght W-F opton n the Network &
Internet menu and press OK to enable wreless connecton.
Avalable networks wll be lsted. Hghlght your network from the
lst and press OK to connect. You may be asked to enter a
password to connect to the selected network, in case the network is
password protected.
The status of the connecton under the Ethernet secton n the
Network & Internet menu wll change from Not connected to
Connected.
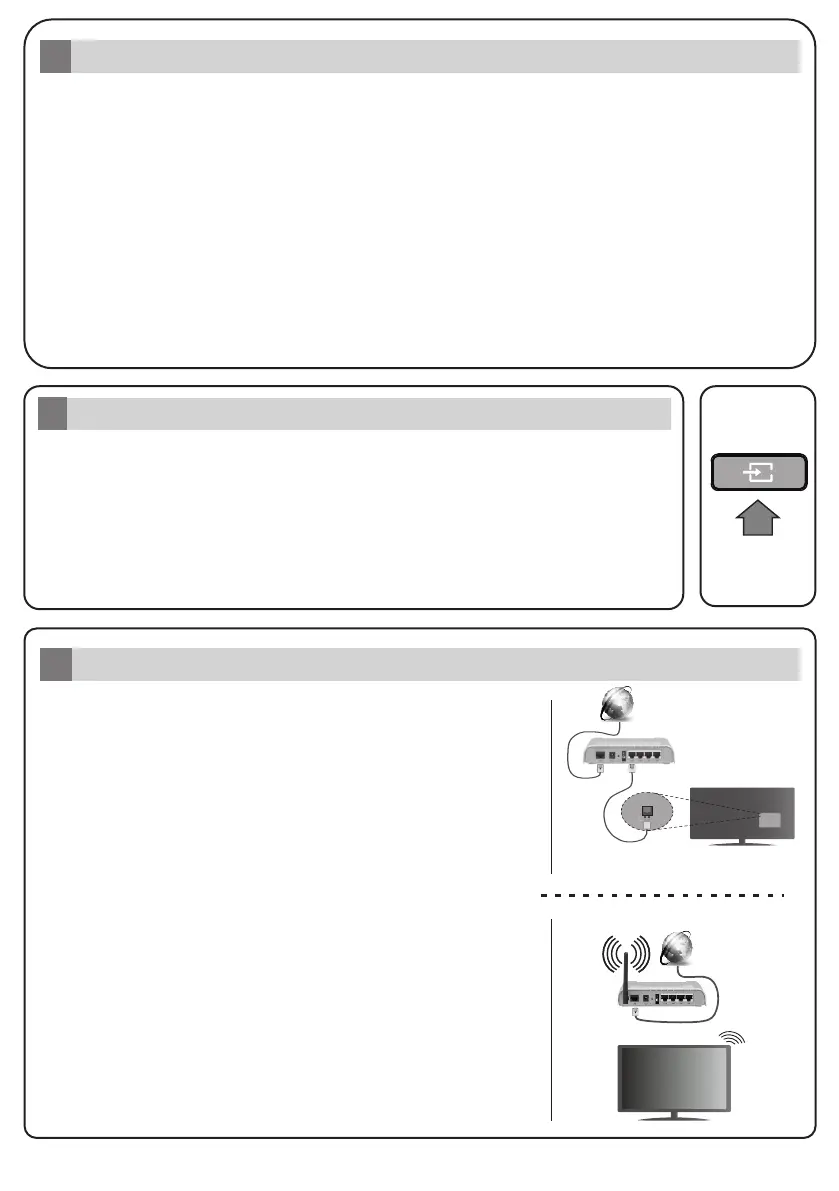
Connect your TV to your modem/router va an Ethernet cable.
There s a LAN port on the rear sde of your TV.
Wred Connecton
LAN (Ethernet) cable
LAN nput on the rear side of the TV
Broadband
ISP connecton
Wreless Connecton
Broadband
ISP connecton