41
DW2U
BACK TO ADJUSTMENTS
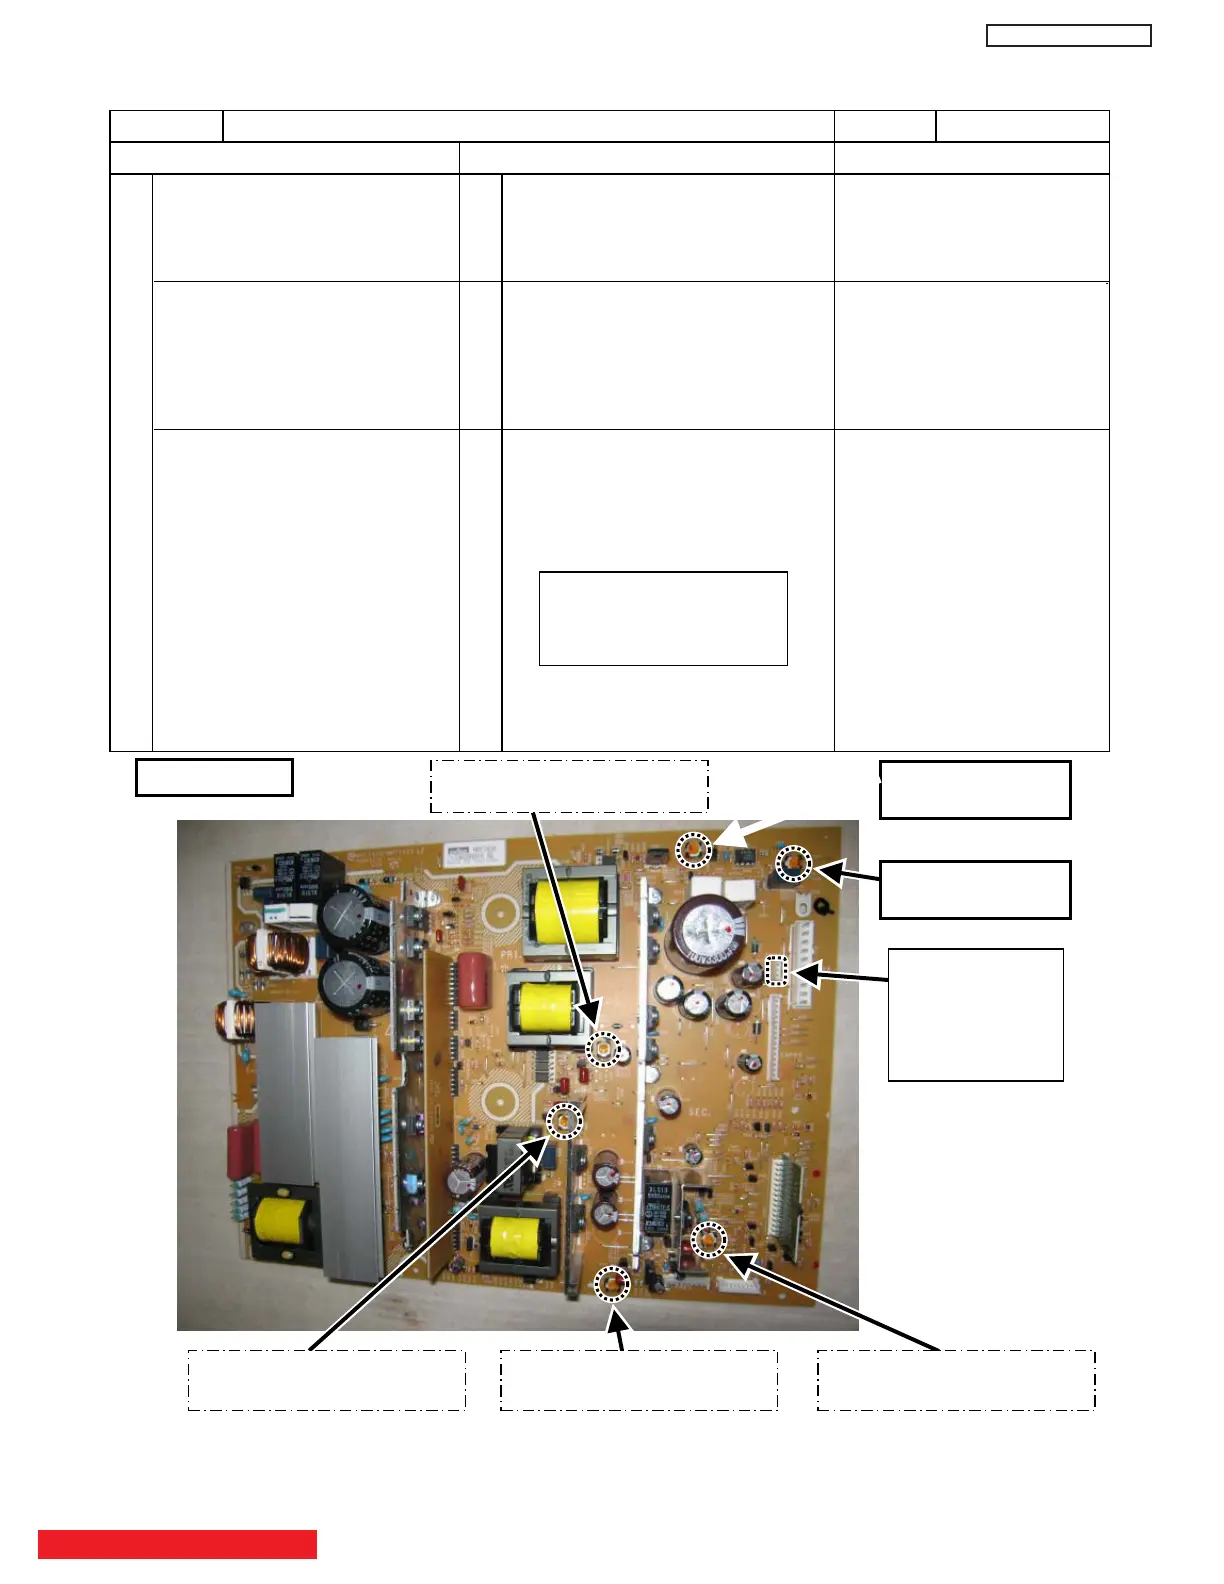
4. Vs, Va voltage adjustment
Never touch this VR !
(This is already adjusted.)
Never touch this VR ! (Va)
(This is already adjusted.)
Never touch this VR !
(This is already adjusted.)
Never touch this VR !
(
This is already adjusted.)
Vs2㧦
Vs Fine ADJ. VR
Vs1㧦
Vs Coarse ADJ. VR
CN99㧦Vs/Va
Test pins
(1)pin: Va
(2)pin: Vs
(3)pin: GND
42”
Item Power Unit Vs, Va Adjustment Adj. point Refer to following
Adjustment Preparations Adjustment Procedures Remarks
(1) Turn on the set and perform
pre-heat run more than 1 min
on burn-in screen.
(1) Turn Vs ADJ to adjust Vs voltage
to be within r0.1V of the value
specified in the label on the panel.
Permissive level of voltage in
sufficient time of heat-run
performed is:
Vs: withinr0.1V
(2) Receive full black pattern signal
(or video silence signal; but the
power will be automatically turned
off after a few seconds by power
save function.)
(2) Turn Va ADJ to adjust Va voltage
to be within r0.2V of the value
specified in the label on the panel.
Va: withinr0.2V
42’’: Adjusted by
manufacturing.
55’’: Need to be adjusted.
(3) Connect voltmeter (which has an
error within 0.02V or less) leads
to Vs (or Va) and GND test points
of the power unit.
(3) Reconfirm that Vs voltage remains
within r0.1V of the specified value.
Readjust if it’s outside of the margin.
[Label example] Label position (Reference)
: Upper left
If it’s hard to read the voltage
value because of the wiring
positions, write it down by a
marker at visible place in
advance.
<LOT>N6
Vs= 80.0V Va=60.0V
V윘=140.0V Vx=60.0V
 Loading...