-1-
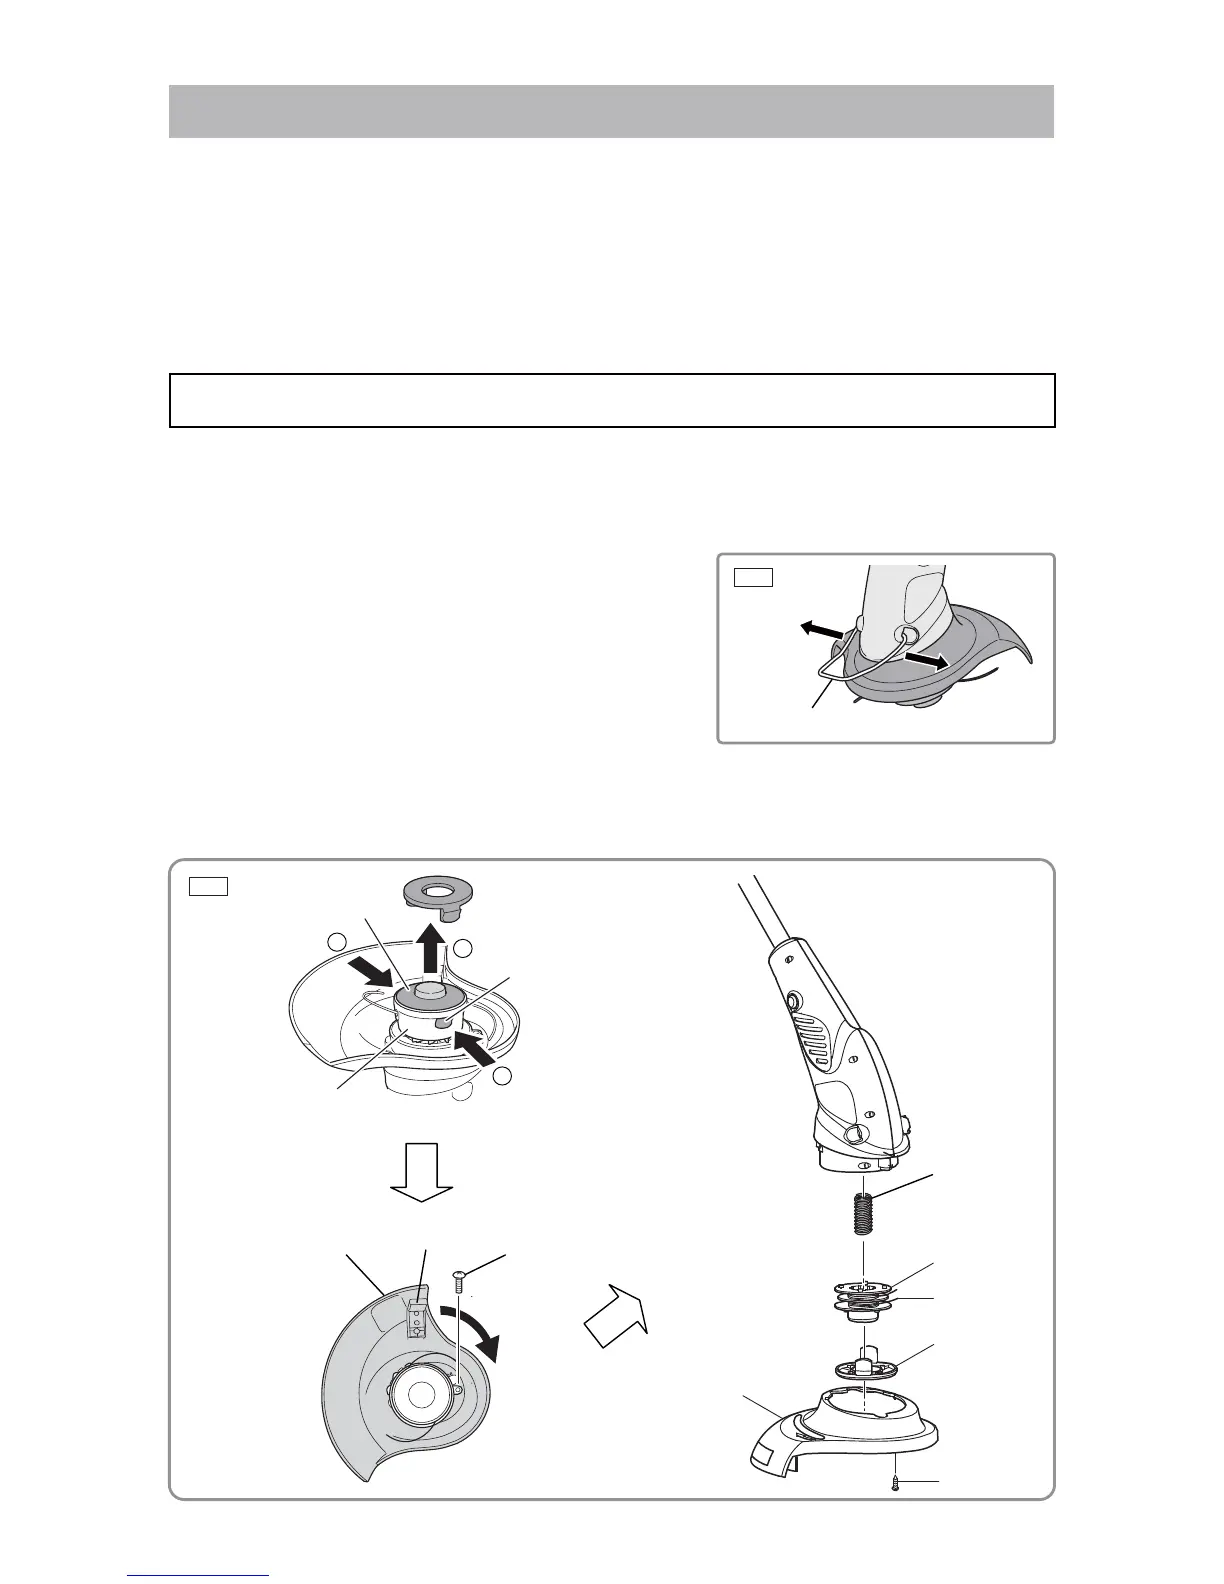
Fig. 2
Fig. 1
WARNING: Before conducting repair, be sure to turn off the power switch and disconnect the
power cord plug from the power source outlet.
1. Precautions on disassembly and reassembly
[Bold] and <Bold> numbers in the description below correspond to the item numbers in the parts lists and
exploded assembly diagrams of the Models CG 25SC and CG 30SC, respectively.
CAUTION: Be careful not to cut your finger with the Blade [51] located on the back of the
Protecting Cover [50].
1. Disassembling the housing section
(1) Open the Guide [43] wide and detach it from the housing
as shown in Fig. 1.
(2) Pull up the Upper Cover [49] from the Wire Roll Support [41] while pushing in its two latches together.
Remove the Wire Roll [47] with the nylon wire and Spring (D) [46]. Next, remove the Screws ST4 x 12
[10]. Turn the Protecting Cover [50] in the arrow direction as shown in Fig. 2 to remove it.
[41]
[49]
Latch (2 pcs.)
[47]
[49]
[50]
[10]
[46]
Disassembly of the Model CG 25SC
REPAIR GUIDE
[43]
1
1
2
[50]
[10]
[48]
[51]











 To Next Page