Do you have a question about the Hitachi CP-EX250 and is the answer not in the manual?
| Native aspect ratio | 4:3 |
|---|---|
| Projection distance | 0.9 - 9.1 m |
| Projection technology | LCD |
| Contrast ratio (typical) | 2000:1 |
| Screen size compatibility | 30 - 300 \ |
| Projector native resolution | XGA (1024x768) |
| Focal length range | - mm |
| Lamp type | UHP |
| Lamp power | 215 W |
| Light source type | Lamp |
| Service life of light source | - h |
| Full HD | No |
| RMS rated power | 1 W |
| USB 2.0 ports quantity | 3 |
| S-Video inputs quantity | 1 |
| VGA (D-Sub) ports quantity | 5 |
| Noise level | - dB |
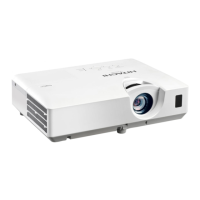
| Product type | Portable projector |
| Product color | White |
| Market positioning | Portable |
| Power source | AC |
| Power consumption (standby) | - W |
| Power consumption (typical) | 320 W |
| Operating temperature (T-T) | 5 - 35 °C |
| Sustainability certificates | RoHS |
| Weight | 2900 g |
|---|
Highlights projector's versatile I/O ports, compact size, and broad picture signal capability.
Instructions for verifying projector package contents and reporting missing items.
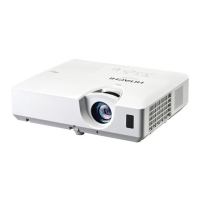
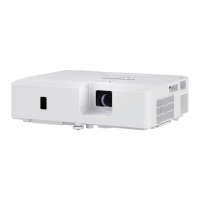
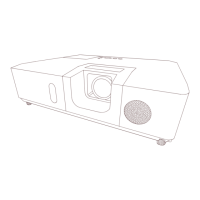
Identifies and illustrates key external components of the projector.
Details the buttons and indicators on the projector's control panel.
Illustrates and labels the various ports on the projector's rear.
Identifies and explains the functions of each button on the remote control.
Guidance on projector placement, screen size, and projection distance.
Instructions for connecting external devices to the projector using appropriate cables.
Explains Plug-and-Play compatibility and its use with VESA DDC 2B.
Procedure for connecting the projector's power cord and ensuring correct power supply.
Details on attaching an anti-theft chain or wire and using the Kensington lock slot.
Step-by-step guide for inserting AA batteries into the remote control.
Explains the range and limitations of the remote control sensor.
Instructions to change the remote control signal frequency for better operation.
Procedure to power on the projector, including indicator lights and initial settings.
Steps to turn off the projector, including power indicator status and cooling time.
How to adjust the projector's volume using the remote control or buttons.
Instructions for muting the projector's sound using the MUTE button.
Methods to switch between different input sources using projector or remote.
How to automatically search for and select an active input signal.
Guide to changing the picture's aspect ratio for various signal types.
How to adjust the projector's tilt using the front and rear elevator feet.
Instructions for adjusting screen size with the zoom ring and picture focus.
Details on automatically adjusting picture position and phase for optimal display.
How to manually adjust the picture's position using the remote control buttons.
Steps to correct trapezoidal distortion using the KEYSTONE button.
How to zoom in on parts of the image for closer viewing using the MAGNIFY button.
How to freeze the current image on screen using the FREEZE button.
How to display a blank screen using the BLANK button.
Overview of accessing and navigating the projector's menu system (EASY/ADVANCED).
Controls the aspect ratio of the projected image. See Image menu.
Corrects vertical keystone distortion. See Setup menu.
Switches between preset picture modes (combinations of GAMMA/COLOR TEMP).
Switches power saving modes (NORMAL, ECO, INTELLIGENT ECO, SAVER).
Displays dialog for changing projector installation orientation (e.g., FRONT/REAR).
Resets EASY MENU items (except FILTER TIME, LANGUAGE).
Shows and resets the air filter usage time.
Changes the OSD display language. See Screen menu.
Accesses the full menu of picture, image, input, setup, audio, screen, option, security.
Exits the OSD menu.
Adjusts the overall brightness of the projected image.
Adjusts the difference between light and dark areas of the image.
Switches gamma modes or allows custom adjustment for tone control.
Adjusts color temperature or customizes offset/gain for color intensity.
Adjusts the strength of the overall color saturation.
Adjusts the color balance between red and green.
Adjusts the clarity and detail of the image.
Saves and loads picture adjustment settings across 4 memory slots.
Controls the aspect ratio of the projected image for various signal types.
Adjusts the over-scan ratio, affecting picture magnification or reduction.
Adjusts the vertical position of the projected image.
Adjusts the horizontal position of the projected image.
Adjusts the horizontal phase to eliminate image flicker.
Adjusts the horizontal size of the projected image.
Performs automatic adjustment of picture position, phase, and size.
Sets the progressive scan mode for video, component, and HDMI signals.
Adjusts the noise reduction mode for video, component, and HDMI signals.
Sets the color space mode for computer, component, and HDMI signals.
Sets the video format for the VIDEO port, including NTSC and PAL.
Sets the video format for the HDMI port (AUTO, VIDEO, COMPUTER).
Changes the digital range for HDMI input (AUTO, NORMAL, ENHANCED).
Sets the computer input signal type for COMPUTER IN1/IN2 ports.
Turns the frame lock function on/off for each port.
Sets the resolution for COMPUTER IN1/IN2, including AUTO, STANDARD, and CUSTOM.
Corrects vertical keystone distortion by shrinking image top or bottom.
Turns the automatic ECO mode on/off for startup.
Switches between power saving modes: NORMAL, ECO, INTELLIGENT ECO, SAVER.
Displays dialog for changing projector installation orientation (e.g., FRONT/REAR).
Switches the standby mode between NORMAL and SAVING for power consumption.
Configures output signal to the MONITOR OUT port during standby or operation.
Adjusts the audio volume level of the projector.
Turns the built-in speaker on or off.
Selects the audio input port or mute icon for sound output.
Switches the OSD display language. See Screen menu.
Adjusts the position of the on-screen menu.
Switches modes for the blank screen feature.
Switches modes for the automatic blank screen feature.
Switches the start-up screen display mode.
Allows capturing and using an image as a custom screen.
Locks the MyScreen function to prevent overwriting.
Turns on/off various system messages and indicators.
Applies custom names and icons to input ports.
Switches between template screens for display guidance.
Configures Closed Caption display, mode (CAPTIONS/TEXT), and channel.
Turns automatic signal search function on/off.
Enables automatic lamp turn-on when power is supplied.
Sets countdown time for automatic projector power off.
Displays and resets the projector lamp usage time.
Displays and resets the air filter usage time.
Assigns functions (input, picture mode, etc.) to MY BUTTON 1/2.
Selects input port for MY SOURCE/DOC.CAMERA button.
Accesses service functions: ALTITUDE, AUTO ADJUST, KEY LOCK, REMOTE FREQ, INFORMATION, FACTORY RESET.
Procedure to change the projector's security password.
Sets/turns off password for MyScreen function, preventing unauthorized access.
Enables PIN code to prevent projector use without authorization.
Protects MY TEXT content from being overwritten by setting a password.
Turns MY TEXT display on/off, showing text on startup/info screens.
Allows inputting/editing custom text (MY TEXT) on the projector.
Instructions for safely replacing the projector lamp unit.
Procedure for cleaning or replacing the projector's air filter.
Guidance on cleaning the projector lens and cabinet.
Explains common on-screen messages and their solutions.
Explains the meaning of different POWER, LAMP, TEMP indicator light combinations.
How to reset projector settings to factory defaults using FACTORY RESET.
Troubleshooting common issues that are not actual machine defects.
Details about the software license agreement for the projector's included software.