--- 25 ---
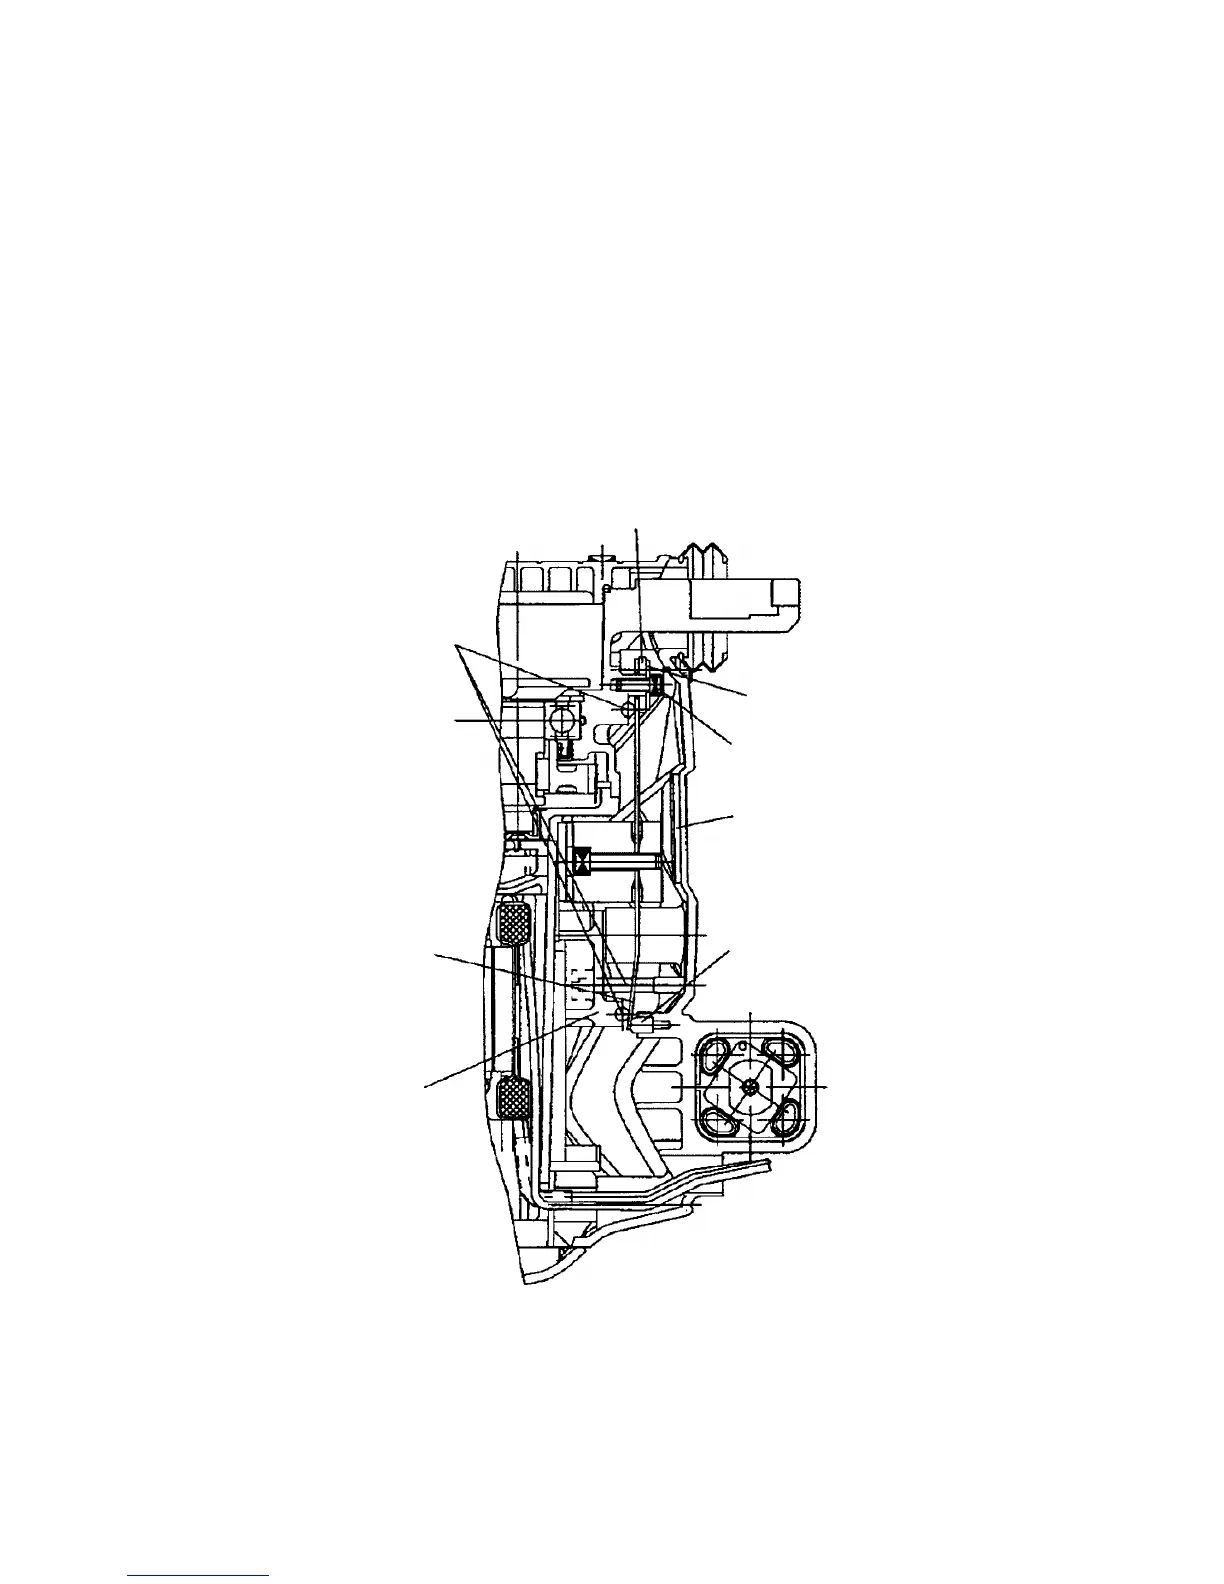
Mount the assembly of the Leaf Spring [51], Weight (A) [59] and Weight (B) [58] to the Cylinder Crank Case
[47]. Then mount Spring Bumper (A) [52] and Washer M4.5 [53] to the Cylinder Crank Case [47] in this order
and fix it with the Seal Lock Hex. Socket Hd. Bolt M4 x 10 [54]. At this time, check that the Leaf Spring [51] is
fitted in the center of the Needle Rollers [55] mounted to the Spring Base [115] and the Leaf Spring [51] is
curved to the housing.
Apply grease to Spring Bumper (B) [75] and mount it to the Back Cover [76] being careful of the mounting
direction. To replace Rubber Sheet (A) [74], sufficiently degrease the adhering surface of the Back Cover [76]
and adhere Rubber Sheet (A) [74] securely.
Mount the Back Cover [76] to the Cylinder Crank Case [47] and the Housing Ass'y [114]. At this time, check
that Spring Bumper (B) [75] and Rubber Sheet (A) [74] are adhered and the Needle Rollers [55] are mounted
to the Cylinder Crank Case [47] and the Spring Base [115] (Fig. 27).
Fig. 27
Needle roller
Washer
Leaf spring
Spring bumper (B)
Rubber sheet (A)
Seal lock hex. socket
hd. bolt M4 x 10
Spring bumper (A)
Spring base
 Loading...