23
WARNING
● Change the oil regularly, as instructed in the
standard maintenance schedule (
page
13 to 16). Neglecting to change the oil
causes oil deterioration that could result in
clogging of the oil strainer and a fire.
● Be sure to use genuine Hitachi GL-68 DSP
compressor. Absolutely DO NOT mix
different types of lubricating oil.
●
Overfilling with lubricating oil may increase
shaft power and result in rise in oil temperature.
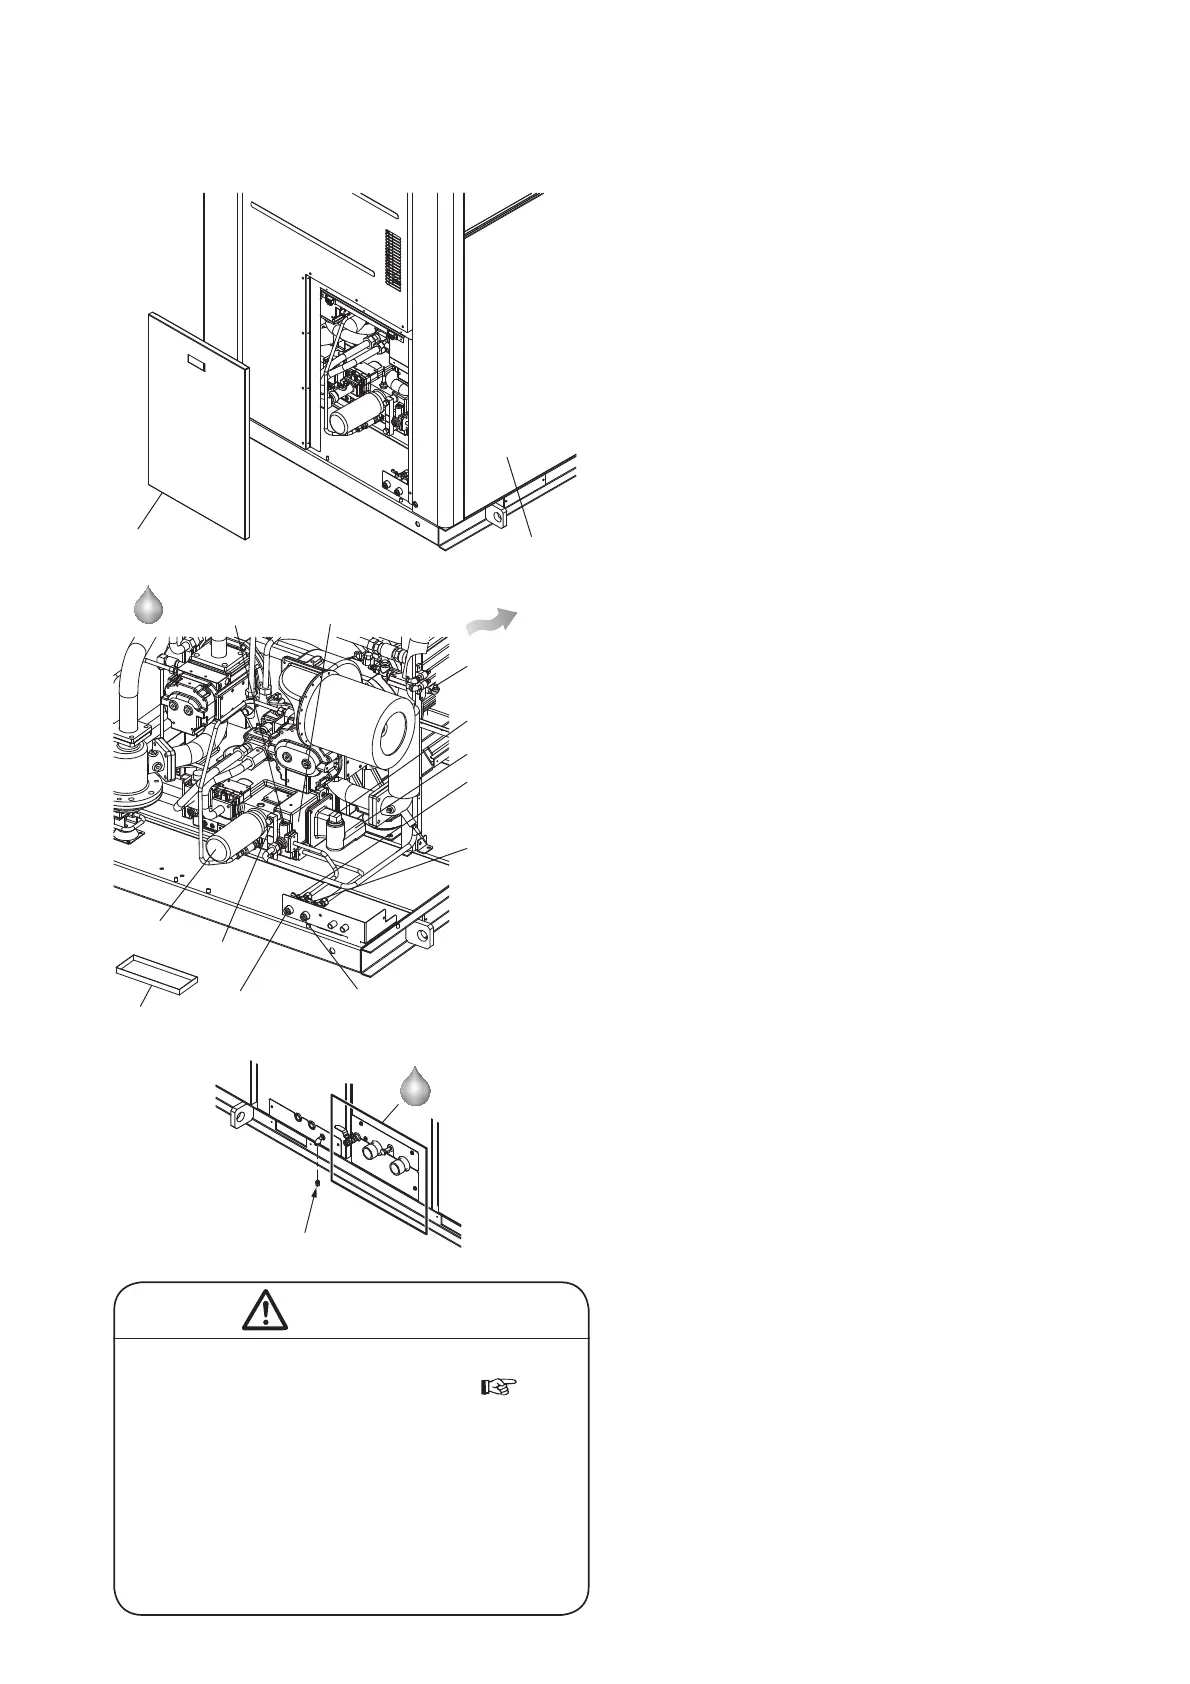
■ Oil drain
① Stop the air compressor and disconnect the power.
Remove the front door (1) and left door.
② Place oil pans under the oil drain ports ①②③. The
dimension of oil pan is approximately 3 × 10 × 14
inches (75 × 250 × 300 mm). Prepare the oil jug of
6.6 gal (25 liters) or more for air-cooled type, and 3.9
gal (15 liters) or more for water-cooled type.
③ Remove the plugs of oil drain ports ① and ②. Then
connect copper pipes to the ports. The dimensions
of the copper pipes is 1/2B × 2 to 4 inches (1/2B ×
50 to 100 mm). After that, open the oil drain valves
① and ② to drain lubricating oil.
④
After opening oil drain valves ① and ②, remove the
plug (for oil/air vent). (Note that the oil/air vent
location of air-cooled type and water-cooled type are
different.)
⑤ Remove the plug from oil drain port ③ to drain
lubricating oil.
⑥ Replace all lubricating oil annually. Also once a year,
remove the oil port cover and wipe the sludge off of
the bottom of the gear case with a sponge and clean.
⑦ Close oil drain valves ① and ②. Tighten removed
plugs with seal tape to oil drain ports ①, ②, ③ and
oil/air vent.
■ Oil filling
⑧ Remove the oil filling port plug, and fill the oil until
the oil reaches the upper red line of the oil level
gauge.
■ Check/refilling
⑨ Turn on the power, press the START button and
press the STOP button after 5 – 6 seconds running.
⑩ Check the oil level on the oil level gauge. The oil
level drops because lubricating oil flows to the
piping, oil cooler and so on.
⑪ Disconnect the power and add the oil until upper red
line.
⑫ After refilling is complete, plug tightly.
⑬ Turn the power on, press the START button and
make sure the oil level is between the upper and
lower red lines of the oil level gauge.
⑭ Make sure no oil leaks from the oil drain valve and
plugs.
Oil drain port ②
(with plug)
Oil filter
Pan
Yellow line
Oil drain valve ①
(for oil case draining)
Oil drain port ①
(with plug)
Oil case
Oil filling port plug
Oil drain valve ②
(for oil case draining)
Oil cover
Plug
(for oil/air vent)
Plug
(for oil/air vent)
Air-Cooled
Water-Cooled
Oil drain port ③
(with plug)
only
Water-Cooled
Left door
Front door (1)
4.3 Lubricating oil Replacement (Annually)

 Loading...