Do you have a question about the Hitachi RAS-2HVRN2 and is the answer not in the manual?
Explains the system for identifying different YUTAKI S series models and their configurations.
Provides detailed breakdown of indoor unit model numbers, including type, power, and refrigerant.
Details outdoor unit types and heat pump model categorizations.
Explains the codification for unit type, compressor power, phase, inverter, and refrigerant.
Lists and describes various room thermostat models for system integration.
Lists additional accessories for system combinations beyond thermostats.
Details critical safety warnings regarding hazards and cautionary measures.
Provides essential information and context for using the manual.
Lists the minimum and maximum operating temperatures for various modes.
Explains the basic functionality and components of the air/water heat pump system.
Describes different system configurations like monovalent, monoenergetic, and bivalent.
Illustrates a typical setup for heating applications with radiators or floor heating.
Shows a typical configuration for heating with a hot water storage tank.
Illustrates a setup with two heating circuits, one for radiators and one for floor heating.
Depicts a configuration for heating, hot water tank, and dual heating circuits.
Shows installations with alternating boiler combinations using hydraulic separators.
Illustrates a configuration with heating, storage tank, and alternating boiler.
Depicts a setup with dual heating, storage tank, and alternating boiler.
Shows a configuration for dual heating, storage tank, and alternating boiler.
Illustrates a direct cooling installation with fan coils and optional room thermostat.
Depicts a cooling setup with a hot water storage tank heated by a pump.
Shows a configuration for floor cooling only, with heating circuits closed.
Illustrates floor cooling with a hot water storage tank heated by a pump.
Depicts a setup for two cooling zones using fan coils and floor cooling.
Shows a configuration for dual cooling zones with a storage tank heated by a pump.
Describes the system configuration for swimming pool heating.
Introduces the option to use solar collectors for domestic hot water heating.
Details the second option for solar collector integration with the system.
Explains the configuration using a buffer tank for temperature management.
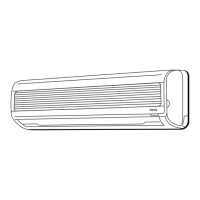
Identifies the main components of the RWM series indoor units.
Shows the internal layout of the control box and its components.
Illustrates the refrigerant flow and key components in the cooling circuit.
Guidelines for choosing a suitable and safe installation location for the indoor unit.
Instructions for safely unpacking and moving the indoor unit.
Procedures to verify unit condition and installation readiness.
Step-by-step guide for mounting the wall bracket and the indoor unit.
Instructions for installing the unit's front cover after pipework.
Procedure for installing the drain pan for cooling applications.
Specifies the necessary clearance around the indoor unit for maintenance.
Provides essential guidelines and precautions before laying refrigerant and water pipes.
Instructions on how to properly hang refrigerant and water pipes to avoid noise and damage.
Details on routing and connecting refrigerant pipes, including size specifications.
Provides dimensions for conical pipes used in the system.
Specifies the thickness of copper pipes used for refrigerant lines.
Details conical nut sizes, tightening torque, and safe soldering practices.
Information on correct refrigerant quantity and safe handling practices.
Guidelines for installing and connecting water pipes, including flow resistance.
Specifies pipe positions, connection sizes, and installation of shut-off valves.
Instructions for connecting the drain pipe to the main drainage system.
Steps for filling the water circuit and recommended pressure levels.
How to measure pressure loss in the circuit using connection ports.
Using pump curves to select the correct pump speed for the circuit.
Procedure to adjust water flow rate by partially closing shut-off valves.
Ensuring electrical components meet standards and norms.
Following EMC directive for system impedance and voltage stability.
Specifies the minimum required cable diameter for power and communication.
Guidance on selecting and connecting circuit breakers and residual current devices.
Detailed instructions for connecting cables to the indoor unit's terminal blocks.
Details the connections for the main power supply (TB1).
Details the connections for communication and various control signals (TB2).
Specific connection points for the main power supply to TB1.
Instructions for connecting indoor/outdoor communication cables to TB2.
Guidance on configuring room thermostats with the system.
Details for connecting the swimming pool pump signal to TB2.
Connection for tariff input signal to TB2.
Connecting solar pump signal or thermostat for second circuit to TB2.
Connection details for the hot water valve to TB2.
Connection details for the swimming pool valve to TB2.
Connection for the mixing valve controlling the second circuit's temperature.
Connection for an additional water pump (WP3) in hydraulic systems.
Connection for the secondary water pump (WP2) for the second circuit.
Connection for the boiler output signal.
Connection for electric heater activation for hot water tanks.
Connection for solar output signal to TB2.
Details connections for various thermistors used for temperature sensing.
Illustrates the location of DIP switches and rotary switches on the PCB.
Explains the purpose and function of each DIP and rotary switch.
Configuration settings for optional functions like 3-phase heater and defrost.
Settings for optional functions like heater disable and cooling mode.
Settings for ambient sensor selection and configuration.
Notes on DIP switches that are not used for specific configurations.
Settings for the refrigerant system, likely related to model or capacity.
Configuration of the address for indoor units in the system.
Explains the meaning of each LED indicator on the unit.
Describes the status codes and information shown on the 7-segment display.
Explains how to activate and use the test display mode.
Important steps and warnings to follow before the initial operation of the system.
Identifies the location of controls like manometer, LCD, and Run/Stop buttons.
Describes how error codes and fault conditions are displayed on the unit.
Essential checks for unit condition, electrical safety, and hydraulic circuit integrity.
Checking wiring, grounding, voltage, and component compliance.
Ensuring the water circuit is flushed, filled, leak-free, and correctly pressurized.
Checking for refrigerant leaks and ensuring correct pipe sizes and fill levels.
Procedure for commissioning the unit in cold ambient conditions, including frost protection.
Step-by-step guide to conducting a test run for the indoor unit's operation.
Overview of the LCD control unit's hardware and its capabilities.
Explains the function of each button on the LCD control panel.
Describes the information displayed on the main 'Overall Overview' screen.
How to set and view the current time and date.
How alarm conditions and codes are displayed.
Managing heating/cooling circuits, including temperature settings and status.
Settings for controlling hot water temperature and heater operation.
Settings for controlling swimming pool temperature and operation.
How to select the operating mode (heating or cooling).
Information regarding the operation of the hot water heater.
How to access and navigate the configuration menus.
Indicates when a timer is active and its settings.
Various status indicators for system components and modes.
Indicates whether central or local control is active.
Symbols indicating the status of heating/cooling circuits and TWE/SWB.
Symbols for temperature settings, lock status, and operating modes.
Symbols for pump, heater stages, hot water, installer mode, pool, solar, compressor.
Symbols indicating active alarms and boiler system status.
Symbols for tariff control, timer operation, and defrost function.
Symbols indicating test run activation and summer shut-off status.
Symbols for accessing menus and indicating central control mode.
Overview of how to access user and installer modes for configuration.
Details on accessing and navigating the user configuration menu.
Procedure for accessing the installer mode with password.
Installer settings for device parameters, system operation, and status.
Installer settings for general parameters like room thermostat options.
Installer settings for system configuration, user rights, and operating modes.
Installer settings for heating parameters, including water calculation.
Installer settings for cooling parameters, including water calculation.
Installer settings for the TWE function.
Installer settings for the swimming pool function.
Installer settings for timer activation and program configuration.
Installer settings for auxiliary heating sources like boilers and electric heaters.
Explains how to navigate through the device configuration menu.
Explains how to navigate through the controller configuration menu.
Instructions on how to exit menus and return to the main screen.
Lists the parameters available for viewing on the operation display.
Details operational modes like heating, cooling, TWE, SWB, and alarm status.
Parameters related to device status, such as expansion valve openings and compressor current.
Lists all temperature sensors and their readings (water, air, gas, liquid).
Parameters for setting target temperatures for water, room, and swimming pool.
Parameters related to logging and viewing alarm history.
Settings for general parameters like room thermostat options and central control.
Detailed settings for room thermostats, including heating/cooling preferences and compensation.
Configuration for central control and setting addresses for cooling circuits.
Setting the address for indoor units to ensure proper communication.
Detailed variables for room thermostat configuration, like connection circuits and compensation factors.
Procedure for linking the room thermostat with the wireless receiver.
Assigning connection circuits for the second loop of the system.
Step-by-step summary for pairing thermostats and circuits.
Defines operation types (Local, Air, Water, Full) for central control.
Overview of available system configuration settings.
Settings to define user permissions for functions like water calculation and anti-legionella.
Configuration options for heating, including water calculation types and temperatures.
Setting water calculation temperatures for heating circuits C1 and C2.
Configures heating temperature based on four defined points.
Sets heating temperature based on a configurable slope and ambient temperature.
Sets the circuit temperature to a fixed defined value.
Disables the calculation mode for a specific circuit.
Defines the maximum and minimum flow temperatures for heating circuits.
Configuration options for cooling mode.
Setting water calculation temperatures for cooling circuits C1 and C2.
Configures cooling temperature based on four defined points.
Sets cooling circuit temperature to a fixed defined value.
Disables the calculation mode for a cooling circuit.
Defines the maximum and minimum flow temperatures for cooling circuits.
Parameters for TWE status, mode, setpoints, and time delays.
Variables related to the hot water tank, including status and temperature setpoints.
Configuration for water disinfection function, including status, schedule, and temperature.
Settings for swimming pool operation, including status and temperature control.
Explains the timer unit's capability to create up to 14 configurations.
Enables or disables the device timer function.
Allows setting up daily timer programs for different configurations.
Resets all timer configurations to their default deactivated state.
Options for selecting the heating source: electric heater, boiler, or solar.
Settings related to the electric heater, including bivalent point and offsets.
Configuration parameters for the boiler, such as bivalent point and time settings.
Settings for the solar collector configuration.
Settings for controlling the mixing valve of the second heating circuit.
Settings for water pump operation, including minimum on/off times and stop conditions.
Configuration options for functions like summer shut-off and tariff control.
Settings to automatically shut off the system during summer based on temperature.
Configuration for the anti-seize function for pumps and valves.
Settings for the tariff function, controlling operation based on electricity tariffs.
Displays the status of the hydraulic separator.
Procedure for performing a test run of the system.
Instructions for the screed drying function to cure new floor heating screed.
Screens displayed during the screed drying process, including remaining time.
Procedure to reset the device settings to factory defaults.
Setting the system's time, date, and time format.
Choosing the display language from a list of available options.
Adjusting LCD backlight settings to reduce energy consumption.
Adjusting the contrast of the LCD screen for better visibility.
Displaying information about the controller's PCB and firmware versions.
Details on how to select the display language.
Details on how the LCD power saving function works.
Details on how to adjust screen contrast.
Details about the controller's firmware versions.
Summarizes safety features and control settings for YUTAKI-S units.
Steps to take when the unit is not operating at all.
Information required when contacting support for ongoing issues.
How to interpret and display alarm codes from the remote control.
| Cooling Capacity | 2.5 kW |
|---|---|
| Power Supply | 220-240V, 50Hz |
| Refrigerant | R410A |
| Indoor Unit Weight | 9 kg |
| Type | Split |