31
IOM ACHA-ACHBA_201a1201_208000_180901_EN
ACHA / ACHBA
PACKAGED COMPACT
HORIZONTAL AIR - AIR
OPERATION
pGD1 o Mini PGD THERMOSTAT
Local Network
It is possible to have only one terminal to act over different machines connected forming a LOCAL NETWORK (LAN).
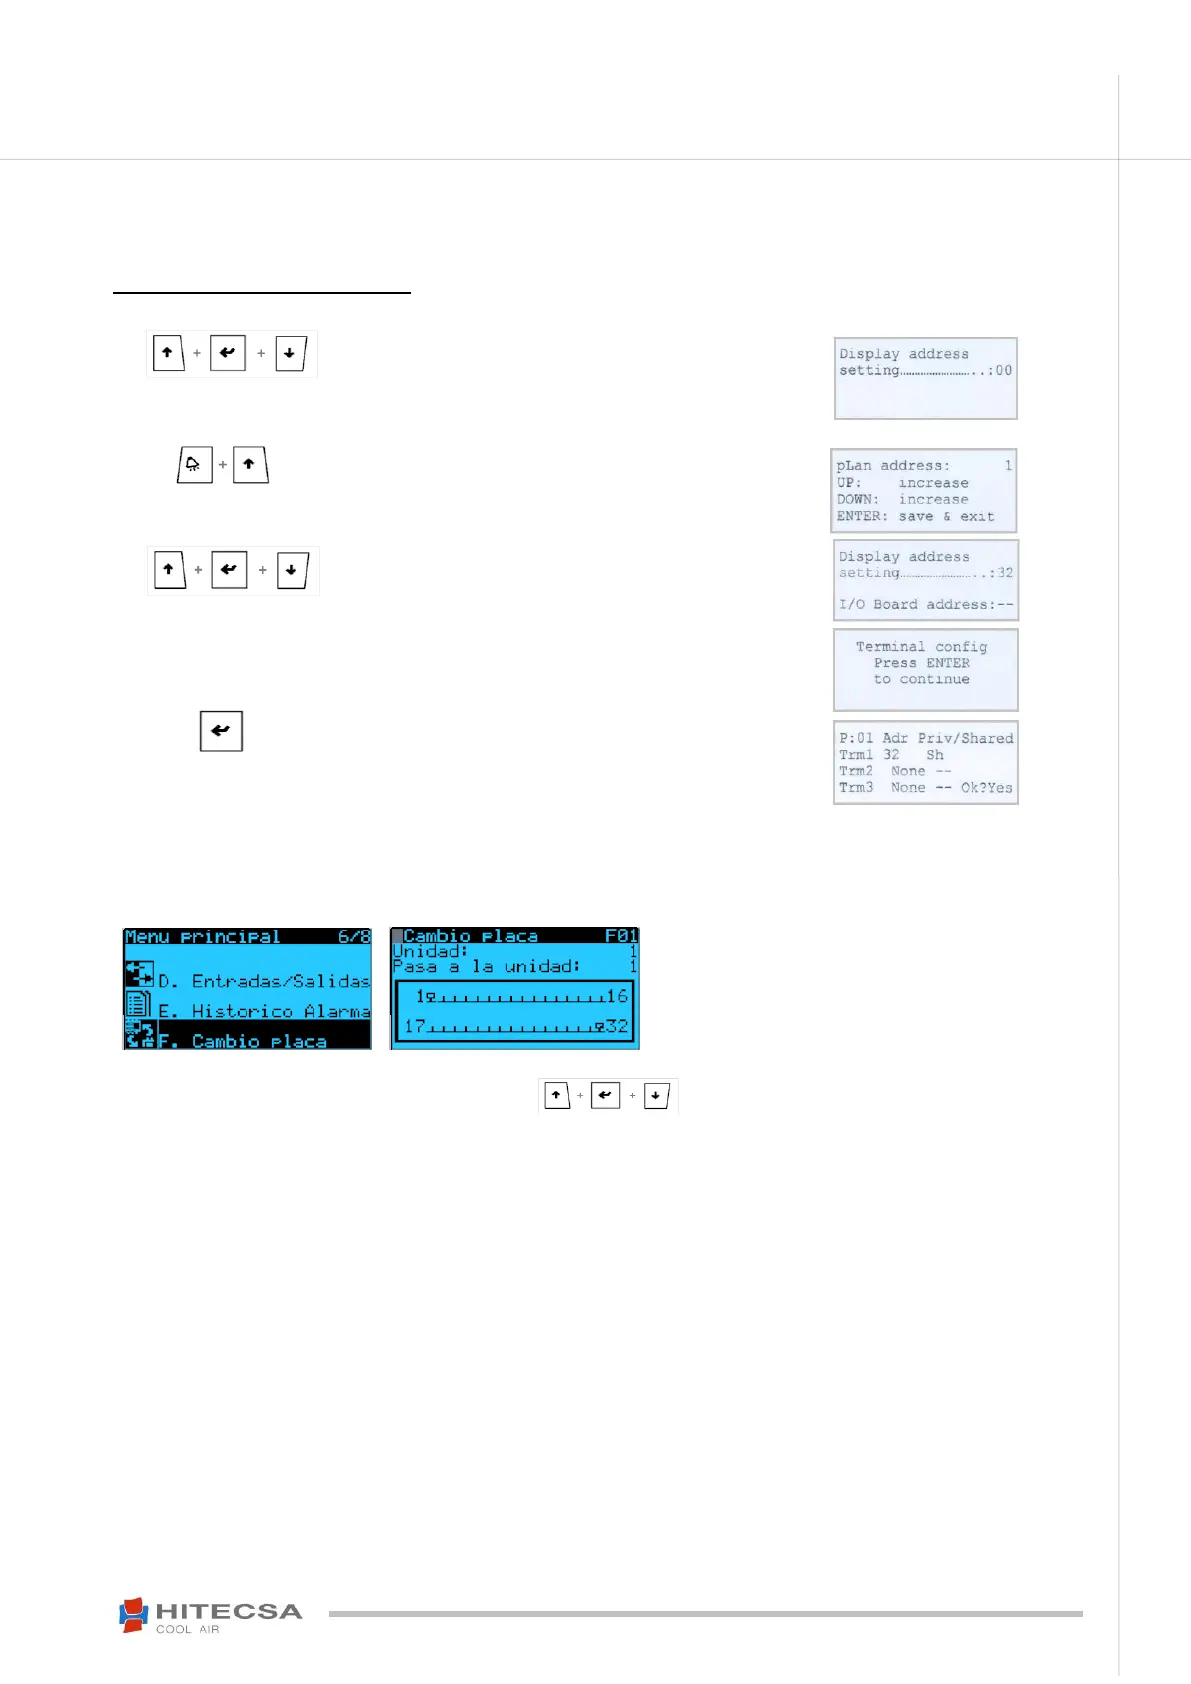
Addressing of the units in the NETWORK:
Connect the pGD terminal to the board that you want to address,
disconnected from any network, pLan, Modbus, etc.
Press the three keys until the screen of the next image (right) is
displayed, change the value Display address setting from 32 to 00.
Remove the voltage of the board
Press the two keys (alarm + UP) and give voltage to the plate.
The next image will be displayed.
pLan address: change its value from 0 to the desired address value
(1,…).
Press the three keys until the next image (right) is displayed again,
put again the value of Display address setting to "32". Press Enter
to confirm.
Put I/O Board adress the desired value that you introduced in pLan
address press “Enter” to confirm.
The next image (right) will be displayed and press “ENTER” again.
After pressing ENTER, configure the next screen just like it shows::
Indicate that your terminal (Trm1) has the address 32 and it is
sheared (Sh) type not private. Place in OK? Yes and confirm.
Access to the Units on the Network
HITSAA01 version:
In main menu select: Select “board change”, on the screen that appears tells you the unit in which you are “unit:” and the unit you want to
go “Go to unit:” modify this value and confirm it with Enter.
HIT005 version:
To accede to every unit press at the same time three keys to change through the different units present in
LAN Network.