– 14 –
AGITATOR
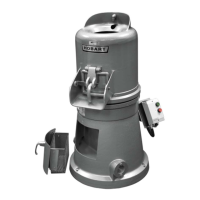
To install an agitator, the bowl must be on the bowl support and fully lowered.
To Install
1. Open the wire cage. Refer to the Wire Cage sec-
tion as needed.
2. Place the agitator inside the bowl and align the
horizontal slot on the agitator with the agitator
shaft pins.
3. Hold the agitator and pull the plunger pin of the
agitator out (Fig. 10).
4. Slide the agitator up the agitator shaft until it
stops and latches.
To Remove
1. Open the wire cage. Refer to the Wire Cage sec-
tion as needed.
2. Lower the bowl by pressing and holding the down
arrow on the bowl switch (Fig. 6, Fig. 7, and Fig. 8)
3. Hold the agitator and pull the plunger of the agitator out (Fig. 10). Slide the agitator down o the
agitator shaft.
POWER BOWL LIFT
Before lowering the bowl onto a bowl truck,
always unlock bowl and swing bowl out slightly (Fig. 11).
To raise the bowl, the bowl must be in the locked position.
Push and hold the up arrow on the bowl switch.
To lower the bowl, push and hold the down arrow on the
bowl switch.
To Raise the Bowl While Mixing
To raise the bowl while the agitator is mixing the product
(when required by recipe or when using the bowl scraper
attachment):
1. Close the wire cage, then select a mixing speed
on the SPEED dial.
2. Select a count-down time or HOLD for continu-
ous count-up mixing. Refer to the Timer Operation
section as needed.
3. While pressing and holding the up arrow on the bowl switch, press and hold the START button.
The mixer runs only in stir speed while the bowl is rising.
4. When the bowl reaches the mix position, release the START button. The mixer automatically
changes to the selected mixing speed.
Mixing speed and time can be adjusted any time during the mixing operation without
stopping the mixer.
Fig. 10
Fig. 11
 Loading...