9
OPERATING INSTRUCTIONS (BEFORE YOU CUT)
b.
a.
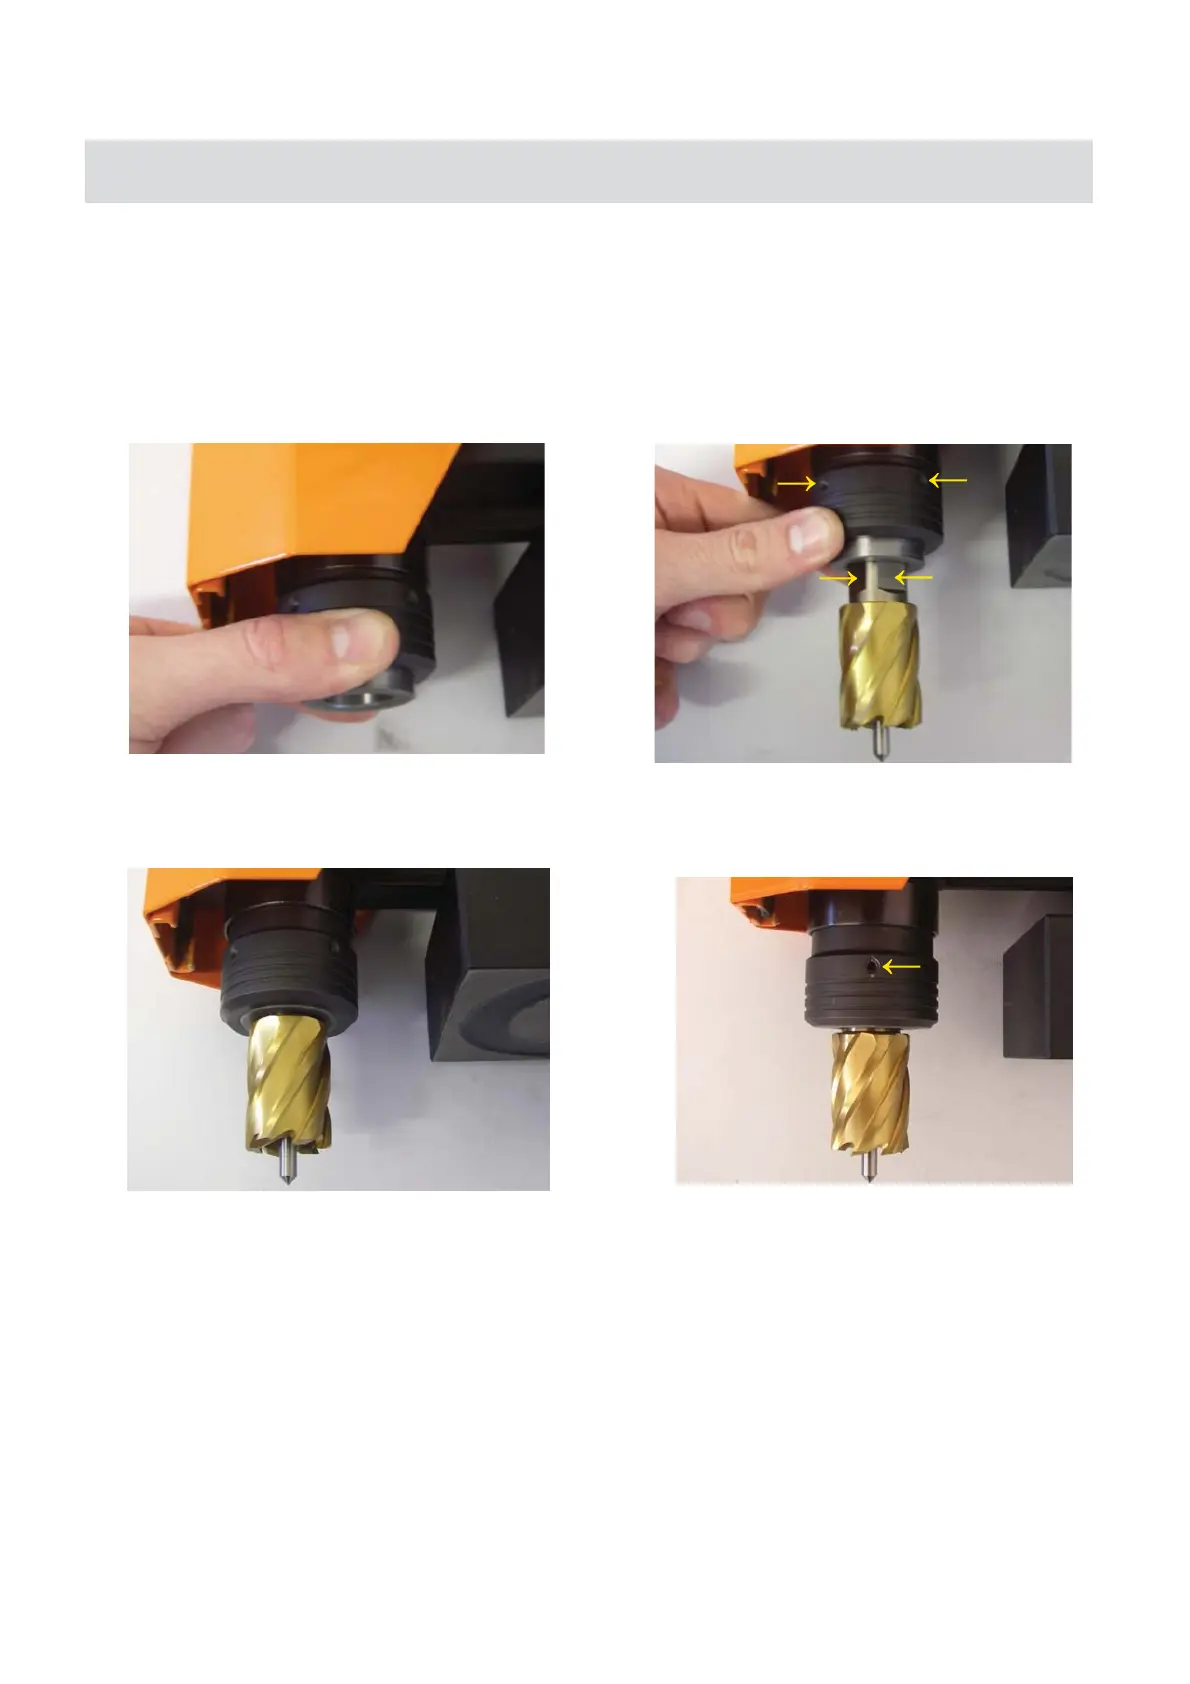
The Holemaker pro 40 uses a quick release arbor
system which accepts standard Holemaker Cutters
by locking onto one flat section of the cutter.
Alternate brand cutters may not be suitable.
e.
.d The annular cutter is now secured into the arbor
and ready for use. To remove the cutter from the
arbor, repeat this action in reverse.
c. Align the two flat sections of the cutter shank with
the two indents that are on the arbor collar. While
keeping the collar pushed upwards, slide the cutter
into the arbor,
DO NOT LOOSEN GRUB SCREW ON ARBOR COLLAR
NOTE: Ensure all setup steps are completed
(including the next page) prior to drilling.
4. USING QUICK GRIB ARBOR SYSTEM
Place the Pilot Pin into the cutter as seen below.
b.
e.
d.
c.
5. Fill coolant reservoir with Holemaker Water Soluble Cutting Fluid
MACHINE OPERATION (BEFORE YOU CUT)
(The Holemaker PRO 40 is also available with either a standard grub screw, or a quick grip arbor system)