17
OTHER FEATURES
Rain Sensor
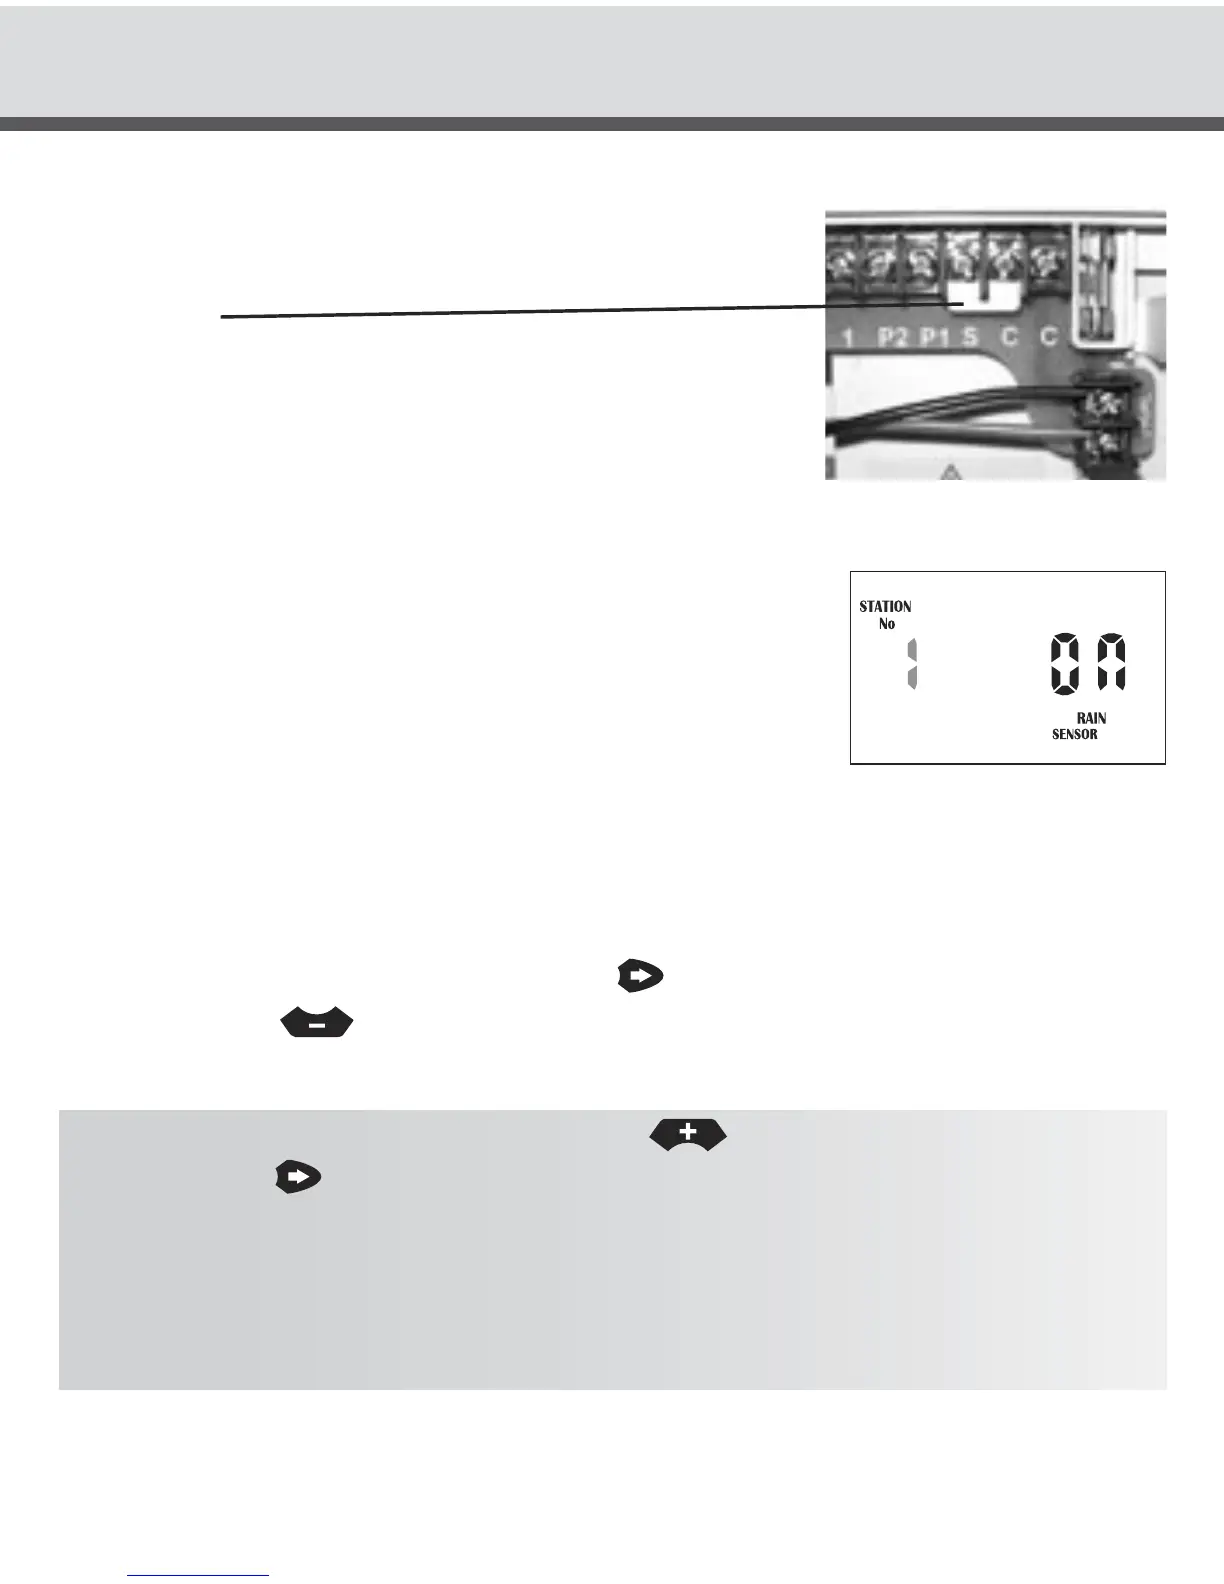
When installing a rain sensor, first remove the the factory
fitted link between the “C” and “S” terminals shown here
by the wire.
Replace with the two wires from the rain sensor into these
terminals, polarity NOT required. Move the rain sensor
switch on the fascia to “ON”.
Turn the dial to “Set Auxiliaries” to enable individual
stations to be set rain sensor “ON” or “OFF”.
The display will show:
If the station is turned “ON” this means that the sensor
will control it, should it rain. The default mode is for all stations to be rain sensor “ON”.
Should you have a station (valve) that always needs to be watered, e.g. an enclosed
green house or plants that are under cover, then the rain sensor can be turned “OFF”
for these particular stations. This way when the sensor is wet they will still water.
To select a station to turn “OFF”. Press the
button, the word “ON” will now be
flashing, use the
button to change to “OFF”.
TIP: To turn the station back “ON” press the
button. To advance to the next
station use the
button and the station number will increment. Do this operation
for all stations (valves) on the controller that need to be altered.
HINT: To disable the rain sensor and allow all stations to water regardless of the
setting, move the slide switch marked Rain/Sensor to the “OFF” position.
The reactivate it slide the switch to the “ON” position.