29
ADJUSTMENTS
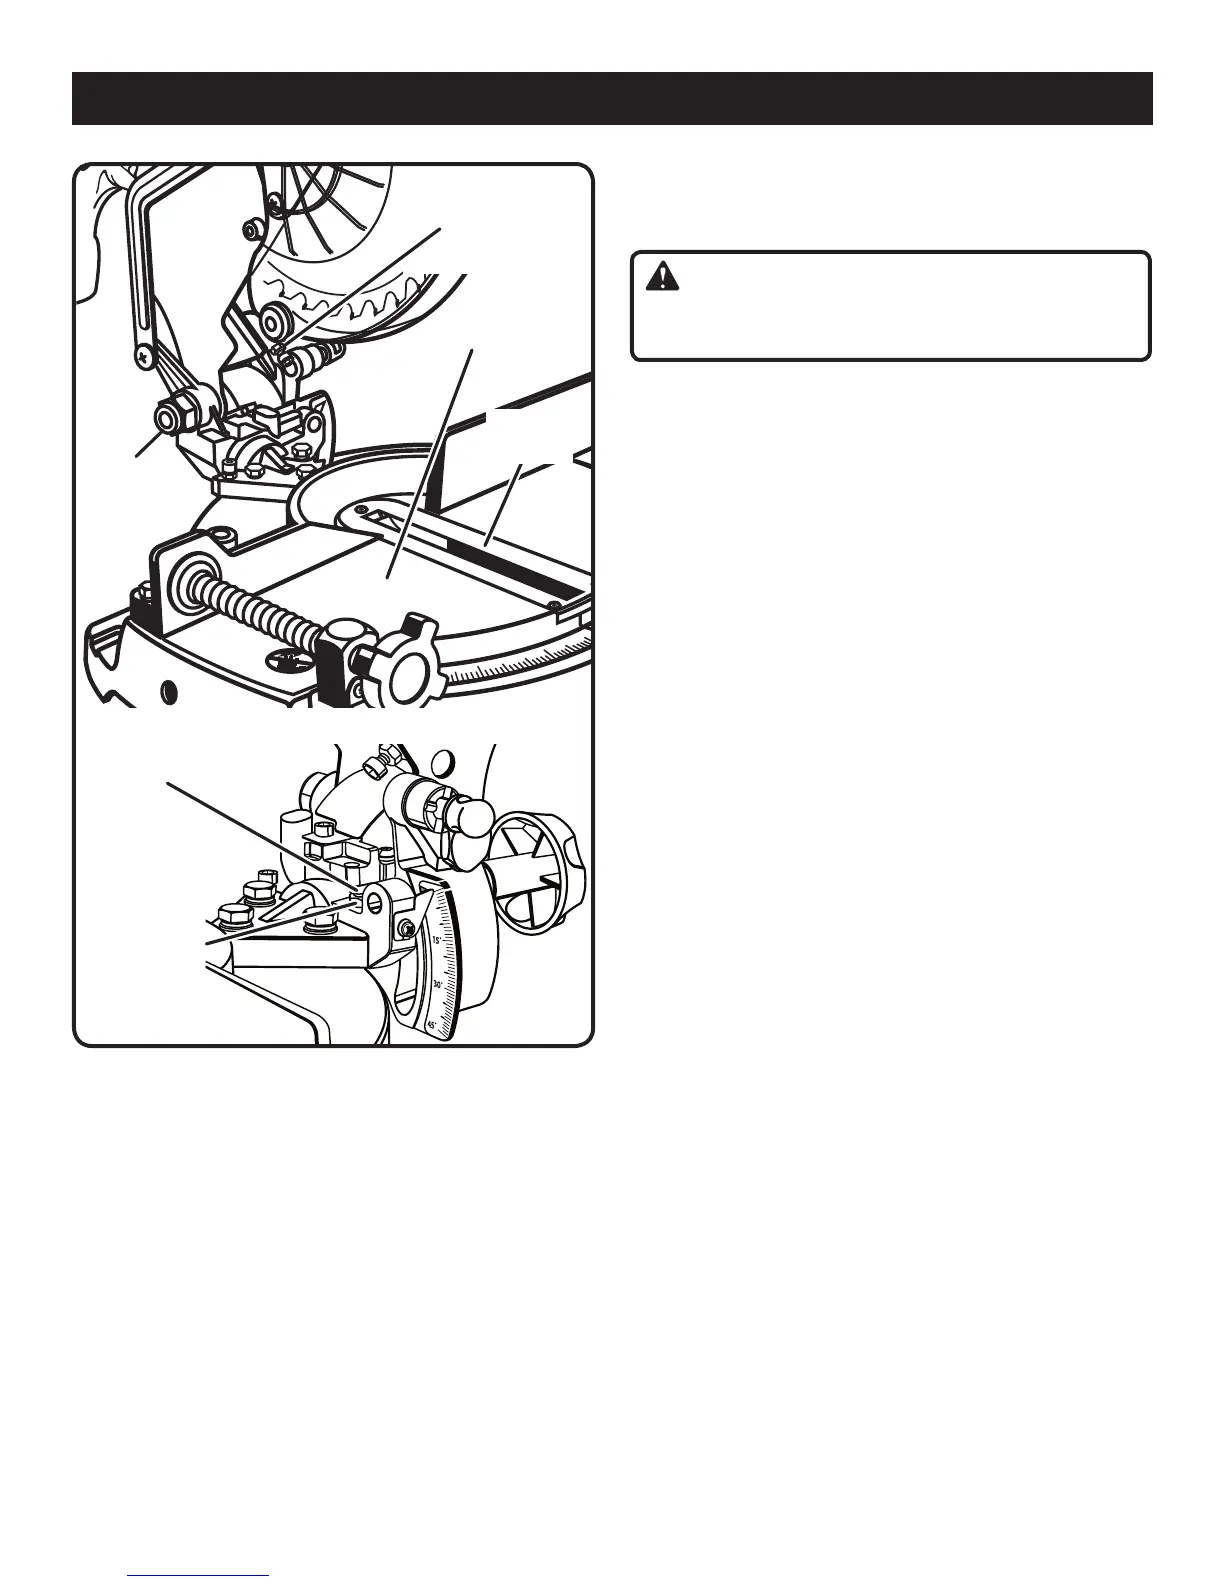
Fig. 35
DEPTH STOP ADJUSTMENTS
See Figure 35.
Unplug your saw.
WARNING:
Failure to unplug your saw could result in accidental start-
ing causing possible serious personal injury.
To adjust the depth stop use a 10 mm wrench or adjustable
wrench and loosen the hex nut at the rear of the miter
saw arm.
Use a 5 mm hex key wrench to adjust the depth stop
adjustment
screw. The saw blade is lowered by turning
the screw counter-clockwise and raised by turning the
screw clockwise.
Lower the blade into the miter table. Check blade clearance
a
nd maximum cutting distance (distance from fence where
blade enters) to front of miter table slot.
Readjust if necessary.
Tighten the hex nut with a 10 mm wrench or adjustable
wr
ench.
To prevent the depth stop adjustment screw from turning
while
tightening the hex nut, carefully hold it with the hex
key wrench while tightening the hex nut.
POSITIVE STOP
ADJUSTMENT
SCREW FOR 0
°
ANGLES
LOCK NUT(S)
MITER
T
ABLE
BEVEL
LOCK KNOB
DEPTH STOP
ADJUSTMENT
SCREW AND
HEX NUT
THROAT
PLATE
 Loading...