15
ASSEMBLY
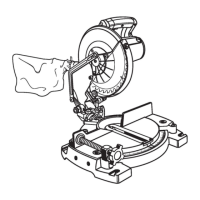
Fig. 9
BASE
WORK
CLAMP
WORK CLAMP
See Figure 9.
WARNING:
In some operations, the work clamp assembly may
interfere with the operation of the blade guard assembly.
Always make sure there is no interference with the blade
guard prior to beginning any cutting operation to reduce
the risk of serious personal injury.
The work clamp provides greater control by clamping the
workpiece to the fence or the saw table. It also prevents the
workpiece from creeping toward the saw blade. This is very
helpful when cutting compound miters.
Depending
on the cutting operation and the size of the
workpiece, it may be necessary to use a C-clamp instead
of the work clamp to secure the workpiece prior to making
the cut.
T
o install the work clamp:
Place
the shaft of the work clamp in either hole on the
saw table base.
Rotate the knob on the work clamp to move it in or out
as needed.
WARNING:
When using any clamp with the stop block, install the
clamp on the same side as the stop block. This will elimi-
nate the possibility of trapping the workpiece, resulting in
the saw blade and workpiece kicking up. Failure to heed
this warning can result in serious personal injury.
TO INSTALL / REPLACE BLADE
See Figures 10 - 11.
WARNING:
A 10 in. blade is the maximum blade capacity of your saw.
Never use a blade that is too thick to allow outer blade
washer to engage with the flats on the spindle. Larger
blades will come in contact with the blade guards, while
thicker blades will prevent the blade screw from secur-
ing
the blade on the spindle. Either of these situations
could result in a serious accident and can cause serious
personal injury.
WARNING
:
Failure to unplug your saw could result in accidental start-
ing causing possible serious personal injury.
Unplug the saw.
Raise saw arm.
Rotate lower blade guard up and remove screws A and
B.
Rotate the blade bolt cover up and back to expose
the blade bolt.
LOWER
BLADE GUARD
Fig. 10
PHILLIPS
SCREW B
FLA
T(S)
ON SPINDLE
SA
W
BLADE
OUTER
BLADE
W
ASHER
BLADE
BOLT
LOOSEN
TIGHTEN
LOCK PIN
INNER BLADE
WASHER
PHILLIPS
SCREW A
BLADE
BOLT
COVER
FLAT
WASHER

 Loading...