2-23
HRX217HYA • HRX217HZA SERVICE INFORMATION
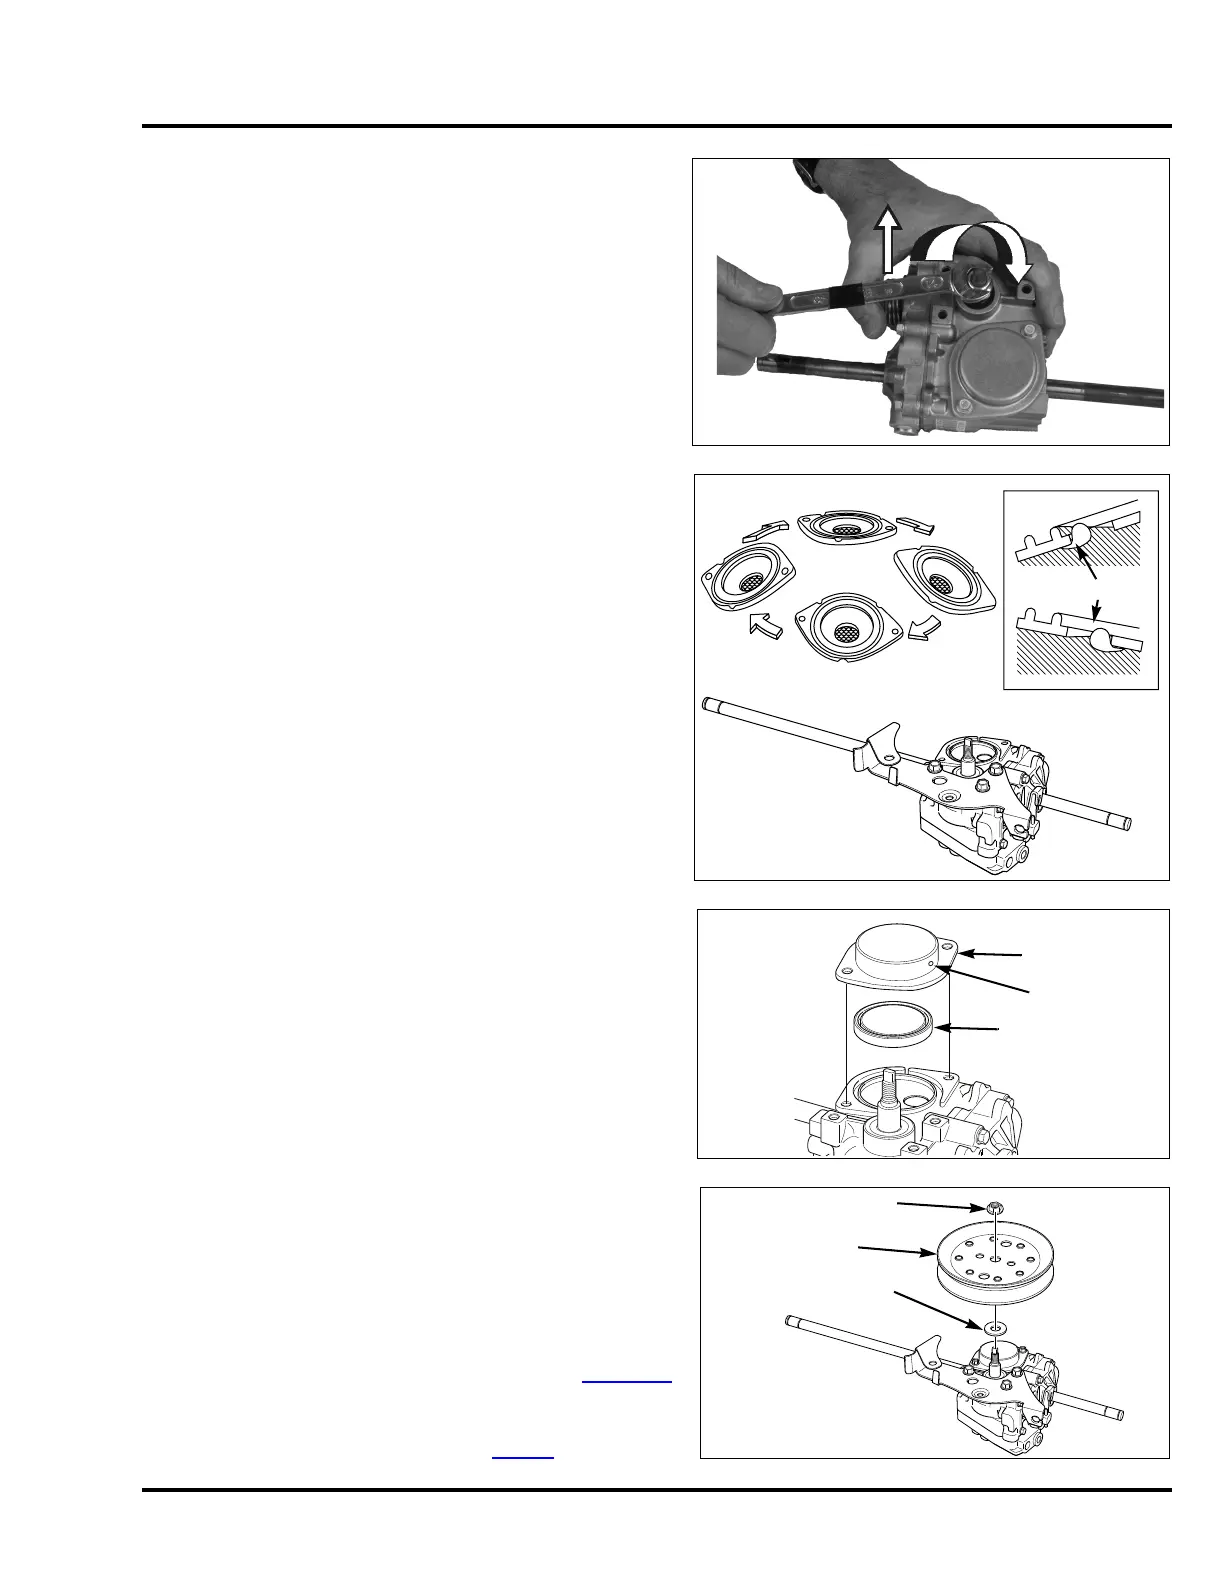
11. Engage the control arm and rotate the input shaft
clockwise until the axle begins to rotate (3 ~ 5 turns).
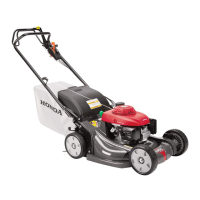
12. Remove the cap and diaphragm.
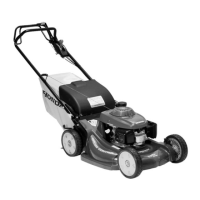
13. Bleed any air from the case by slowly rotating and tilting
the transmission as shown. Continue until bubbles stop
escaping from the fill hole. Add Honda Hydrostatic Fluid
to the upper level.
Complete bleeding is critical to obtain the correct
fluid level.
Be sure the HST level is filled to the upper limit. If the
fluid level is even slightly low, a growling noise and/or
slow ground speed can occur. Be sure to fill to the upper
limit.
14. Reinstall the diaphragm and cap so the vent hole is
positioned as shown.
15. Rotate the input shaft again while repeatedly engaging
and releasing the control arm. Confirm that the axle
rotates when the control arm is engaged and stops when
the control arm is released.
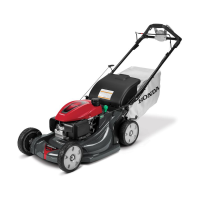
16. Install the driven pulley. Be sure to install the washer
first as shown. Install and tighten the pulley nut to the
specified torque.
TORQUE: 26 ~ 29 N•m (19 ~ 22 ft•lb)
17. Reconnect the change cable to the change arm.
18. Install the transmission in the lawn mower and proceed to
“DRIVE CLUTCH CABLE ADJUSTMENT AND GROUND
SPEED MEASUREMENT PROCEDURE” on page 2-24
.
Be sure to inspect, clean, and coat the rear adjuster
bushings with extreme pressure wheel bearing grease
when reinstalling the transmission (P. 2-20
).
10 mm FLANGE NUT
10 x 24 mm WASHER
DRIVEN PULLEY


 To Next Page