Do you have a question about the HoneyGuaridan A40 and is the answer not in the manual?
Explains the function of each button on the control panel for feeding and settings.
Configure daily feeding schedules, specifying meal times and portion volumes up to 48 portions.
This document is a user manual for the A40 Automatic Pet Feeder, providing instructions for its setup, operation, and maintenance. The feeder is designed to automate pet feeding, offering various customizable settings to ensure pets receive their meals consistently.
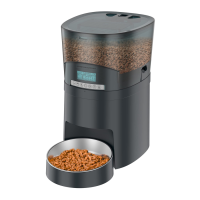
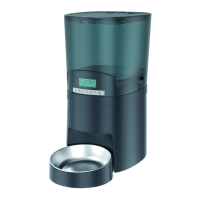
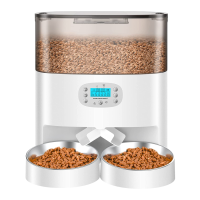
The A40 Automatic Pet Feeder is an indoor household device designed to dispense pet food automatically. It features a hopper for storing dry pet food, a control panel for programming feeding schedules, and a bowl for serving the food. The feeder supports both single and dual bowl configurations, making it suitable for households with one or more pets. It can be powered by a power adapter or batteries, providing flexibility in placement and ensuring continued operation during power outages. The device also includes a recording function, allowing users to record a voice message that plays during feeding times to call their pets.
The feeder's control panel is equipped with several buttons for easy programming and manual operation:
To set the current time, press and hold the Time Setting Button (Clock icon) for three seconds to unlock the screen and enter the time setting mode. The hour and minute display will blink, indicating that they are ready for adjustment. Use the Hours Setting Button (12H) and Minutes Setting Button (60M) to set the desired time. Once set, press and hold the Time Setting Button (Clock icon) for three seconds again to exit the time setting mode. The feeder supports switching between 12-hour and 24-hour clock formats by simultaneously pressing the Hours Setting Button (12H) and Minutes Setting Button (60M).
The feeder allows for setting 0-6 meals per day, with a maximum of 48 portions per meal. To set a meal, press the Meal Switch Button (MEAL) once to enter the feeding plan mode. The meal number, feeding time, and portion volume will blink. Use the Hours Setting Button (12H) and Minutes Setting Button (60M) to set the feeding time, and then use the Meals Portion Volume Button (Bowl icon) to set the desired portion size. This process can be repeated for up to six meals. If fewer than six meals are required, users can simply set the portion volume to zero for the unwanted meals or skip programming them.
To record a voice message, press and hold the Recording Button (Microphone icon) for three seconds. The recording indicator will light up, signaling that recording has started. Users can record for a maximum of 10 seconds. Releasing the button finishes the recording. To play the recorded message, press the Recording Button (Microphone icon) once. To delete the recording, press the Recording Button (Microphone icon) twice until the recording indicator blinks three times.
When the batteries are low, a battery icon will appear on the LCD screen to alert the user. This icon will disappear once new batteries are installed. The feeder uses 4×D size alkaline batteries.
To perform a factory reset, press and hold both the Manual Feeding Button (Hand icon) and the Time Setting Button (Clock icon) for three seconds.
| Product Type | Automatic Pet Feeder |
|---|---|
| Connectivity | Wi-Fi (2.4GHz) |
| Food Type | Dry food |
| Weight | 2.5 kg |
| Power Supply | DC power adapter and battery backup |
| App Compatibility | iOS & Android |
| Dispensing Control | Remote via app or manual button |
| Timer | Up to 6 meals per day |
| Voice Recording | 10-second recording |
| Material | Plastic |
| Waterproof Rating | Not waterproof |