EasyManua.ls Logo

HoneyGuaridan S68 - User Manual

HoneyGuaridan S68
25 pages
Print Icon
To Next Page IconTo Next Page
Loading...
S68
Smart Pet Feeder
User Manual
Question and Answer IconNeed help?

Do you have a question about the HoneyGuaridan S68 and is the answer not in the manual?

Summary

Product Diagram and Contents

Packing List Details

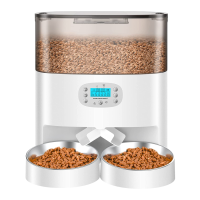
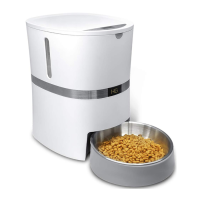
Lists contents for single and dual bowl versions of the feeder.

Important Usage Notice

Provides essential usage instructions and warnings for the feeder.

Dual Power Supply Configuration

WiFi Functionality Note

WiFi requires plug-in power; unavailable when running on battery only.

Single Bowl Assembly Guide

Dual Bowls Assembly Guide

2-Way Splitter Removal Procedure

Pet Food Loading Instructions

Desiccant Bag Installation and Care

Desiccant Bag Replacement Schedule

Recommends replacing the desiccant bag every 15 days to maintain freshness.

Routine Feeder Maintenance

Smart Life App Setup

App Installation Steps

Guide to download and install the "Smart Life" mobile application.

App Account Creation and Network Connection

Granting App Permissions

Wi-Fi Indicator and Factory Reset

Device Discovery and Wi-Fi Pairing

Adding Feeder to the App

Feeder Internet Connection Confirmation

Voice Recording Functionality

Feeding Modes

Manual Feeding Operation

How to manually dispense food via the app or feeder buttons.

Creating Custom Feeding Schedules

Managing Feeding Plans and Viewing History

Basic Settings Adjustments

Advanced Device Settings and Management

FQA: Power, Food Dispensing, and Battery

FQA: Voice Recordings, Schedules, and Connectivity

Overview

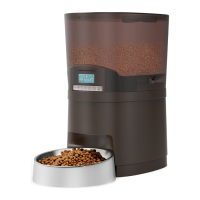
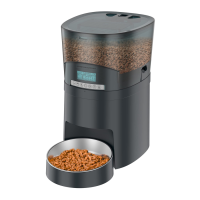
This document is a user manual for the S68 Smart Pet Feeder, an automatic pet feeder designed to provide a scientific and reasonable feeding solution for pets, promoting a healthy lifestyle and a harmonious relationship between pets and their owners.

Function Description

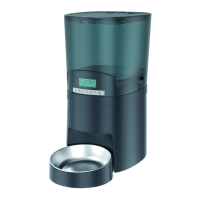
The S68 Smart Pet Feeder is an automatic feeding device that dispenses pet food according to a scheduled plan. It offers both single and dual bowl versions, catering to different pet owner needs. The feeder can be controlled manually or through a smartphone application (Smart Life APP) via Wi-Fi connectivity. It supports voice recording for calling pets to eat and features a slow feed function. The device is designed for indoor household use.

Important Technical Specifications

  • Power Supply:
    • Dual Power Supply: The feeder can be powered by a power adapter (plug-in power) and/or 4 D-size alkaline batteries (backup battery, not included).
    • Battery Life: If powered by battery only, the device can work for 3 months.
    • Wi-Fi Functionality: The Wi-Fi function only works when the device is powered by the plug-in adapter. For energy saving, Wi-Fi is unconnectable and app operations are unavailable if powered by batteries only.
  • Food Compatibility:
    • Recommended Food Size: 0.2-1.2 cm (0.07-0.47 inch) diameter kibble. Food smaller than 1.2 cm is recommended to prevent the feeder from getting stuck.
    • Portion Size: Each portion size is approximately 5-6g (16ml) of food kibble. For the dual bowls version, one portion dispenses about 2.5g to each bowl.
  • Feeding Plan: Supports a daily 6-meal feeding plan.
  • Voice Recording: Allows for a maximum of 10 seconds of voice recording to call pets.
  • Wi-Fi Network: The feeder only works under a 2.4GHz Wi-Fi network and does not support 5GHz.

Usage Features

  • Dual Power Supply Installation:
    1. Plug the power cord into the feeder.
    2. Install 4 D-size alkaline batteries as a backup. It is recommended to use both the power adapter and batteries simultaneously to ensure continuous operation during power outages.
  • Bowl Installation:
    • Single Bowl Version: Assemble the base of the food bowl with the host.
    • Dual Bowls Version:
      1. Install the two-way splitter into the host, ensuring Buckle A and Buckle B align with their respective holes.
      2. Assemble the two bowl bases with the connector plate.
      3. Place the host in position.
  • Adding Pet Food:
    1. Press the lid open button to open the lid.
    2. Pour pet food into the food container.
  • Desiccant Bag Installation:
    1. Place the desiccant bag into the desiccant box to keep pet food dry and fresh.
  • Software Installation and Setup (Smart Life APP):
    1. Ensure Bluetooth and Wi-Fi are turned on on your phone.
    2. Confirm the feeder is powered by the adapter for Wi-Fi functionality.
    3. Confirm your Wi-Fi network is 2.4GHz.
    4. Install the "Smart Life" APP by scanning the QR code or searching in the app store.
    5. Create an account, agree to the privacy policy, select your country, register with email or mobile number, log in, and grant local area network access.
    6. Agree to Home Data, Notifications, and Bluetooth permissions.
    7. Check if the Wi-Fi indicator flashes quickly (once per second). If not, press the "MEAL" and "CLOCK" buttons simultaneously for 3 seconds to reset the feeder until you hear a "beep" sound and the Wi-Fi indicator flashes quickly.
    8. Refresh the mobile phone interface in the app to auto-search for devices. Click "add devices" when the feeder appears.
    9. Allow APP permissions, select your 2.4GHz Wi-Fi network, and enter the Wi-Fi password.
    10. Wait for the APP to connect to the feeder. Once connected, the Wi-Fi indicator will stop flickering and stay on. The app will then jump to the device name modification page. Enter a new name and click "Finish."
  • Recording Setting:
    1. Press and hold the "RECORDING" button for three seconds to record for a maximum of 10 seconds. The recording indicator will light up during recording.
    2. Release the button to complete the recording.
    3. Press the "PLAY" button to play the recording.
    4. To delete or close the recording function, press the "PLAY" button twice until the recording indicator blinks 3 times.
  • Feeding:
    • Manual Feeding (APP):
      1. Enter the feeder control page in the app.
      2. Click "Manual feeding."
      3. Select the desired portions of food.
      4. Click "OK" to dispense food immediately.
    • Manual Feeding (Feeder Button):
      1. Press and hold the "MANUAL FEEDING" button on the feeder for 3 seconds.
      2. After a "beep" sound, the feeder will dispense 1 portion.
    • Making a Feeding Meal Plan (APP):
      1. Click the "feeding meals plan" button.
      2. Select the desired feeding portions volume and meal time.
      3. Click "Save." The feeder supports a daily 6-meal feeding plan.
    • Disabling a Feeding Meal Plan (APP):
      1. Click the feeding meal plan you wish to disable.
      2. Close the "feeding meals plan" button.
      3. Click "Save."
  • Viewing Feeding Records (APP):
    1. Click the "FEEDING RECORDS" icon in the app.
    2. Pull down to refresh the page to display feeding records.
  • Basic Settings (APP):
    1. Click the "Setting" button to access the Settings page.
    2. Voice Plays Times: Adjust the number of times (0-6) the recording plays before feeding.
    3. Backup Battery Status: Displays the battery status.
    4. Slow Feed: Turn on/off the slow feed function.
    5. 24-Hour: Turn on/off the 24-hour clock display.
  • Advanced Settings (APP):
    1. Click "device Info" to enter the advanced settings page.
    2. Device Information: Displays device ID, IP, MAC, device time zone, and signal strength.
    3. Offline Notification: Turn on this function to receive notifications when the device is offline.
    4. Share Device: Share device control with family members.
    5. Add to Home Screen: Add the feeder to the home screen for quick access.
    6. Remove Device: Reconfigure the feeder by removing it from the app.

Maintenance Features

  • Cleaning:
    • For your pet's health, regularly clean the food container, stainless steel bowl, and bowl holder.
    • The feeder host is not washable; wipe it with a dry cloth.
  • Desiccant Bag Replacement: To prevent mold growth, it is recommended to replace the desiccant bag every 15 days.

Frequently Asked Questions (FQA)

  • LCD Screen Not Lighting Up:
    • Check for poor connection of the power adapter.
    • Try powering with batteries if there's an issue with the adapter.
  • Food Not Coming Out:
    • Verify kibble size (2-12mm diameter).
    • Try the manual feeding button.
    • Clean the feeder, disassemble the food tank, and clean the chute and food outlet.
  • Power Source Requirement: The pet feeder can work with either the power adapter or batteries. Using both simultaneously is recommended to prevent power outages.
  • Low Battery Indicator: Yes, a battery level sign on the LCD screen turns on when batteries are low. It turns off after new batteries are installed.
  • Voice Recording Playback Issue: Press the Recording button to play. If no sound is heard, re-record.
  • Turning Off Voice Recording: Press the Recording Button twice until the recording indicator blinks 3 times to remove the message. This does not affect the meal schedule.
  • Feeding Schedule Reset: Once set, the feeding schedule repeats every day until there is no food in the food tank.
  • Uneven Food Dispense (Two-Way Splitter): The first few portions may vary, but after several feedings, the dispense should become almost even. This is not indicative of a faulty equipment.
  • Wi-Fi Connection with Batteries Only: The phone cannot connect to the pet feeder via Wi-Fi when only using batteries. Wi-Fi functionality requires adapter power to save battery life.

HoneyGuaridan S68 Specifications

General IconGeneral
BrandHoneyGuaridan
ModelS68
CategoryPet Care Product
LanguageEnglish

Related product manuals