Do you have a question about the Honeywell Home T5 and is the answer not in the manual?
Uses smartphone location to know when you're away, saving energy via geofence technology.
Combines geofencing and time scheduling for busy, active lifestyles.
Programs thermostat for one week with customizable daily schedules and periods.
Allows manual control of comfort by adjusting temperature set points only.
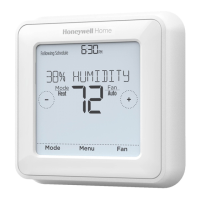
Provides notifications for filter changes, indoor temp warnings, and learns system for optimal temp.
Automatically determines if home needs heating or cooling for maximum comfort.
Can cause electrical shock or equipment damage. Disconnect power before beginning installation.
Compressor protection is bypassed during testing. Avoid cycling the compressor quickly.
Do not place mercury controls in trash. Contact local waste management for proper disposal.
Do not dispose of product with household waste. Check authorized centers for correct disposal.
This thermostat requires a 24 VAC power source with a 'C' wire for operation.
Compatible with most heating, cooling, and heat pump systems; requires 24 VAC 'C' wire.
Does not work with electric baseboard heat (120-240V) or millivolt systems.
Does not support indoor/outdoor sensors, ventilation relays, or older mobile devices.
To protect yourself and equipment, turn off power at the breaker box or switch.
Check if the thermostat turns on within 5 minutes to confirm the system is off.
Gently pull thermostat off wall plate; some may have screws, buttons, or clasps. Do not remove wires.
Check for thick black wires with wire nuts. Line voltage systems are not compatible.
Photograph wiring, including terminal letters, for a helpful reference during installation.
Remove jumpers connecting terminals, which look like staples or colored wires.
Record wire presence and color for terminals R, RH, and Rc, excluding jumpers.
Check and write down wire colors for terminals Y, Y2, G, C, A/L/A, O/B, W2/AUX, E, W, K.
Use a screwdriver to release wires from terminals. Wrap wires around a pencil to prevent falling.
Pull open UWP, insert wires, ensuring at least 1/4-inch is exposed for terminals.
Level wall plate, mark anchors, drill holes, insert anchors, ensure flush with wall.
Set R-switch based on wiring notes. Insert R-wire(s) into R-terminal or Rc-terminal.
Depress terminal tabs to insert wires into UWP. Gently tug wires to verify they are secure.
Mount UWP using provided screws. Install all three screws for a secure fit and close the door.
Align the thermostat onto the UWP and firmly snap it into place.
Turn on the power at the breaker box or switch that controls the heating/cooling system.
Confirm screen shows START SETUP. If not, contact Resideo support.
Touch START SETUP on the thermostat to begin app-guided setup.
On the USE APP screen, touch 'Yes' to proceed with app setup.
Download Resideo app, open it, tap 'SET UP NOW' for your thermostat.
Access menu, set temperature, select fan and system modes, and schedule home comfort.
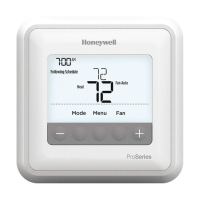
View desired/indoor temperature, adjust settings, select mode, access menu, and control fan.
Touch START SETUP on the thermostat to begin manual configuration.
On the USE APP screen, touch 'No' to proceed with manual setup.
Use navigation buttons to move through options; touch 'Edit' or text area to change values.
Touch navigation buttons until 'Finish Setup' appears, then touch 'Select'.
If Wi-Fi fails, manually set time/date. Select 'No' on SETUP WIFI screen.
Set daylight saving time, date, clock format, and time on subsequent screens.
Refer to page 17 for more information about basic operation.
Choose schedule type: No Schedule, 5-1-1, 5-2, or Each Day different.
Select system type: Conventional Forced Air, Heat Pump, Boiler, or Cool Only.
Select equipment: Gas, Oil, Electric, Fan Coil, Heat Pump (Air/Geothermal), Boiler (Water/Steam).
For Heat Pump, select if O/B should energize in cool or heat.
Select number of Cool or Compressor stages (0, 1, or 2).
Select number of Heat stages (0, 1, 2) or Aux/E stages (0, 1).
Thermostat works directly if Wi-Fi is lost, but geofencing features require Wi-Fi.
Thermostat uses 2.4GHz. Ensure router broadcasts 2.4GHz network for visibility.
Allow for a short delay for changes made in the Resideo app to appear on the thermostat.
Multiple users can geofence. Each user requires a unique account and login credentials.
Invite users via the Resideo app by entering their email address in 'Manage Users'.
Wi-Fi signal strength is determined by the router. Consult router manual for optimization.
Indicates lost Wi-Fi signal. Reconnect via app or troubleshoot router. Thermostat will auto-reconnect.
Strike-through Wi-Fi icon means lost connection. Power cycle router to restore connectivity.
Check spam folder. If not found, click Resend. Contact Support if still not received.
Device complies with FCC Part 15. Operation subject to two conditions regarding interference.
Contains licence-exempt transmitters/receivers. Operation subject to two conditions regarding interference.
Supports Apple HomeKit. Open HomeKit app, follow instructions and enter code displayed on Thermostat.
For warranty information, visit honeywellhome.com.
| Connectivity | Wi-Fi |
|---|---|
| Display | Touchscreen |
| Scheduling | 7-day flexible scheduling |
| Energy Saving | Yes |
| Programmability | Yes |
| Operating Modes | Heat, Cool, Auto, Off |
| Remote Control | Yes, via Honeywell Home App |
| Color | White |
| Compatibility | Works with most HVAC systems including gas, oil, electric, and heat pump systems |
| Type | Programmable |
| Features | Geofencing, Auto Changeover |
| Voice Control | Amazon Alexa, Google Assistant |
| Dimensions | 4.06 x 4.06 x 1.06 inches |
| Power Source | C-Wire (Common Wire) Required |
| Stages | 1 or 2 heating and cooling stages |