3
1. With the safe door open, press and hold the lock release button on the inside edge of the
safe door. (Figure 1)
2. While holding the lock release button, turn the handle to the left to place the bolts in the locked
position. (Figure 2)
3. Enter the preset factory code 1-5-9 followed by the # key. (Figure 3) If the code is entered
correctly, the LED will turn green. (Figure 4)
4. You will have 5 seconds to turn handle to the right, to retract the bolt into the unlock
position. (Figure 5)
5. Press and hold lock release button and turn handle to the left to return the bolt to the locked
position.
6. Leave the door open and proceed to the Programming Your Safe section.
INSTALLING / REPLACING THE BATTERIES
To use the digital keypad, first install the batteries. The battery compartment is located on the interior
side of the safe door. (Figure 1)
TESTING THE DIGITAL LOCK
Once the batteries are installed, test the digital lock using the preset factory code.
IMPORTANT: Replace batteries regularly to avoid losing keypad access to your safe. If the bat-
teries drain completely, you will not be able to access the safe using your passcode. However, you
will still be able to open the safe using the Override Access Keys. To open the safe with the keys,
follow the instructions in the Using the Override Access Keys section. Then, replace the batteries
and reset your passcode.
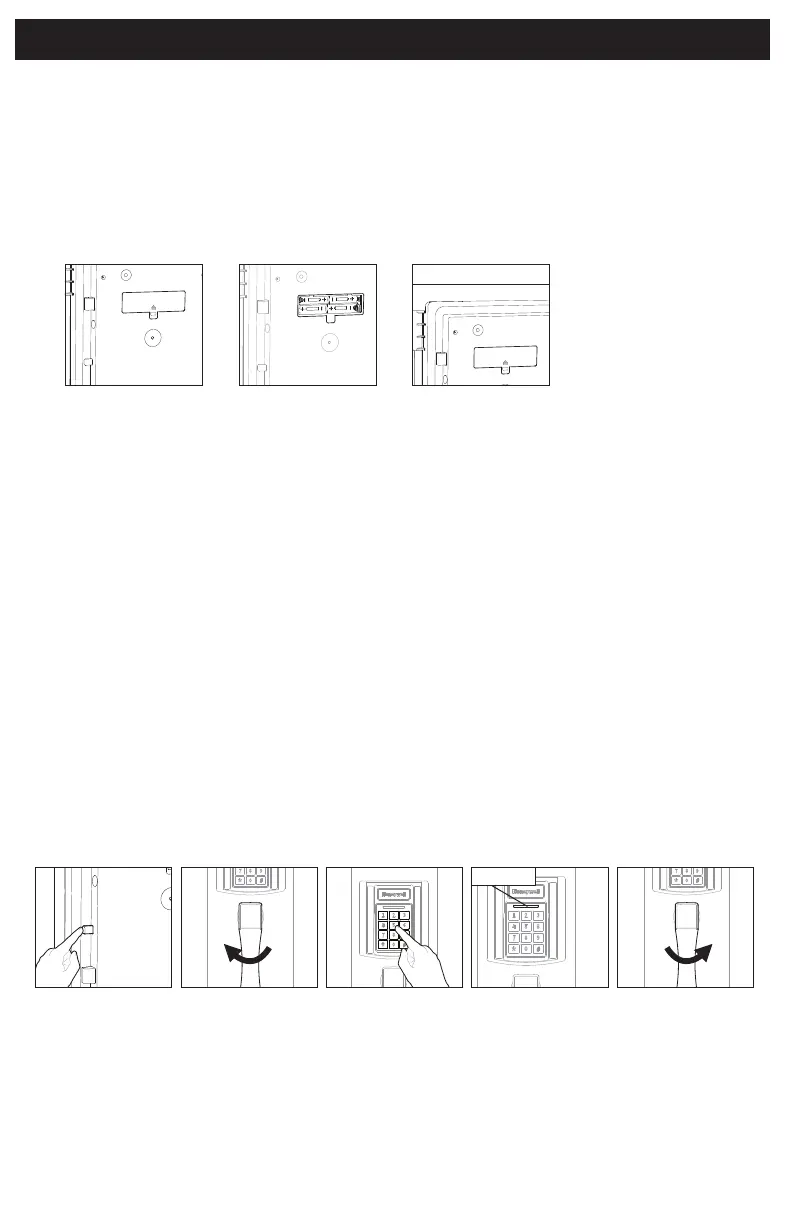
Figure 1
Figure 1 Figure 2 Figure 3 Figure 4 Figure 5
Figure 2 Figure 3
1. Remove the battery compartment cover. (Figure 1)
2. Insert 4 “AA” batteries (not included). Make sure batteries are installed correctly, with
respect to polarity (+ and -). (Figure 2)
3. Replace the battery cover. (Figure 3)
4. Leave the door open and proceed to the Testing the Digital Lock section below.
GETTING STARTED (CONTINUED)
Green LED
 Loading...