Installation and Operations Guide
|
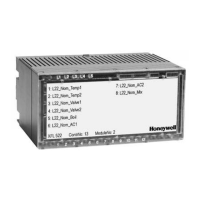
ACM-VLX/VLX/EXP/AXM
68
© Honeywell. All Rights Reserved. LT-VLXEXPAXMIOG Rev. 01
To re s e t VLX power
• Press and hold the Reset button for three seconds, and then release
it.
Clearing DDC and objects
In rare circumstances, DDC and automation setups may become corrupt and you
may be unable to use normal methods from an operator workstation to delete the
objects. This may cause missing DDC and objects or the appearance of erratic,
inexplicable data.
To c le ar VLX DDC and auto mation s e tups
1. Set Switch 4 on DIP Switch Bank SW1 to ON. This DIP switch bank is
located under the VLX’s left flap.
2. Reset the VLX.
All four diagnostic LEDs show steady ON.
3. Within two seconds, while all four diagnostic LEDs show steady ON,
reset the VLX again.
The CPU LED shows steady ON, then flashes, and the SYS and ROC
LEDs show steady ON.
4. Return Switch 4 to the OFF position.
Clearing the ROC file
In addition to clearing DDC, objects and automation setups, this procedure also
clears the real-time operating code (ROC) file from the VLX. After clearing the
ROC, connect an operator workstation to load a new ROC file.
IMPORTANT! After sending a new ROC file to a VLX, you must update the
device capabilities before doing anything else.
In rare circumstances, the ROC may become corrupt and you may be unable to
delete or overwrite the ROC by downloading a ROC file from an operator
workstation. Indications of ROC issues include:
• You are unable to delete or clear objects through normal methods or by
clearing DDC, objects, and automation setups.
• BACnet devices (such as the BACtalk operator workstation) are not
able to recognize the presence of the VLX on the network when all other
network parameters are set correctly and the physical connection is
sound.
To c lear ROC alo ng with all DDC, obje c ts and auto mation s e tups
1. Set Switch 3 on DIP Switch Bank SW1 to ON. This DIP Switch bank is
located under the VLX’s left flap.
2. Reset the VLX.
All four diagnostic LEDs show steady ON.
3. Within two seconds, while all four diagnostic LEDs show steady ON,
reset the VLX again.
4. Return Switch 3 to the OFF position.
 Loading...