Installation Instructions
ACM
© Honeywell Page 1 LT-ACM-II-03 Rev. A
LT-ACM-II-03
WARNING! Install all equipment in accordance with the National
Electric Code and in a manner acceptable to the local authority
having jurisdiction. Read these instructions and the ACM
Installation & Operations Guide (LT-ACMIOG) carefully before
installing equipment. Failure to follow all instructions may result in
equipment damage or a hazardous condition.
ATTENTION! Installez tout le matériel en conformité avec le
Code national de l'électricité et d'une manière acceptable pour
l'autorité localecompétente. Lisez ces instructions et le guide d'
installation et fonctionnement de l'ACM (LT-ACMIOG) avant
l'installation du matériel. Le non respect des instructions peut
entraîner desdes dommages matériels ou une situation
dangereuse.
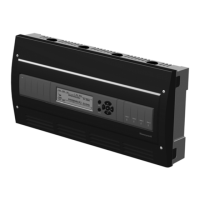
Overview
ACMs are intended for indoor applications. Ensure that the
installation location is dry, away from direct sunlight, and
free from excessive dust, vibration, and electrical
interference. The ambient temperature range is -4 °F
(-20 °C) to 149 °F (65 °C).
Mounting
The ACM mounts on a standard DIN rail in one of two
ways:
vertically, with the connections on the right and left
sides of the unit.
horizontally, with the connections on the top and bot-
tom of the unit.
The controller can also be screw-mounted using the four
key-holes located at each corner, accessible under the
covers. Install the ACM in a UL Listed enclosure only.
WARNING! Be sure the ACM does not have power connected
while mounting.
ATTENTION! Assurez-vous que l'appareil n'est pas connecté à
l'alimentation lors du montage.
• To mount the ACM on a DIN rail [standard EN50022;
1-3/8 in. x 9/32 in. (7.5 mm x 35 mm)]
1 Holding the controller with its top tilted in towards
the DIN rail, hook the two top flex snaps on the
back of the controller onto the top of the DIN rail.
2 Push down and in to latch the two bottom latching
tabs of the controller onto the DIN rail.
• To remove the ACM from the DIN rail
1 Push straight down from the top to release the
bottom tabs.
2 Rotate the bottom of the controller out towards you
and pull the controller up and away from the DIN
rail to release the bottom latching tabs.
• To mount the ACM on the wall
1 Lift the front covers of the ACM, position the unit
against the wall in the desired location, and then
mark the key holes with a pencil.
2 Use screws (not packed) to scurely fasten the ACM
to the wall.
Use care when installing screws to avoid damaging
circuit board components.
Fig. 1 ACM mounting dimensions.
Power
The ACM requires a dedicated 24 VAC, 50/60 Hz @ 40 VA
minimum Class 2 transformer.
WARNING! Do not ground either leg of transformer secondary!
This may damage the ACM. Do not power other devices from the
same transformer. Use a dedicated transformer for the ACM.
ATTENTION! Ne pas raccorder les bornes secondaires du
transformateur à la terre. Cela peut endommager l’ACM. Ne pas
alimenter d'autres appareils a partir du meme transformateur.
Utiliser un transformateur dédié pour l'ACM.
Recommended cable 18 AWG (max. 4 ft.) for power
connections. Mount the transformer inside the enclosure
with the ACM.
7.3 IN (185.2 MM)
8.6 IN (217.9 MM)
1.7 IN (43.1 MM)
DIN RAIL
1.4 IN
(35 MM)
DIN RAIL
1.4 IN
(35 MM)
1.7 IN (43.1 MM)