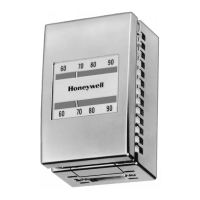
TP970 SERIES CONVERTASTAT
®
KITS
4.
Turn changeover adjustment screw an additional
one-eighth to one-quarter turn clockwise. This
places the changeover in calibration and allows for
normal main air pressure fluctuations.
Calibration Check
Direct-Acting, Bimetal Elements
1.
Turn setpoint adjustment until setpoint indicator
reads 5
°
F (2.8
°
C) below actual space temperature
as measured by a test thermometer and allow
thermostat to build up branch line pressure.
2.
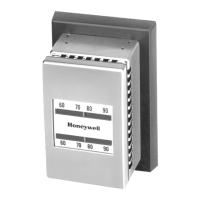
Turn setpoint adjustment (Fig. 8) up slowly.
3.
If thermostat begins to bleed off between 1 and 3
°
F
(0.5 and 1.5
°
C) below space temperature, no
recalibration is necessary.
Reverse-Acting, Bimetal Elements
1.
Turn setpoint adjustment until setpoint indicator
reads 5
°
F (2.8
°
C) above actual space temperature
as measured by a test thermometer and allow
thermostat to build up branch line pressure.
2.
Turn setpoint adjustment down slowly (see Fig. 8).
3.
If thermostat begins to bleed off between 1 and 3
°
F
(0.5 and 1.5
°
C) above space temperature, no
recalibration is necessary.
Recalibration
IMPORTANT
As the thermostat is very sensitive, excessive
handling during calibration will heat the
thermostat and result in improper calibration.
NOTE: References in the following procedures to a 30
psi (210 kPa) gage mean the gage with gage
adapter listed in Equipment Required section.
TP970
1.
Remove cover and install a 30 psi (210 kPa) gage
into gage tap.
2.
Turn setpoint adjustment until setpoint indicator
reads space temperature.
3.
Turn calibration screw (Fig. 5) until gage indicates
0 psi (0 kPa).
4.
Turn calibration screw in opposite direction until
gage indicates 8 ±1 psi (56 ±7 kPa). The
thermostat is now calibrated.
5.
Remove gage and replace cover.
TP971
1.
Remove cover and install a 30 psi (210 kPa) gage
into gage tap.
2.
Turn setpoint adjustment until setpoint indicator
reads indicated temperature.
3.
With 13 psi (90 kPa) day main air pressure, turn
day (left) calibration screw (Fig. 8) until gage
indicates 0 psi (0 kPa).
4.
Turn calibration screw in opposite direction until
gage indicates 8 ±1 psi (56 ±7 kPa).
5.
With 18 psi (126 kPa) night main air pressure,
rotate night setpoint dial until setting agrees with
indicated temperature.
6.
Repeat Steps 3 and 4 using night (right) calibration
screw. The thermostat is now in calibration.
7.
Remove gage and replace cover.
TP972
1.
Remove cover and install a 30 psi (210 kPa) gage
into gage tap.
2.
Turn setpoint adjustment until setpoint indicator
reads indicated temperature.
3.
With 13 psi (90 kPa) main air pressure, turn left
calibration screw (Fig. 8) until gage indicates
0 psi (0 kPa).
4.
Turn calibration screw in opposite direction until
gage indicates 8 ±1 psi (56 ±7 kPa).
5.
With 18 psi (126 kPa) main air pressure, repeat
Steps 3 and 4 using right calibration screw.
NOTE: If thermostat has a second setpoint
dial (Fig. 8), it must be set to indicated
temperature before returning to Steps
3 and 4.
6.
The thermostat is now in calibration.
7.
Remove gage and replace cover.
Home and Building Control Home and Building Control
Honeywell Inc. Honeywell Limited-Honeywell Limitée
Honeywell Plaza 155 Gordon Baker Road
P.O. Box 524 North York, Ontario
Minneapolis, MN 55408-0524 M2H 3N7
Printed in U.S.A. on recycled
85-0210EF—1 B.B. Rev. 4-00
paper containing at least 10%
www.honeywell.com
post-consumer paper fibers.
 Loading...