6
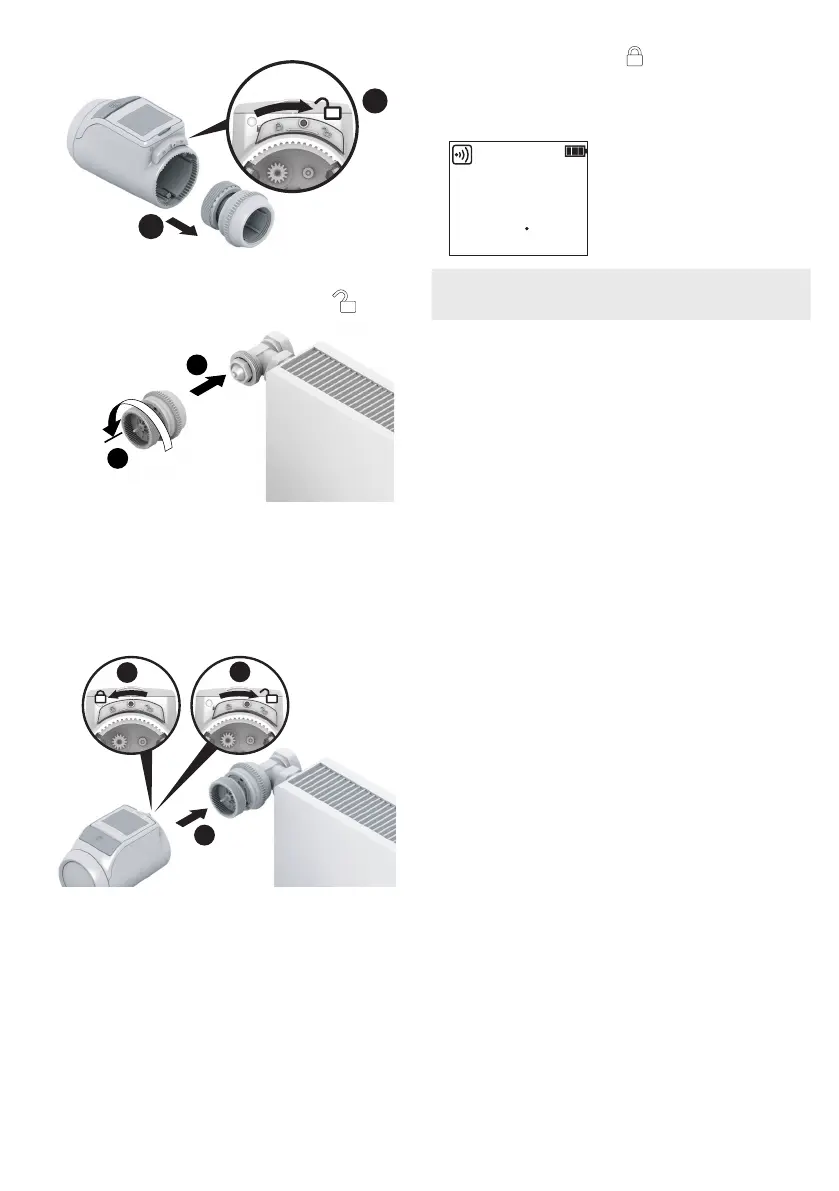
Mounting the valve baseplate
1a
1b
1. Separate the valve baseplate from the radiator
controller. To do so, push the slide towards .
3.
2.
2. Turn the adjustment dial of the valve baseplate
counter-clockwise until it stops.
3. Put the valve baseplate onto the radiator valve or the
adapter and tighten by hand (without tools!).
Mounting the radiator controller
2.
3.
1.
1. Ensure that the slide on the radiator controller is in the
open position.
2. Put the radiator controller onto the valve baseplate
so that the indentation latches in and is no longer
visible.
3. Lock the radiator controller in the end position. To do
so, push the slide towards .
After approx. 1 minute
cycl
(self-test) is displayed.
Afterwards the radiator controller changes to normal
operation.
25
2
°C
i
The radiator controller only operates if it is locked
correctly in the end position.
FINISHED! – The radiator controller now controls the
room temperature in accordance with the specification
of the central operating device.
 Loading...