43-TV-33-65 iss.5 GLO Jan 21 UK 4
Note:
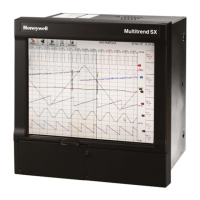
The touch screen cable may have an extender cable fitted as shown in fig 4 or may have a longer cable that plugs
directly onto the board.
There are two different types of display connector. One has a black top, one has brown. Check which type is fitted to
your board and follow the relevant instructions.
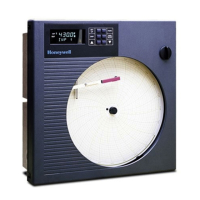
Type 1
The display cable is unplugged by gently pulling up the top part (the black part as shown below) of the connector (J4)
until the cable is unclamped and can easily be pulled free. See fig 5
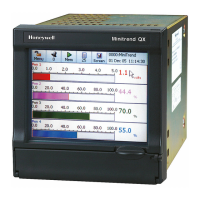
Type 2
The display cable is unplugged by gently rotating the brown part of the connector (J4) until the cable is unclamped and
can easily be pulled free. See fig 6
Pull top part of connector (black part)
upwards. This will release the cable
that can then be withdrawn
 Loading...