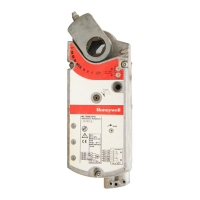
ML7999A UNIVERSAL PARALLEL-POSITIONING ACTUATOR
5 65-0239—2
Fig. 5. Opening ML7999 low-voltage wiring compartment.
Fig. 6. Typical ML7999 wiring.
OPERATION
Table 1. On-Board LED Indications.
Actuator Setup
After the password (ID signal) has been written to the
ML7999, the actuator stroke will have to be determined for the
fuel, air and FGR, if used. The auto seek open/closed function
can be used to find the actuator end strokes. It is important, if
you use the auto seek open/closed function, that you move off
the mechanical end stops of the actuator by a minimum of
five degrees. See Fig. 7.
Fig. 7. Mechanical end stop changes for auto seek open/
closed function.
CHECKOUT AND TROUBLESHOOTING
Checkout
Refer to the R7999 literature (form 66-1120) for system
checkout.
Troubleshooting
If the actuator does not operate properly during Checkout,
perform the following troubleshooting steps. Perform these
steps before replacing the actuator:
1. Check the actuator label to make sure the power and
control signal requirements are correct for the
application.
2. Check for the presence of 120-240 Vac at the actuator
(L1) and (L2) connections when the actuator should be
driving. If the voltage is not present or is low, check the
power supply.
3. Ensure actuator stroke matches stroke of damper or
valve.
a. Remove the cover.
b. Press the button labeled CW. The actuator should
drive the device clockwise.
c. Press the button labeled CCW. The actuator should
drive the device counterclockwise.
4. If the actuator operates properly, check the controller for
proper output signals.
5. If the actuator does not drive, remove power, disconnect
the actuator hub, and try to turn the shaft clockwise and
counterclockwise. If the shaft turns freely throughout the
90-degree stroke and the actuator is installed properly,
replace the actuator.
6. If the shaft does not turn freely for the full 90 degrees,
check for binding. If necessary, adjust mounting to
prevent binding.
7. If the device shaft does not turn freely, fix or replace the
device.
M16470
LINE VOLTAG
WIRING
LOW
VOLTAGE
WIRING
GND
L2
L1
DR1
DR2
CW
S
CCW
L2
L1
ML7999
R7999
M16469
1/2 IN. MAXIMUM
TERMINATE WIRE SHIELD AT THE CONTROLLER (R7999).
SEE FIGURE 5 FOR ACTUATOR WIRING.
1
2
1 2
G
LED Online Configured Meaning Notes
Fast Blink No Yes Awaiting ID signal. Responds only to ID signal.
Slow Blink Yes Yes ID signal recognized. Monitors signals for operation or offline commands.
Steady On No No Actuator has failed. Return actuator to factory.
ACTUATOR MECHANICAL OPEN/CLOSED FIXED STOP
M1966
ACTUATOR MECHANICAL OPEN/CLOSED FIXED STOP
MOVED MINIMUM OF 5 DEGREES
 Loading...