14 www.honeywell.com
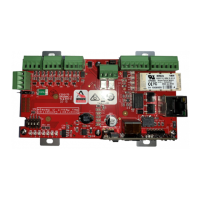
PW7K1R1E Wiring and Setup
Input Power
4. Within 10 seconds from applying power, change switches 1 or 2 to “OFF”. If
these switches are not changed, the PW7K1R1E will power up using the OEM
default communication parameters.
5. LEDs 1 and 2 alternately flash at a 0.5 second rate while the memory is being
erased.
6. Once the memory is eased, LED 1 will be on for about 3 seconds, then the
PW7K1R1E will reboot.
2.8 Input Power
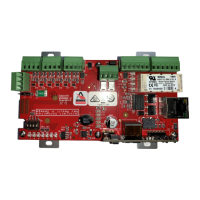
The PW7K1R1E is powered by one of two ways (jumper selected, J5)
• Power is supplied via the Ethernet connection using PoE or PoE+.
• Local 12VDC power supply. TB4-3(VIN), TB4-4(GND).
2.9 Communication Wiring
Communication between the controller and the PW7K1R1E is Ethernet
(10Base T/100Base-TX). It is not recommended to connect the PW7K1R1E to
a public intranet.
2.10 OSDP Reader Wiring
TB7 has connections for the 2-wire RS-485 OSDP communication bus and 12 VDC to
power the OSDP readers. Up to four OSDP readers are supported on the PW7K1R1E.
This 12 VDC output is limited to.5 A. maximum. The OSDP reader wiring diagram
below shows the use of a 2-pair cable for data and power. If this cable cannot support
the voltage/current requirements, a 1-pair cable of sufficient gauge must be used for
power. See specification section
The RS-485 termination jumper, J4, is only installed if the PW7K1R1E is at one end
of the communication bus. Only devices at each end of the communication bus are
terminated, never install termination to more than two devices on the communication
bus.
Note: When powering any remote device(s) by the PW7K1R1E, care must be taken
not to exceed the maximum current available. Cable gauge must also be evaluated. See
specification section for details.
 Loading...
