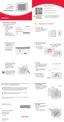
5. Separate Wi-Fi thermostat and its wallplate.
On your new thermostat, grasp the finger holds on the top and bottom of the wallplate with one
hand and the thermostat (front) with the other hand. Pull pieces apart.
6. Mount wallplate for Wi-Fi thermostat.
Mount your new wallplate using screws and anchors included with the thermostat.
If necessary:
Drill 3/16-in holes for drywall.
Drill 7/32-in holes for plaster.
Note: The Wi-Fi thermostat requires a C wire to operate. The C, or common, wire brings 24 VAC
power to the thermostat. Many older mechanical or battery operated thermostats do not require a
C wire. If you don’t have a C wire, try:
Looking for an unused wire that is pushed into the wall. Connect that wire to C and check
that it is connected to the 24 VAC common at your heating/cooling system. Check the video
section at wifithermostat.com.
Installing a new wire. If required, contact a contractor to install a new wire (go to
wifithermostat.com to locate a contractor in your area).
Wiring
For conventional heating/cooling systems (natural gas, oil or electric furnace, air conditioner),
see page 16. See “Glossary” on page 65 for further definition.
For a heat pump system, see page 17. See “Glossary” on page 65 for further definition.
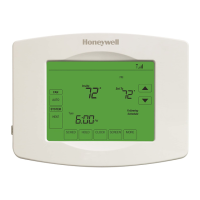
7. Wiring (conventional system)
7A. Connect wires.
Wire the Wi-Fi thermostat to your conventional system.a. Match the labels on the wires to the
terminal labels. You must have a C wire. See page 15.
b. Loosen screws, insert wires into holes on inside edge of terminals, then tighten screws.
c. Push any excess wire back into the wall opening.
d. Continue to page 22.
 Loading...