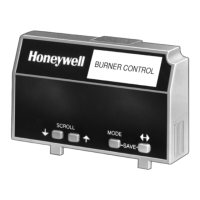
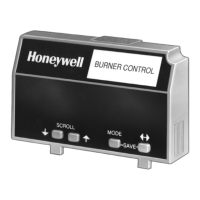
7800 SERIES S7800A KEYBOARD DISPLAY MODULE
65-009
0-6
16
4. State 4: In the fourth state, both lines are blanked for
one-half second, then the display sequences to the first
state.
NOTE: For further explanation of Lockout Messages,
Troubleshooting and Checkout, refer to form 65-0229.
Table 7. Hold and Fault Message Summary.
Fault Code System Failure Recommended T
oubleshooting
Fault 1
*No Purge Card*
No card is plugged into the
purge card slot.
1. Make sure the purge card is seated p
operl
.
2. Inspect the purge card and connector on the relay module for
damage or contaminants.
3. Reset and sequence the relay module.
4. If the fault code reappears, replace the purge card.
5. Reset and sequence the relay module.
6. If the fault persists, replace the relay module.
Fault 2
*AC Frequen/Noise
Excess noise o
device running
on slow ac.
1. Check the relay module and display module connections.
2. Reset and sequence the relay module.
3. Check the relay module power supply and make sure that both
frequency and voltage meed the specifications.
4. Check the backup power supply, as appropriate.
Fault 3
*AC Line Dropout
Ac line dropout detected.
Fault 4
*AC Frequency*
Device
unning on fast ac.
Fault 5
*Low Line Voltage*
Lo
ac line detected.
Fault 6
*Purge Card Error*
Pu
ge card timing changed
since card was initially read.
1. Make sure the purge card is seated p
operl
.
2. Inspect the purge card and connector on the relay module for
damage or contaminants.
3. Reset and sequence the relay module.
4. If the fault code reappears, replace the purge card.
5. Reset and sequence the relay module.
6. If the fault persists, replace the relay module.
Fault 7
*Flame Amplifier*
Flame sensed when flame not
present.
1. Check wiring and correct any er
ors. Make sure that the flame
sensor wires are in separate conduits. Check for noise
coupling into the flame detector leadwires.
2. Make sure that flame detector and flame amplifier are
compatible.
3. Remove the flame amplifier and inspect connections. Reset
the flame amplifier.
4. Reset and sequence the relay module.
5. If the code
reappears, replace the amplifier.
6. If the fault persists, replace the flame detector.
7. If the fault persists, replace the relay module.
Fault 8
*Flame Amp/Shutr*
Flame sensed when no signal
expected during shutter-check
or Ampli-Check™ versions.
Fault 9
*Flame Detected*
Flame sensed when no flame is
expected during STANDBY.
1. Check that flame is not present in the combustion chamber;
correct any errors.
2. Check wiring and correct any errors. Make sure that flame
sensor wires are in separate conduits. Check for noise
coupling into flame detector leadwires.
3. Remove the flame amplifier and inspect
its connections. Reset
the amplifier.
4. Reset and sequence the relay module.
5. If the code reappears, replace the amplifier and/or the flame
detector.
6. If the fault persists, replace the flame detector.
7. If the fault persists, replace the relay module.
Fault 10
*Pre-Ignition ILK*
Pre-Ignition Inte
lock fault
during STANDBY
1. Check wiring and correct any errors.
2. Check Pre-Ignition Interlock switches to assure proper
functioning.
3. Check fuel valve operation.
4. Reset and sequence the relay module; monitor the Pre-Ignition
Interlock status.
5. If the code persists, replace the relay module.