Preparation
17.
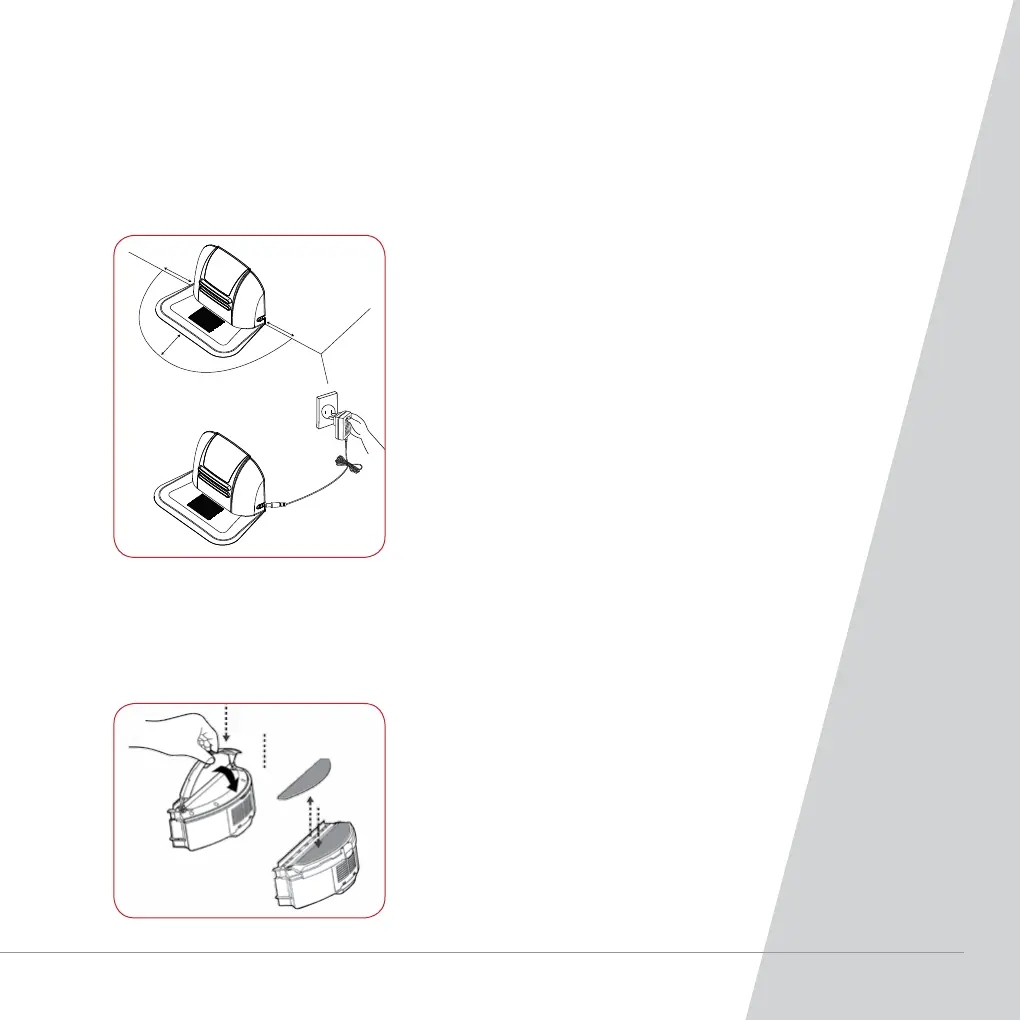
1. Position the charging base plate on a hard, level surface
against a wall.
2. No obstacle or hollow areas 3m away from the charging
base plate in the front and 1m on the right and left.
3. The Robot cannot search the charging base plate for
charging if the infrared signal transmitting window of the
charging base plate is covered.
4. Connect the output terminal of the mains power adaptor
with DC socket of the charging base plate.
5. Status of LED indicator:
a. During charging to the main body, the LED light will
flash frequently at every 1 second.
b. At standby status, the LED light will light from
bright to dark. Press the “ALL” button on the
remote controller to turn off the LED light.
1. Turn the cleaner off.
2. Press the button on the dust box and remove
the dust box.
3. Clip the trailing bar to the dust box.
4. Press the trailing bar down to secure the
trailing bar to the cleaner.
Automatic Charging
Tip: The cleaner may run out of battery on the way back to charging base plate due
to too much obstacles on the way. Try to locate the charging base plate on the area
to be cleaned.
Cleaning with the Polisher Pad