EN
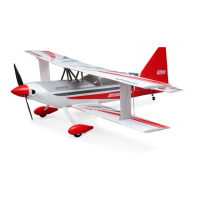
Ultimate 3D
10
Model Assembly Continued
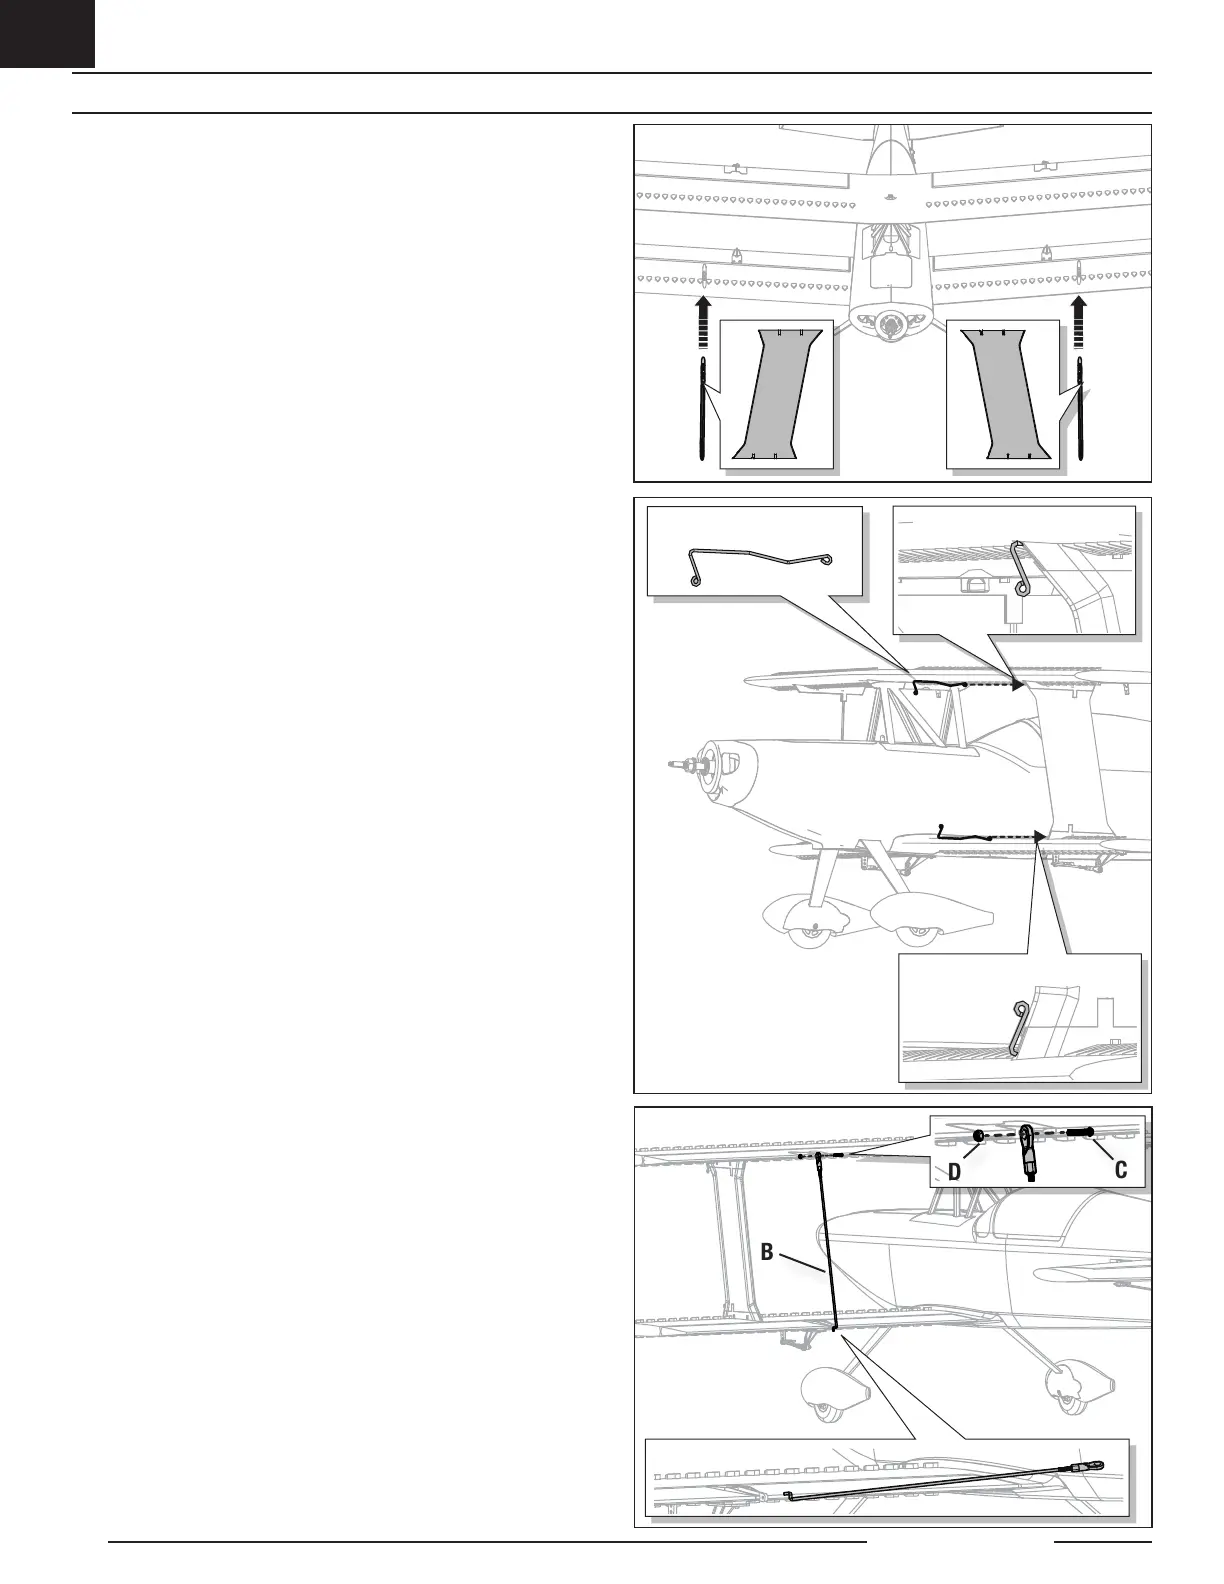
A
Bottom wing pin fully seated
Top wing pin fully seated
B
D
C
3. Slide the left and right wing strut in place, between the upper and lower
wings as shown. Ensure that the arrow indicator on top of the strut is
pointing forward and that the smooth side of the strut faces out.
4. Secure the wing struts to the top and bottom wing with the 4 included pins
(A). Ensure that the wing pins are fully seated.
5. Link the upper and lower ailerons by installing the Z-bend end (B) to the
lower wing’s aileron control horn.
6. Center the lower aileron and adjust the ball link as needed so the top
aileron is centered.
7. Secure the ball link end of the pushrod to the top wing control horn with the
included screw (C) and nut (D).
Disassemble in reverse order.