16
MAINTENANcE
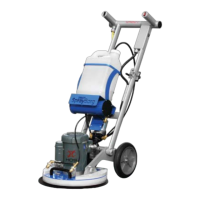
Cleaning the ORBOT machine:
• CleanthemachinewithasoftclothandaneutralpHcleaner.
Cleaning the spray system:
• RinsetheORBOTspraysystemaftereachapplicationtopreventcloggingofthehoses,ltersand
the pump system.
• Torinsethespraysystem,installabottlelledwithclearwaterandplaceaSuperZorbpadinfront
of the spray jets. Rinse the system by holding down the black spray button on the machine’s handle
for at least 30 seconds.
• Ifthespraynozzlesgetclogged,removethecapsandsoakthebrasspartsofthespraynozzlesand
ltersinadegreasingsolution(likeacetone)forabout15minutes.
• Ifthespraynozzlesareleaking,replacethelters(seepage16).
• Whenassemblingthenozzles,makesurethatthenozzleholesarealignedhorizontallytoachievea
uniform spray pattern.
Changing the HOS ORBOT SprayBorg Velcro driver discs
• RemovetheeightouterscrewsthatfastentheVelcrodisconthedriverplate.Tosavetime,usean
electric screwdriver with a PH3 bit.
• WARNING:ThePH3bitisslightlylargerthanstandardsize.ItisimportantthatyouareusingaPH3
bit, as smaller bits can damage the screw heads and produce sharp edges which can damage the
cleaning pads.
• AttachanewVelcrodisctothedriverplateusingtheeightscrews.
WARNING: Make sure that the screws are very tight, not loose. If the screws are the slightest
loose it can cause damage to the Velcro disc.
• EnsurethatthefourholesinthemiddleoftheVelcrodiscarealignedwiththescrewslocatedon
thedriverplate.Anexactalignmentallowsaneasyremovalandinstallationofthedriverplate.
Changing the filters
• Ifthesprayjetsbecomecloggedorshouldleak,thisisasignthattheltersmustbechanged.
• Tochangethelters,openthesprayjetcapsbyturningthecapswithasuitablewrench
counterclockwise.Fixthesprayjetbodywithawrenchusingtheotherhandforstabilization.
• Removethesprayjetcaps.Thespraytipandthecheckballvalveltercannowberemovedeasily
from the spray jet body.
• Insertthenewlterinthesprayjetbodyhousing,placethespraytipinsidethecap,putthecapon
the thread and turn clockwise to seal.
• Sealthecaprmlybyusingtheappropriatewrenches.Thesprayjetscannowbeoperatedas
usual.
• WARNING:Makesuretoaligntheslitsofthesprayjettipsinahorizontalplanetotheoorto
allow for an even spray pattern.
A:cap,B:spraytip,C:checkballvalvelter
 Loading...