39
V(b)Heater
1. Remove top section as in V (a) 1 - 2.
2. Release heater by removing the two 19 mm nuts.
V(c) One Shot Cut-Out
1. Remove top section as in V (a) 1 - 2.
2. Remove heater as in V (b) 1 - 2.
3. Remove screw holding heat shield to top section.
4. Remove two screws fixing cut-out to top section.
Thermal Fuse Cable - From Serial No. 60508.0000
To remove:
1. Disconnect the thermal fuse from the heater/loom end.
2. Remove the thermal fuse cable clamp.
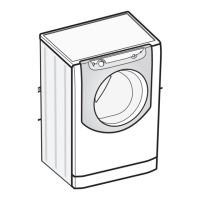
W(a) Drum Assembly
1. Remove the table top (A).
2. Remove the top balance weight (Nb).
3. Remove heater box assembly.
4. Remove the dispenser drawer (C).
5. Remove the console panel (D).
6. Remove the dispenser (S).
7. Remove the front panel (J).
8. Remove the lower balance weight (Na).
9. Remove the lower rear access panel (B).
10. Remove the motor (M).
11. Detach the drum from the damper units by removing the two plastic pegs using special
tool Part No. 5600198.
12. Remove the sump hose fixing clip and detach the sump hose from the sump chamber.
13. Disconnect heater / thermistor wiring and release the wiring harness from the drum clips.
14. Unclip any wiring retained within the integral clip on the spring bearing keeper plates.
15. Gently lever out the spring bearing keeper plates with a small flat bladed screwdriver.
16. Unhook springs from the cabinet top rail bearings.
17. Carefully lift the drum assembly out of the cabinet.
W(b) Inner Drum & Support Assembly / Drum Seal / Outer Drum Halves
1. Remove the drum assembly (Va).
2. Remove the drum pulley (Q).
3. Loosen the inner drum assembly by tapping the drum shaft with a soft copper hammer or by
inserting a pin punch into the shaft hole and tapping with a copper hammer.
4. Remove sixteen T30 Torx head drum fixing screws and detach the drum front.
5. Lift out the inner drum and support assembly.
6. The inner drum and support are not designed to be separated, and must be replaced as an
assembly if required.
 Loading...