25 of 36
Indesit Company
Service Manual UK English
2. Remove the plastic cover from the interior lamp housing.
3. Unscrew the screws at base of multiflow unit and from the inside of the lamp holder.
4. Pull the base of the multi-flow unit towards you while simultaneously sliding it downwards releasing it
from the top locating lugs.
NOTE: - Withdrawing the multiflow unit may be impeded by the baffle unit mounted to the liner wall
immediately behind the upper section of the multiflow unit.
5. Disconnect the lamp holder and baffle wiring from the connector blocks (See also J2 below).
6. Replace seals as necessary to ensure good sealing.
7. When reassembling, ensure the wiring is not able to foul the baffle or be trapped by the duct moulding.
H. Door Reversal ~ See Page 35
J. Damper (Baffle) Unit (Motorised Type)
1. Remove the Multi-Flow unit as in G1 to G5.
2. Disconnect baffle wiring from the terminal block above the baffle unit. To release the plug depress the
tab on its upper side.
3. Replace seals as necessary to ensure good sealing.
K. Freezer Fan Motor
1. Remove the contents, food and furniture from the freezer compartment.
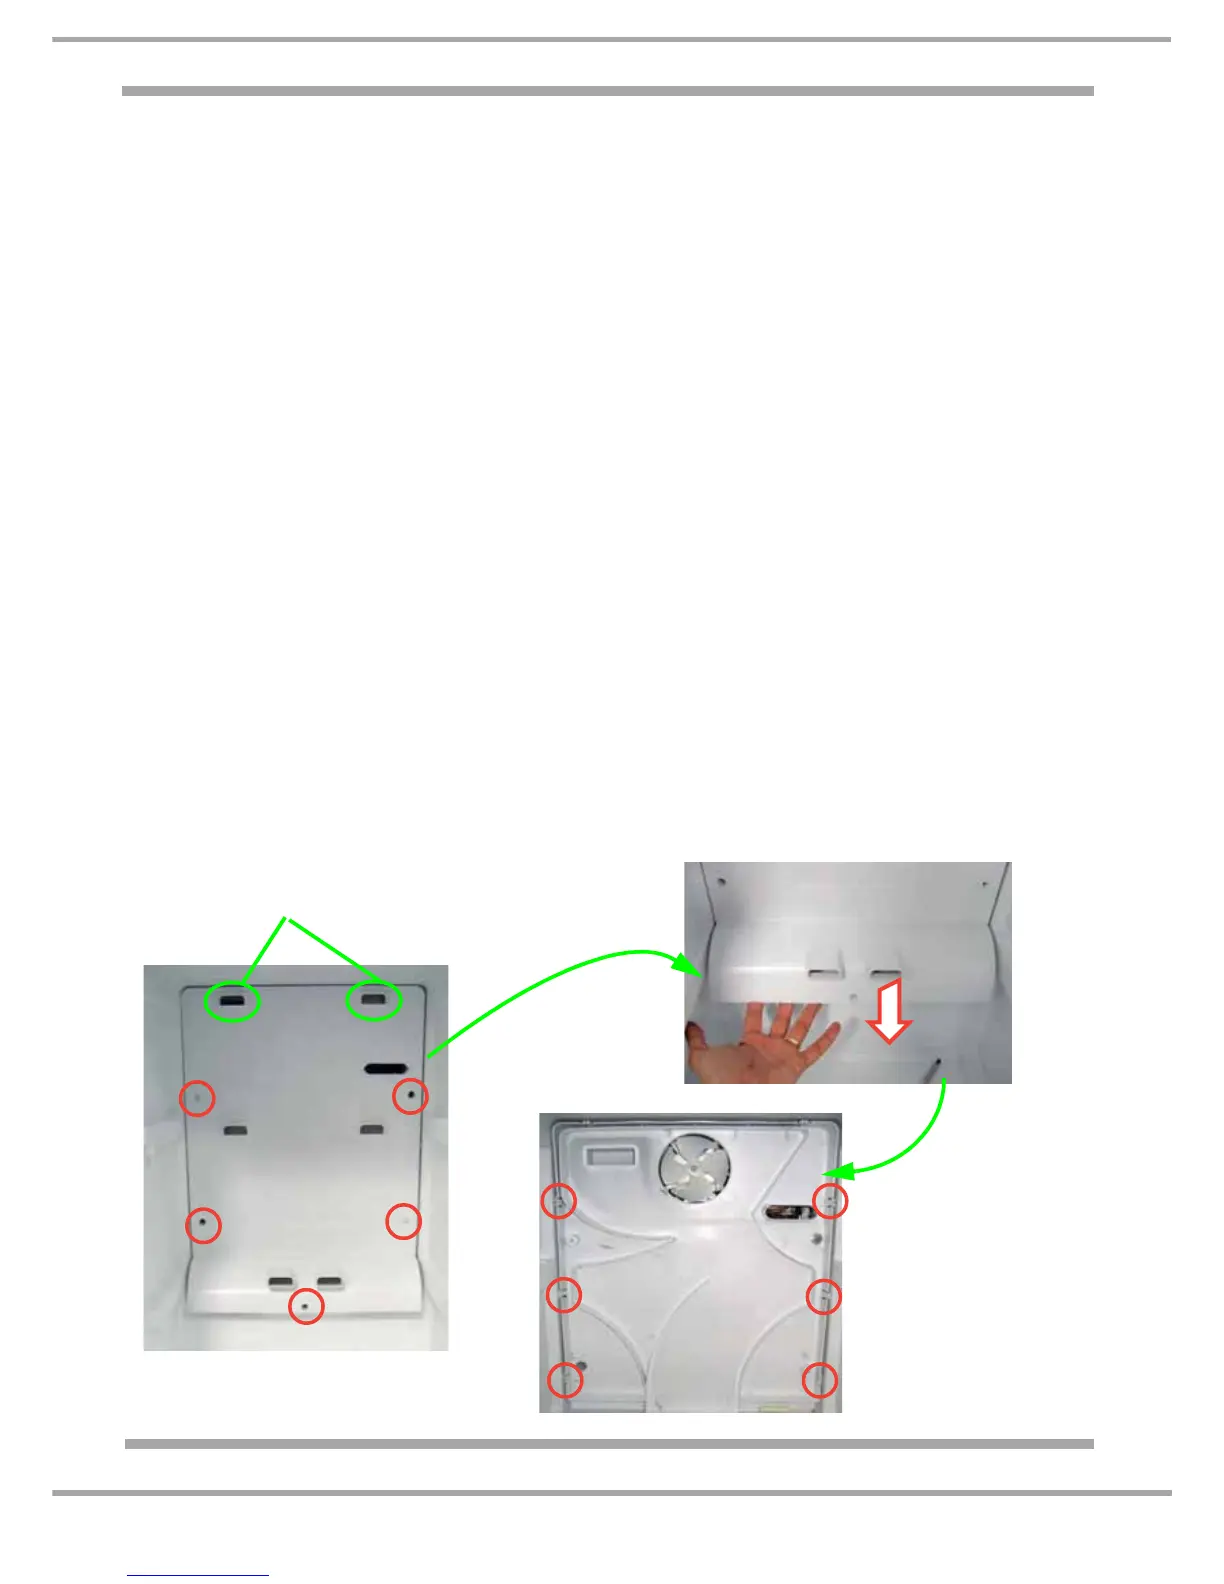
2. Remove the screws from around the edge of the duct cover (See photo 1).
3. Insert a slotted screwdriver into the cover upper vent holes to unclip the cover from the duct
assembly (See photo 1).
4. Pull cover forward and withdraw (See photo 2).
5. With the cover removed, unclip the duct assembly from the sides of the freezer liner and withdraw
assembly complete with fan motor housing (See photo 3.).
6. Disconnect fan wiring from the terminal block.
7. Pull fan impeller off the motor shaft; lay the duct assembly face down so the fan motor bracket is upper
most. Unclip the plastic fan motor bracket to release the fan motor.
Photo 1
Photo 2
Photo 3
Insert a slotted screwdriver into the upper
vents to unclip it from the duct assembly
shown in Photo 3.