HOTSY 965SS-1075SS • 9.807-621.0 • Rev. 09/18
OPERATOR’S MANUAL
PRESSURE WASHER
8
ASSEMBLY INSTRUCTIONS
Unpacking
Unpack carefully. Wear safety glasses or goggles while
unpacking, assembling, or operating pressure washer.
If there are missing components or hidden damage,
immediately contact carrier concerning discrepancies.
1. Cut strapping band from pressure washer and pallet.
2. Remove pressure washer from pallet.
Parts Included
• Pressure Washer
• Pressure Hose
• Wand
• Operating Instructions and Parts Manual
• Gasoline Engine Manual
• Parts Bag Containing:
Pressure Nozzles (3 Ea.)
Trigger Gun
Battery Terminals (2 Ea.)
Tools Required
• 8" Adjustable Wrench
• Teon Tape
• Flat Blade Screwdriver
Pressure Hose, Trigger Gun and Wand
1. When assembling, use teon tape on all threaded
plumbing connections to prevent leakage.
2. Install the pressure hose on the pressure washer as
shown in Figure 1.
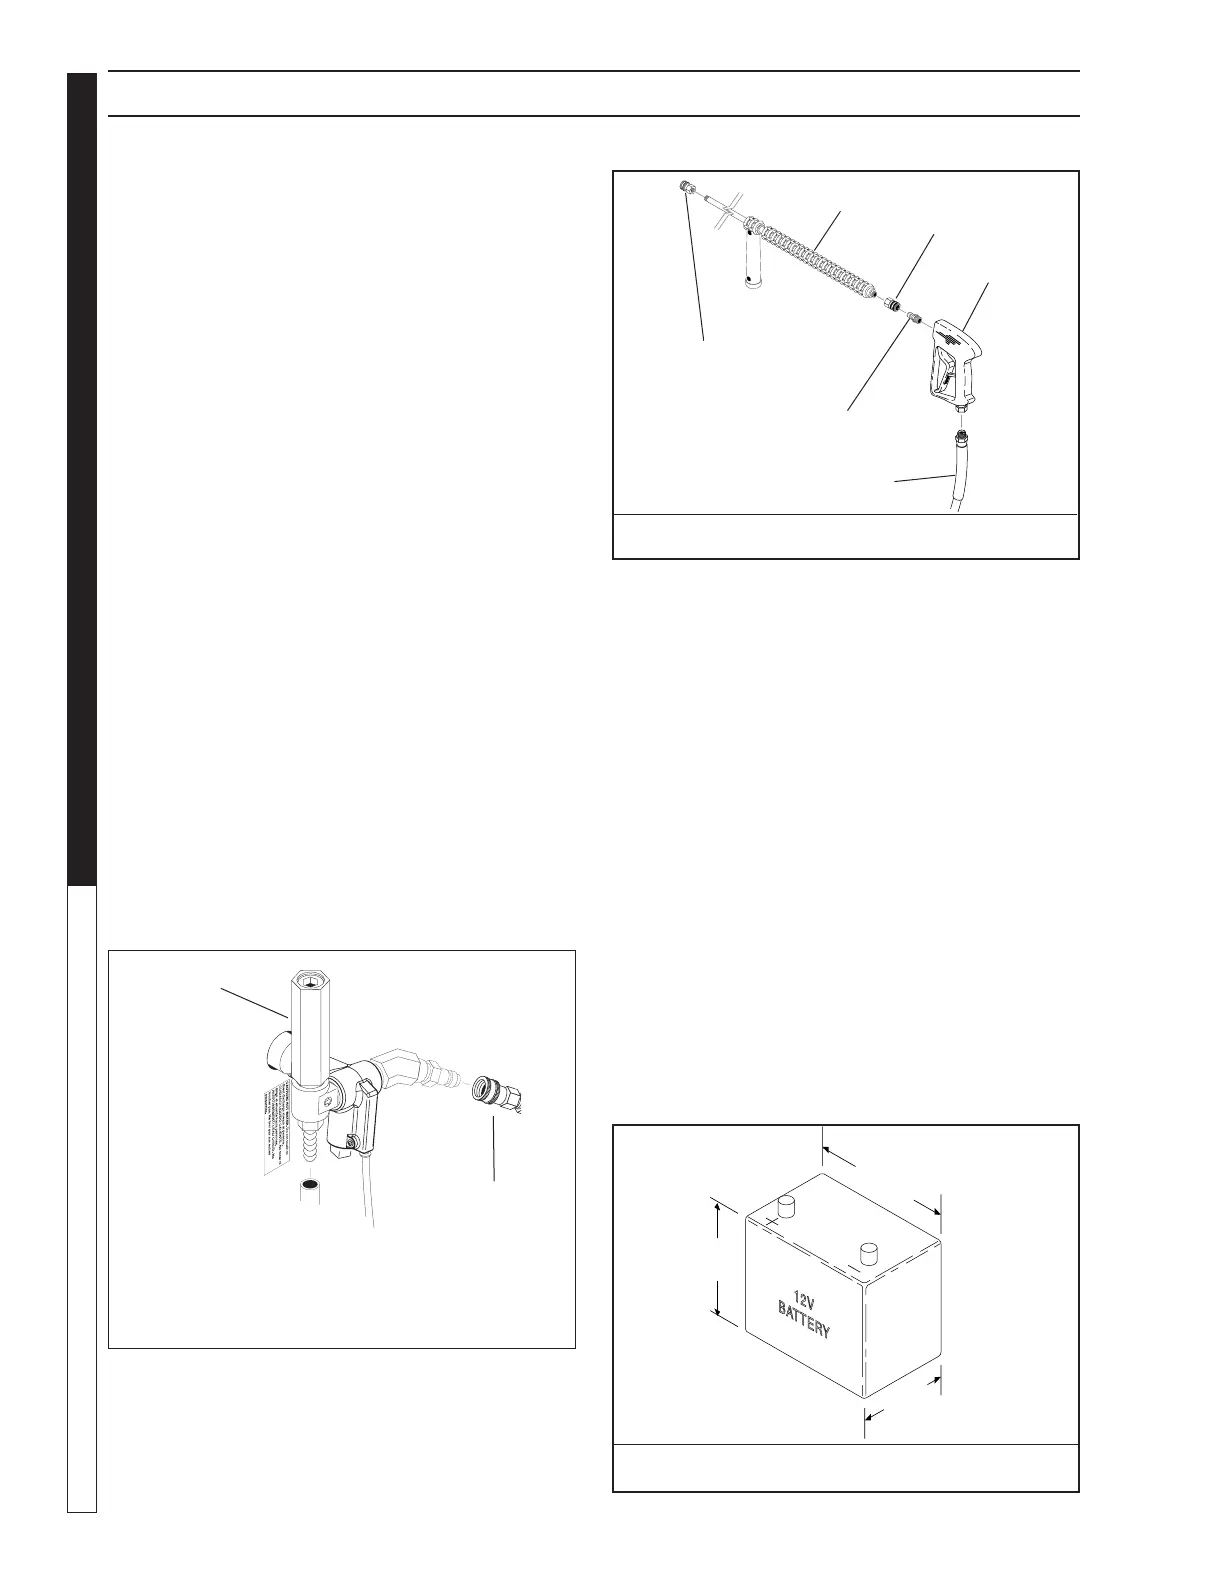
3. Assemble wand components as shown in Figure 2.
NOTE: The pressure nozzle is not to be installed at
this time.
4. Make sure all plumbing connections are tight.
Battery
WARNING: Wear eye, hand and skin protection when
handling or connecting battery.
WARNING: Batteries generate explosive gases during
normal battery operation.
WARNING: DO NOT expose the battery to ame or
sparks as these gases may ignite.
WARNING: Battery uid is highly acidic. If battery
uid contacts skin or clothing, wash immediately
with soap and water. If battery uid enters eye, im-
mediately ood eye with running cold water for at
least 15 minutes and get immediate medical attention.
1. Electric Start Machines Only: Place battery in bat-
tery box (battery not included). Use a standard 12 volt
automotive battery. Select a battery similar to the one
in Figure 3 for proper t and installation.
2. Install the battery terminals as shown in
Figure 2 - Wand Assembly
Trigger Gun
Quick
Disconnect
Quick Disconnect
Wand
Quick
Disconnect Plug
Pressure
Hose
Figure 3 - Battery Dimensions
6-3/4"
Max
10-1/2"
Max
8-3/4"
Max
Relief Valve
Figure 1 - Pressure Hose Installation
Pressure
Hose