EasyManuals Logo

HP Compaq dc7600 SFF User Manual

HP Compaq dc7600 SFF
73 pages
To Next Page IconTo Next Page
To Previous Page IconTo Previous Page
Page #48 background imageLoading...
Page #48 background image
2-38 www.hp.com Hardware Reference Guide
Hardware Upgrades
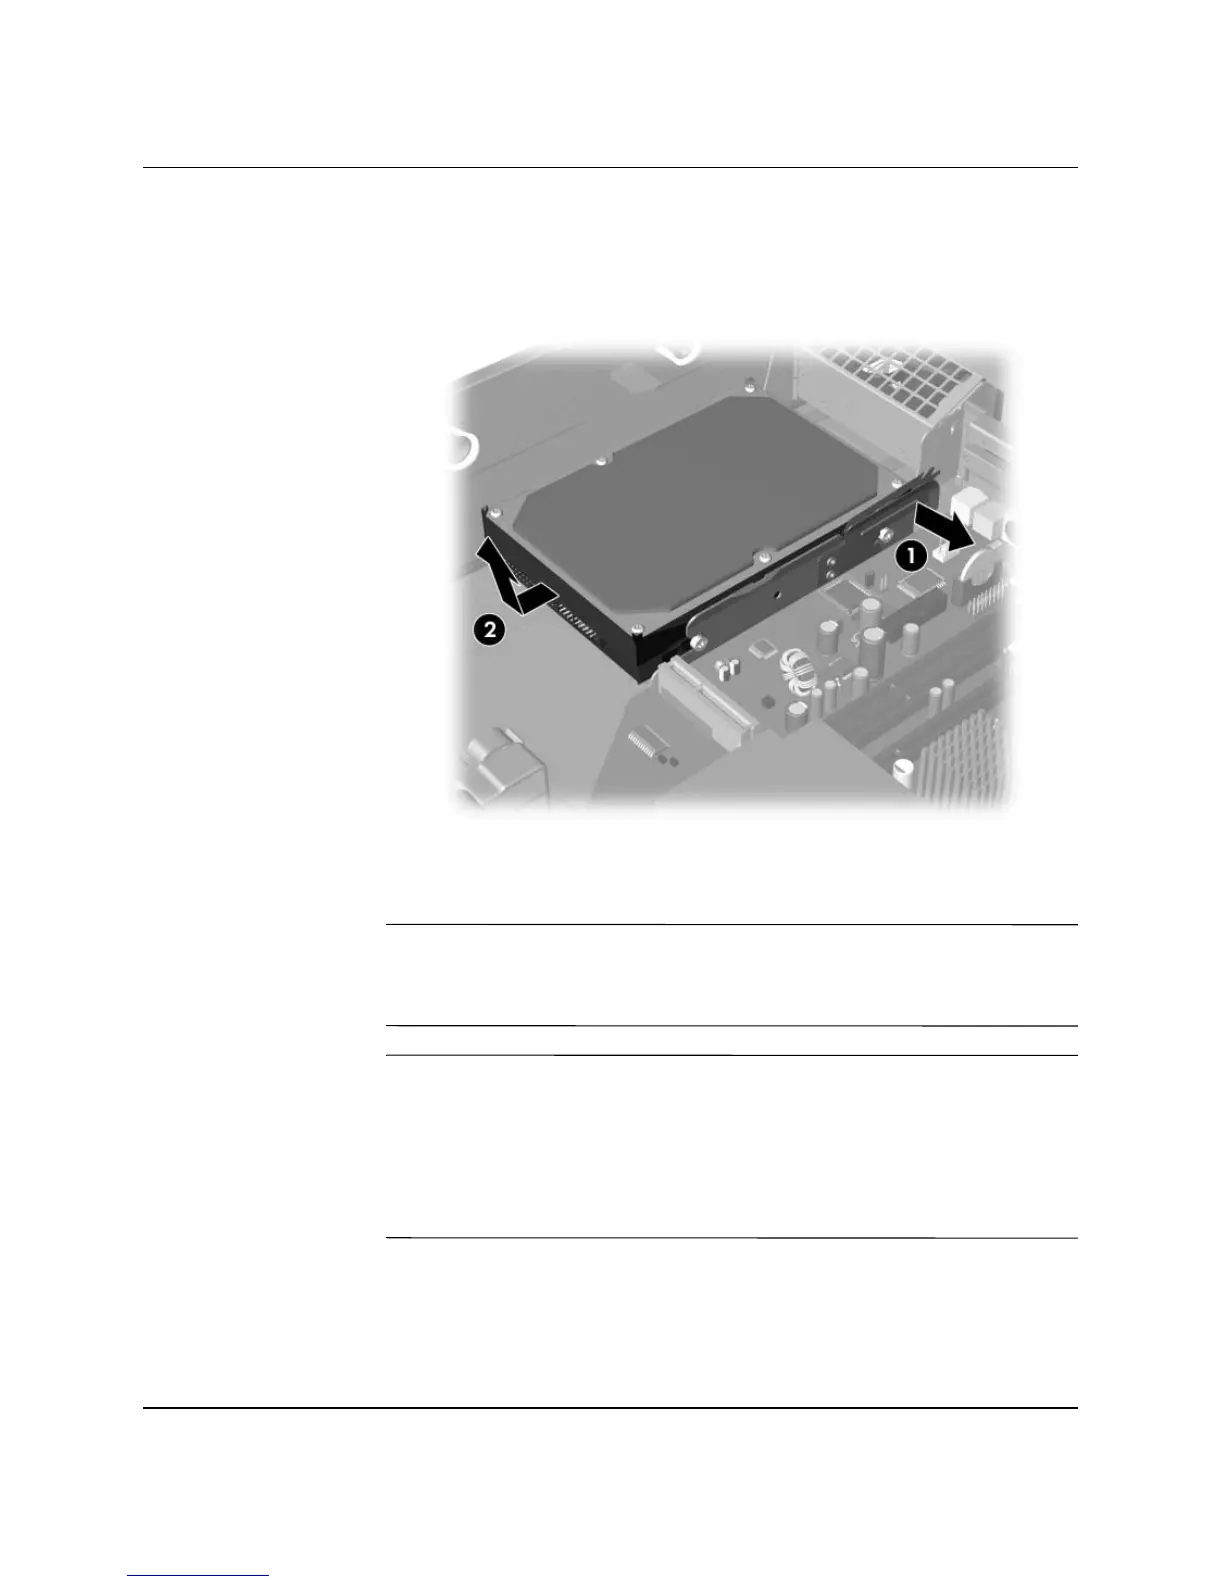
9. Pull the green tab that locks the drive in place away from the
drive 1, slide the hard drive toward the front of the computer,
then lift the drive up and out of the bay 2.
Removing the Hard Drive
10. To install a hard drive, reverse the above procedure.
If the system has only one SATA hard drive, the data cable must be
connected to the blue connector labeled P60 SATA 0 on the system
board to avoid any hard drive performance problems.
When replacing the hard drive, transfer the four screws from the old
drive to the new one. The screws take the place of drive rails. You will
need a Torx T-15 screwdriver to remove and re-install the guide
screws. HP has provided four extra 6-32 standard guide screws on the
front of the chassis, under the computer cover. The 6-32 standard
guide screws are silver.

Other manuals for HP Compaq dc7600 SFF

Questions and Answers:

Question and Answer IconNeed help?

Do you have a question about the HP Compaq dc7600 SFF and is the answer not in the manual?

HP Compaq dc7600 SFF Specifications

General IconGeneral
Processor SpeedUp to 3.8 GHz
MemoryUp to 4 GB DDR2 SDRAM
Form FactorSmall Form Factor (SFF)
Power Supply240W
ProcessorIntel Pentium 4, Intel Celeron D
StorageUp to 250 GB SATA HDD
GraphicsIntel Graphics Media Accelerator 950
Optical DriveDVD-ROM, DVD\u00b1RW
NetworkIntegrated Gigabit Ethernet
Expansion Slots1 low-profile PCI Express x16, 1 low-profile PCI Express x1, 1 low-profile PCI
PortsUSB 2.0, serial, parallel, PS/2, VGA
Operating SystemWindows XP Professional
ChipsetIntel 945G Express Chipset

Related product manuals