Left
Component Description
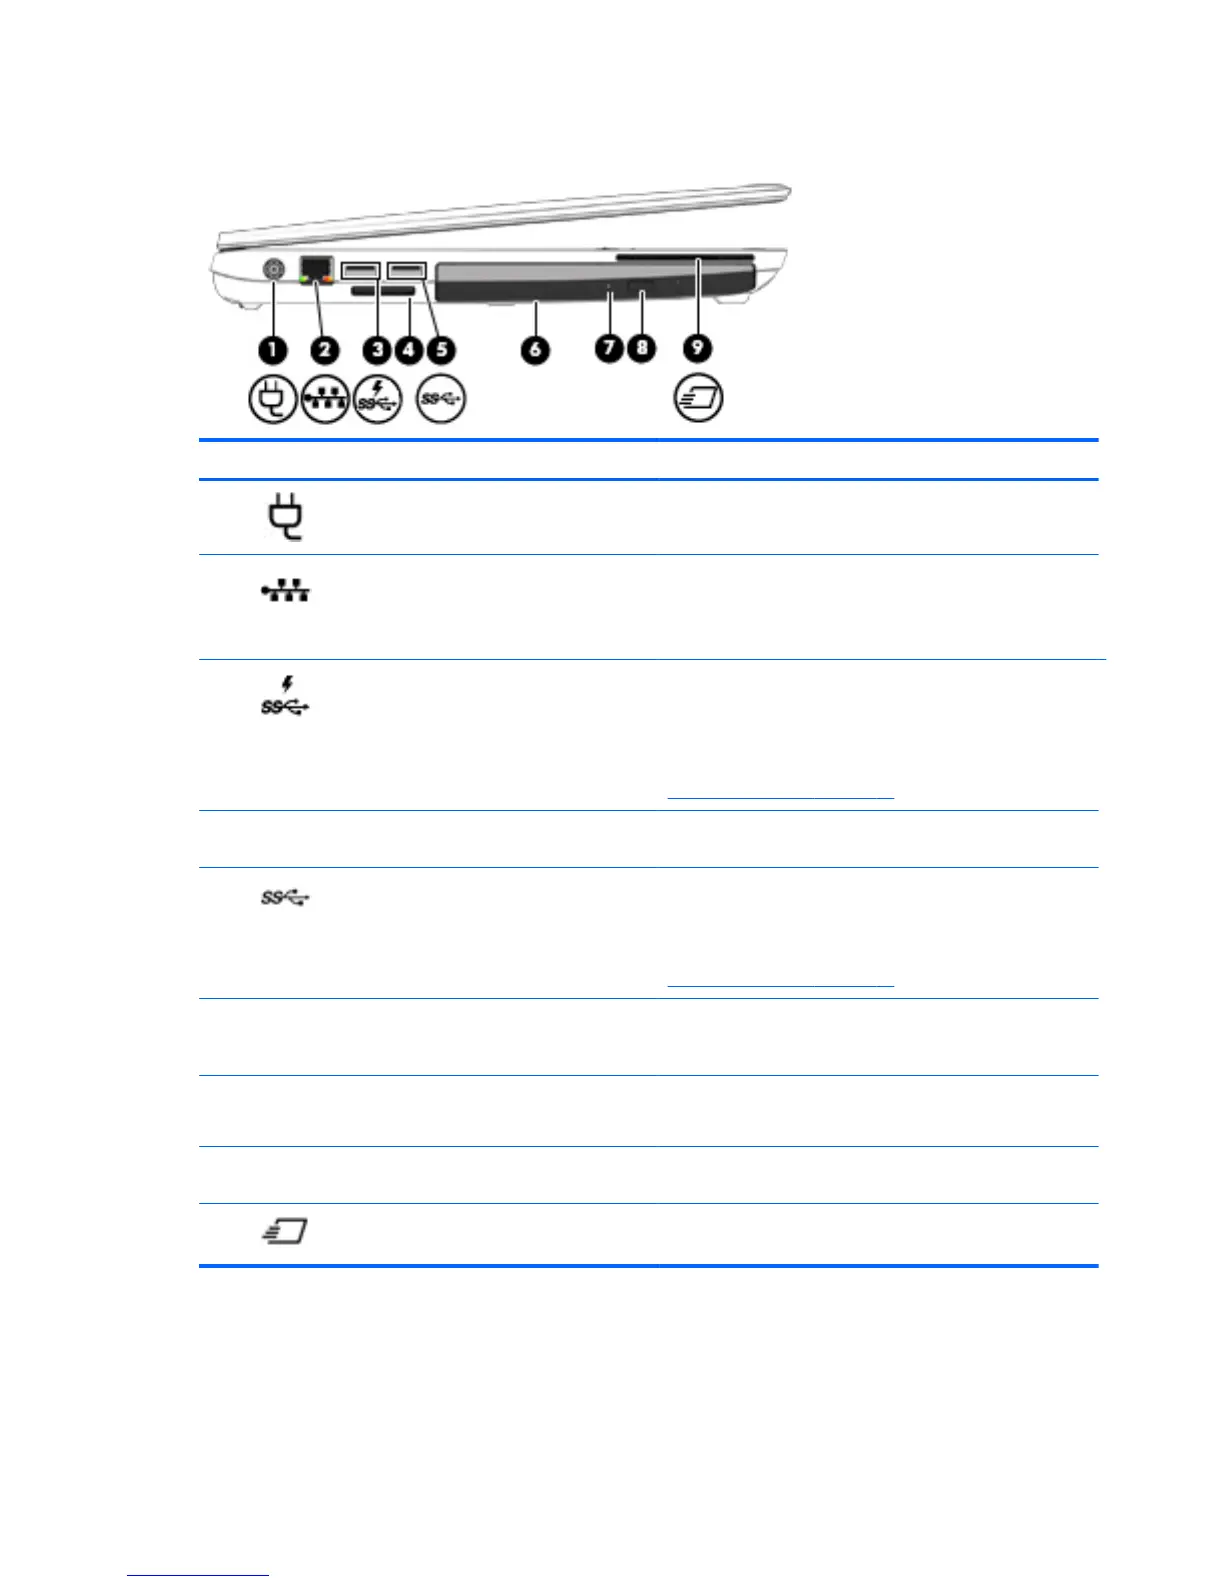
(1)
Power connector Connects an AC adapter.
(2)
RJ-45 (network) jack
RJ-45 (network) lights (2)
Connects a network cable.
●
Green (left): The network is connected.
●
Amber (right): The network is showing activity.
(3)
USB charging port Connects an optional USB device. The USB charging port
can also charge select models of cell phones and MP3
players, even when the computer is off.
NOTE: These ports support USB 2.0 by default. For
details about activating the USB 3.0 port functionality, see
Using a USB device on page 41.
(4) Memory card reader Reads data from and writes data to memory cards such as
Secure Digital (SD).
(5)
USB port Connects optional USB devices and provide enhanced
USB power performance.
NOTE: These ports support USB 2.0 by default. For
details about activating the USB 3.0 port functionality, see
Using a USB device on page 41.
(6) Upgrade bay (optical drive shown) The upgrade bay can hold an optical drive that reads and
writes (select models only) to an optical disc. It can also
hold a weight saver option.
(7) Optical drive light (select models only)
●
Green: The optical drive is being accessed.
●
Off: The optical drive is idle.
(8) Optical drive eject button (select models
only)
Releases the optical drive disc tray.
(9)
Smart card Supports optional smart cards.
10 Chapter 2 Getting to know your computer