EasyManuals Logo

HP CQ60 Series User Manual

HP CQ60 Series
134 pages
To Next Page IconTo Next Page
To Previous Page IconTo Previous Page
Page #48 background imageLoading...
Page #48 background image
Removal and replacement procedures 4–9
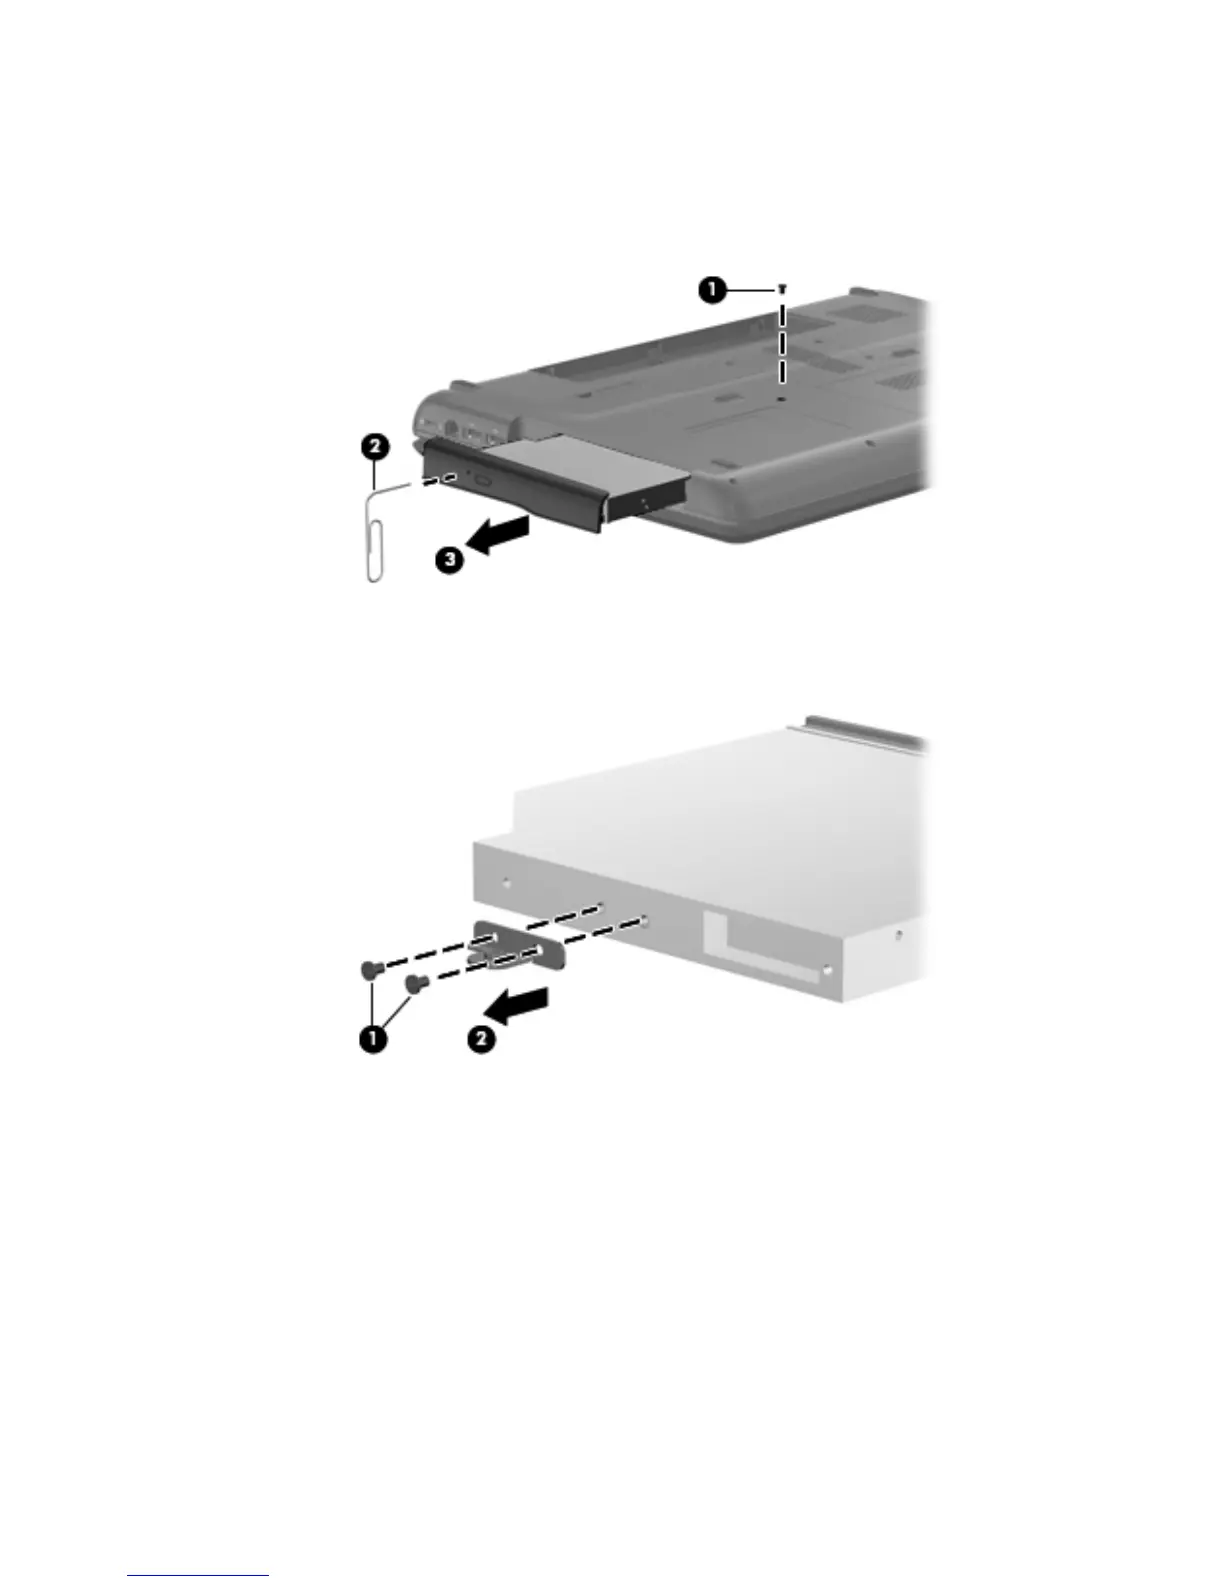
Remove the optical drive:
1. Position the computer with the left side toward you.
2. Remove the Phillips PM2.5×9.0 screw 1 that secures the optical drive to the computer.
3. Insert a thin tool, such as a paper clip 2, into the release access. (The disc tray is partially ejected from the
optical drive.)
4. Grasp the bezel and slide the optical drive 3 out of the computer.
5. If it is necessary to replace the optical drive bracket, position the optical drive with the rear toward you.
6. Remove the 2 Phillips PM2.0×4.0 screws 1 that secure the optical drive bracket to the optical drive.
7. Remove the optical drive bracket 2.
Reverse this procedure to reassemble and install an optical drive.

Table of Contents

Questions and Answers:

Question and Answer IconNeed help?

Do you have a question about the HP CQ60 Series and is the answer not in the manual?

HP CQ60 Series Specifications

General IconGeneral
AudioAltec Lansing speakers
RAMUp to 4GB DDR2
Storage320GB HDD
Display15.6" diagonal High-Definition HP BrightView Widescreen Display
GraphicsIntegrated Intel Graphics Media Accelerator 4500M
Operating SystemWindows Vista
Optical DriveDVD±RW DL LightScribe
Battery6-cell Lithium-Ion
ChipsetIntel GL40 Express
Wireless802.11b/g
Ports3 x USB 2.0, 1 x HDMI, 1 x VGA, 1 x RJ-45, 1 x Headphone, 1 x Microphone
Card Reader5-in-1 integrated Digital Media Reader
WebcamIntegrated webcam
Networking10/100 Ethernet
Weight2.7 kg (5.95 lbs)

Related product manuals